
Arkveld can easily be one of the toughest story bosses you’ll encounter in Monster Hunter Stories 3: Twisted Reflection. In the middle of the fight, you’ll need to charge Ratha’s power to successfully defeat the monster. If you miss the timing or come in underprepared, the encounter can spiral out of control quickly. Thankfully, with the right setup — and one important consumable — you can easily turn this seemingly overwhelming battle into effortless victory.
Pre-fight Preparation: Gear and Party Member
Before entering this Level 58 boss fight, we suggest aiming for a recommended level of 52-55 to make things go much smoother. Arkveld is both weak to and dishes out Dragon attacks; bring Dragon-element weapons and consider wearing Ebony Odogaron armor. Ebony Odogaron naturally spawns around the Old Capital Road and the Sacrosanctum/Lazlion areas, and the armor offers useful skills for this encounter:
- Dragon resistance.
- Salt In Wound.
- Fortify.
- Dragon Atk Boost.
If possible, equip Ratha and your Ranger with skills that increase Kinship Gauge build-up, such as Soul Kinship and Pet. This will become extremely important once the scripted sequence of the fight begins.
Every party member has their own strength. However, if you’ve completed Kora’s final Side Story already, bringing her along is highly recommended since her secondary Monstie performs well in this fight. More importantly, Kora’s abilities can draw aggro away from both you and Ratha, which greatly improves survivability throughout the fight.
Arkveld Boss Fight Strategy for Monster Hunter Stories 3
| Normal State | Dragon Mantle State | |
|---|---|---|
| Move | Technical | Power |
| Weak Against (Element) | Dragon | All Elements |
| Resist (Element) | All Elements | Physical |
| Weak Against (Status) | Blastblight, Darkness | Blastblight, Darkness |
| Resist (Status) | Burn, Sleep, Bleeding | Burn, Sleep, Bleeding |
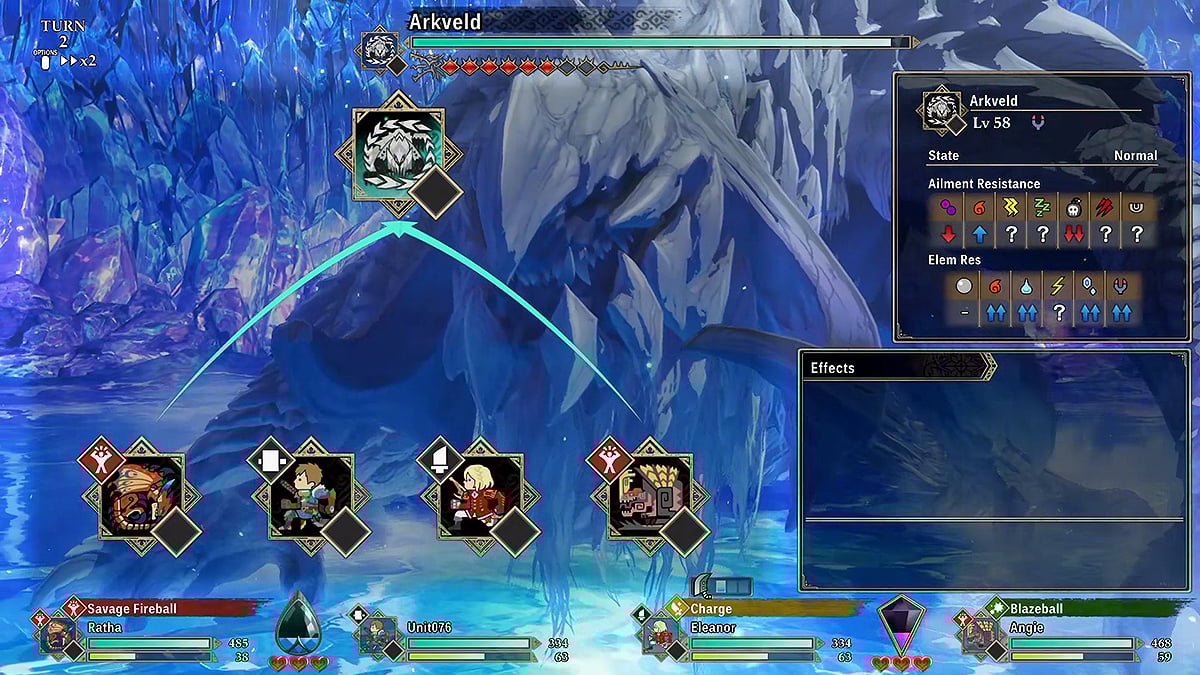
For the first five turns, your main goal is survival — you don’t have to worry about dealing damage or breaking parts for now. Focus on building Stamina, filling your Kinship Gauge with Ratha, and keeping both yourself and Ratha alive.
Arkveld is pretty aggressive and deals a huge amount of damage. If you’re underleveled or careless, there’s a good chance you may lose a Heart from Ratha getting knocked out early. Especially since Rathalos is weak against Dragon attacks.
Now, the key moment of the Arkveld boss fight happens on Turn 5. When Ogden shouts that you should ‘whack it somethin’ fierce’ and Gaul says something about ‘charging’ Ratha’s attack power, it’s your cue to boost Ratha with Attack Up.
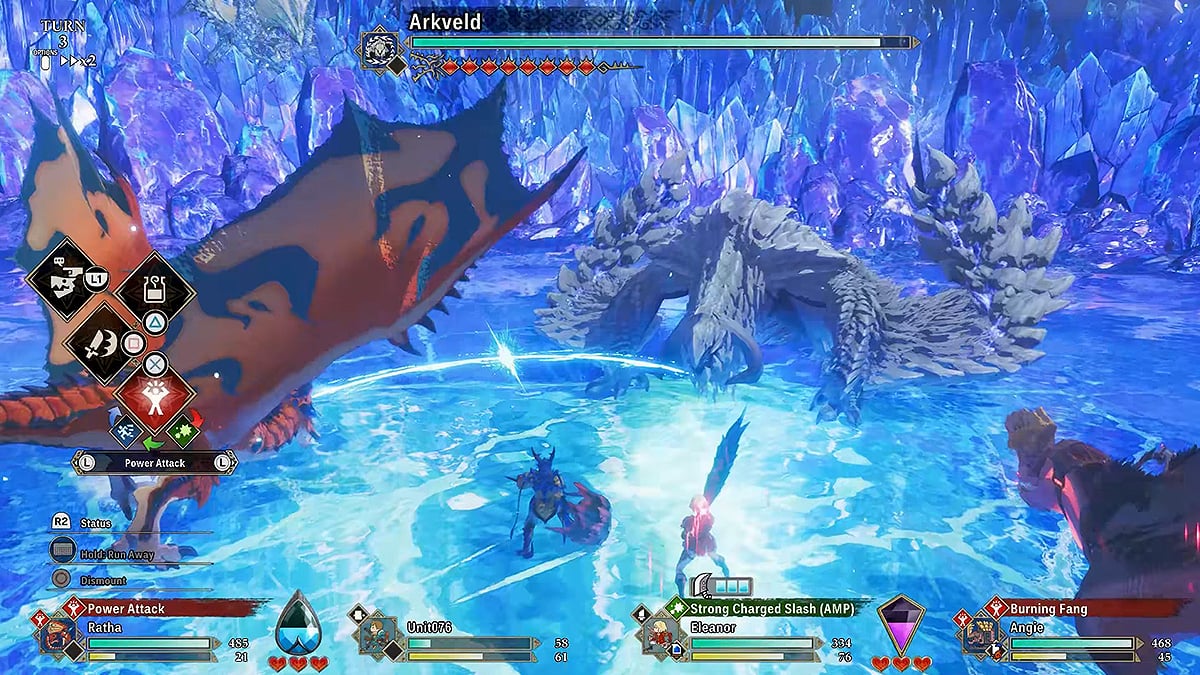
Gaul’s explanation can be a little misleading. While ‘charging’ Ratha’s power can be done with skills like Flame Aura, simply giving Ratha a Mega Demondrug works too. This step is critical; without the attack boost, Ratha’s Savage Fireball will be absorbed by Arkveld in the next turn.
Then, on Turn 6, you must ensure that Ratha uses Savage Fireball. Most of the time, the computer-controlled Ratha will automatically choose Savage Fireball during this moment. But, from our own experience, it’s not a guaranteed move. Sometimes Ratha will use a normal attack or another skill instead. Always double-check Ratha’s action and adjust if necessary!
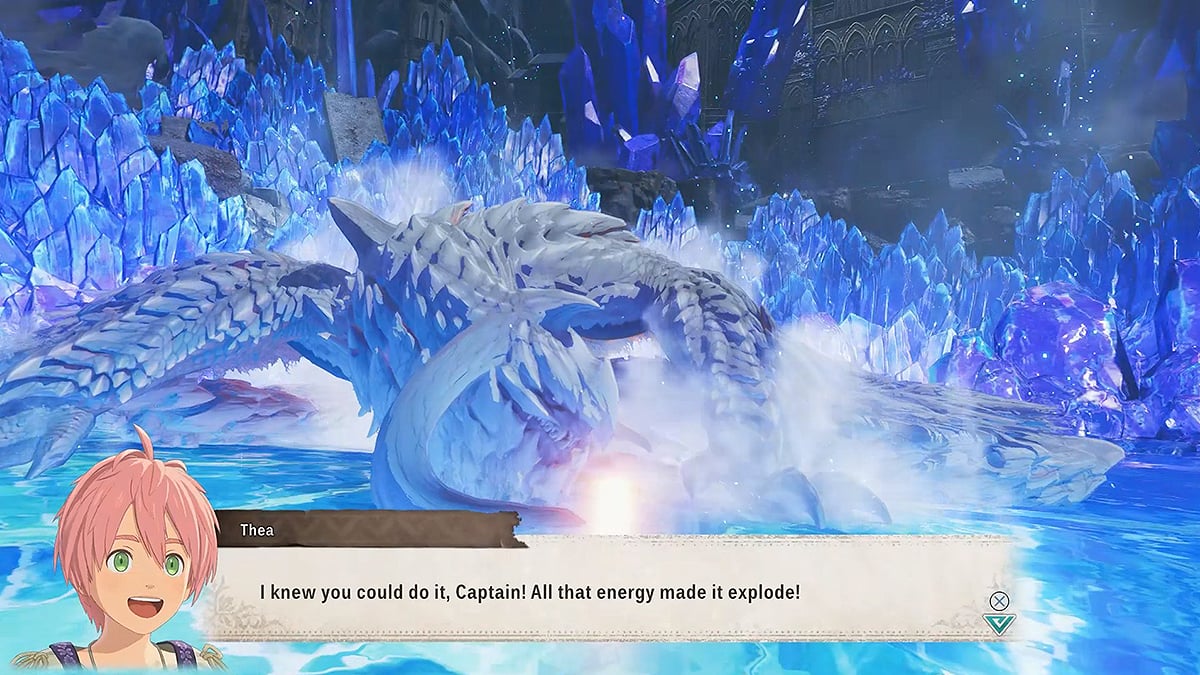
If the Savage Fireball lands correctly, Arkveld will be overloaded by the energy and toppled. By this point, if you’ve been building Kinship properly, you should have enough meter for a Kinship Attack. Hold it until Arkveld gets back up, then use a Kinship Attack immediately on the next turn to stagger the boss again.
Once this scripted sequence is complete, the fight becomes much more manageable. You can now switch to Monsties that resist Dragon attacks and start pushing damage more aggressively. Your main goal from this point forward is to keep Arkveld staggered to avoid area-of-effect moves like Chain Crawl or Berserk Blade.
Rather than focusing heavily on breaking Wyvernsoul parts for topples, prioritize Synchro Rushes and Double Attacks. Rapidly rebuilding your Kinship Gauge helps keep the monster staggered often.
Still, whenever Arkveld enters Dragon Mantle mode and reveals its chainblades, focus on breaking the chainblades using Pierce weapons and elemental attacks. Breaking them will instantly topple Arkveld, giving you another opportunity to deal heavy damage or heal up.
If you manage your Kinship Gauge carefully, the battle shifts from a desperate survival into a loop of staggers and topples. From there, it’s only a matter of time before Arkveld finally goes down, and you’re one step closer to discovering the mystery behind Sacrosanctum.


