
Fast Links
While most Hyrule Shrines feature chambers well-lit for puzzle solving, Kikakin Shrine in Zelda Tears of the Kingdom forces Link to navigate in the dark. “Shining in Darkness,” the name of Kikakin Shrine’s challenge, can be difficult or easy, depending on how much you can see. Thankfully, no monsters or hostile Construct lurk in the pitch-black rooms of the Shrine. However, there are giant spike walls that you need to watch out for, including chests well-hidden without a light source.
Where Is Kikakin Shrine’s Location in TotK?
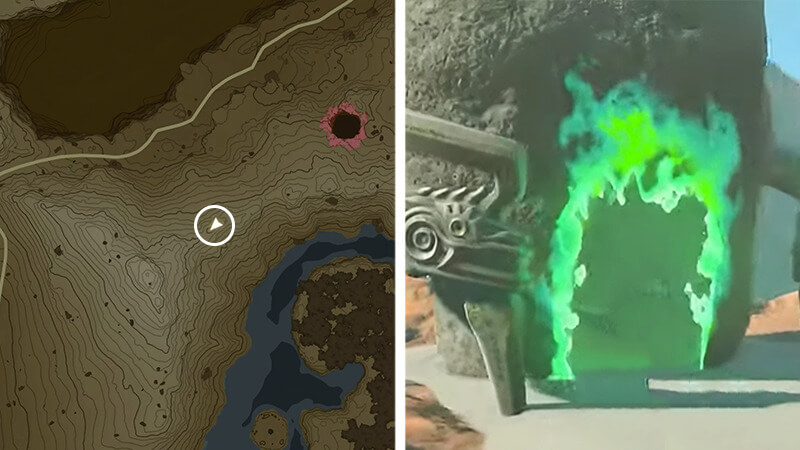
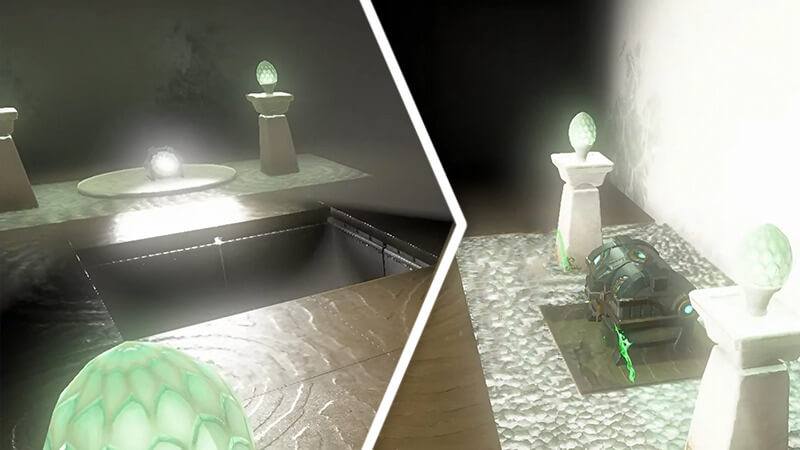
Tears of the Kingdom Kikakin Shrine is located along the rugged ridges northeast of Mount Drena. It sits by a shelf overlooking the Great Hyrule Forest to the southeast. Southwest of the Thyphlo Ruins Skyview Tower is where you’ll find the Drenan Highlands Chasm. From the tower, if you continue southwestward to the coordinates -0395, 2736, 0287, you’ll eventually encounter Kikakin Shrine in TotK.
Related:
How To Complete Domizuin Shrine in Zelda Tears of the Kingdom
How To Complete Shining in Darkness in TotK
The Kikakin Shrine solution in Zelda Tears of the Kingdom involves finding a Small Key that opens the locked door to the Light of Blessing. However, as noted above, the primary challenge of “Shining in Darkness” in Totk is finding this key’s Treasure Chest in the dark. While the Shrine provides you with a portable light you can carry around while searching for the chests, there is a more convenient method.
If you’ve explored caves in Hyrule, you’ll likely have encountered the naturally glowing Brightbloom Seeds. This resource serves as a material that can be attached to the arrows of your bow. Accordingly, you can easily light up the interior chambers of Kikakin Shrine in Tears of the Kingdom.
Of course, stocking up on Brightbloom Seeds before clearing this Shrine isn’t necessary for its completion. Nevertheless, this preliminary step will make “Shining in Darkness” a much easier puzzle to solve in The Legend of Zelda: Tears of the Kingdom.
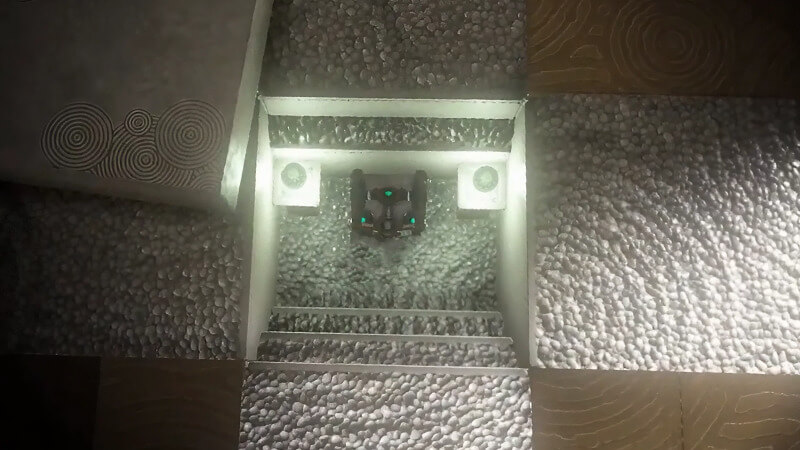
Treasure Chest 1 – Amber
- From the first room, head down the corridor on the left and take the first right.
- Continue until you spot a brown square on the wall to your right.
- Using your Ultrahand, pull out the center block of this square to find the first Treasure Chest of the Shrine.
Treasure Chest 2 – Luminous Stone
- Continue down the hall where you found the Amber chest and turn left.
- Take the first right and head to the back of the corridor.
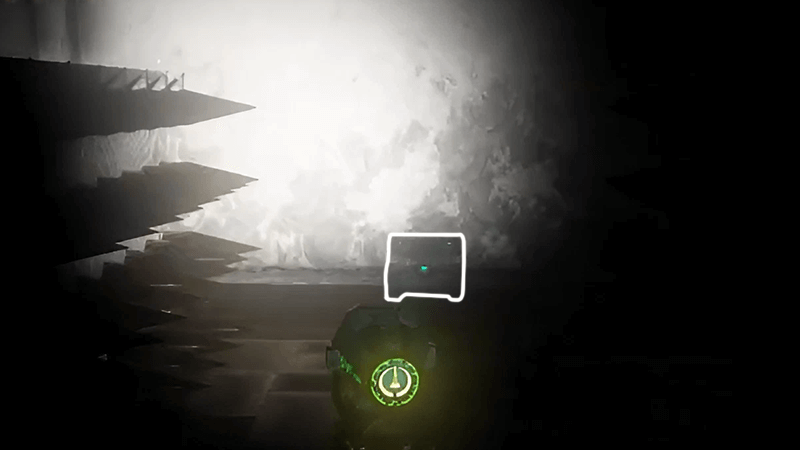
- You’ll encounter two spike walls that come together every few seconds.
- Wait until the walls are spread apart and rush to the back of the room to loot the Treasure Chest.
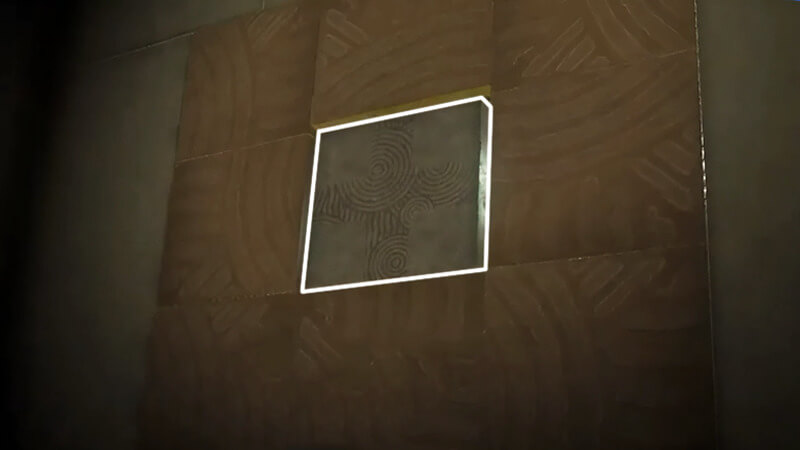
Treasure Chest 3 – Small Key
- Continue down the hallway from which you came and take a right after reaching a wall.
- Avoid the spike wall and investigate the “plus-shaped” spot on the ground.
- Activate your Ultrahand again, and grab the panel in the center to reveal the chest with a key.
If you’re not interested in the other Treasure Chests, you can return to the locked door near the entrance of Kikakin Shrine in TotK.
Treasure Chest 4 – Zonaite Bow
- Return to the spacious hallway connected to the pathway you came from.
- As you walk down the hall, look at the ceiling for a square-shaped hole.
- Aim at the ceiling near that opening with your Ascend ability and send Link into the hidden chamber above.
- Open the chest in the “Shining in Darkness” Shrine to receive a Zonaite Bow.
- Be careful not to drop diagonally into the spike trap below when leaving the upper room.
Treasure Chest 5 – Opal
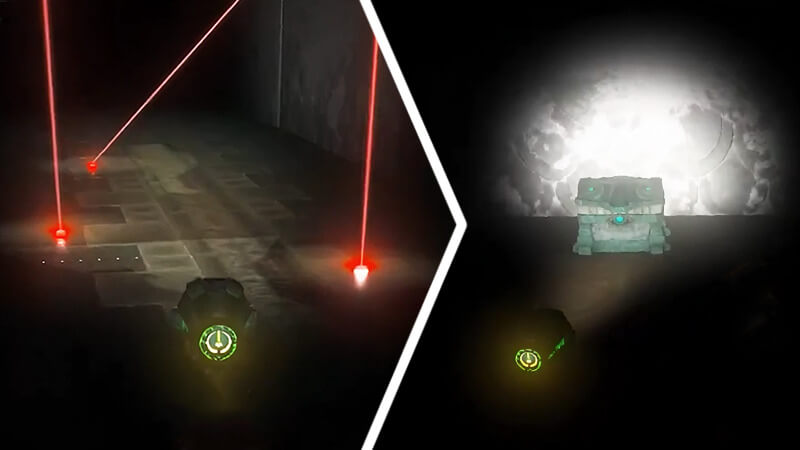
- Continue onward, taking a left at the next hall, followed by a right.
- Navigate through the room with red lasers.
- After you pass through the lasers, investigate the alcove to the left to find a chest containing an Opal hidden in the dark.
After looting the fifth chest, return to the entrance of Kikakin Shrine in Tears of the Kingdom and unlock the green door. Receive the Light of Blessing to exit the Shrine, completing the “Shining in Darkness” challenge. For a video Kikakin Shrine walkthrough, YouTuber 100% Guides has made an excellent Shrine guide: