
Fast Links
Stop shocking yourself to death and learn how to complete Turakamik Shrine, Hidden Metal, in Zelda Tears of the Kingdom. Shrines test your wit and creativity. With Link’s abilities and the elements provided within, you’re meant to solve the puzzles and reach the end of the shrine for some rewards. This sentence, of course, understates the difficulty of this task — and the fact that shrines like Turakamik Shrine keep shocking you to death while you try to complete them. This guide will help you navigate this electrifyingly difficult shrine and solve its mind-boggling puzzles.
How To Find Turakamik Shrine in Tears of the Kingdom
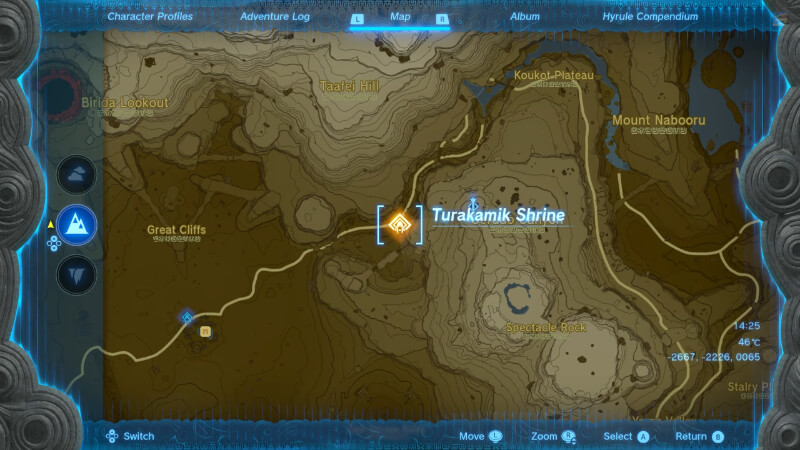
Turakamik Shrine is located south of the Gerudo Highlands, just west of Gerudo Canyon. To get there, you can glide from the nearby Skyview Tower. Look for the shrine’s distinctive entrance and prepare for an electrifying adventure.
How To Solve Hidden Metal in Tears of the Kingdom
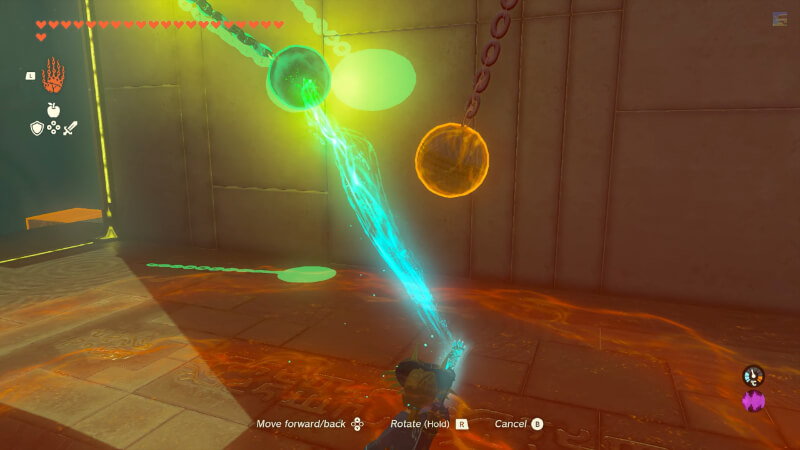
On the first platform, you’ll come across the following elements:
- An electricity-powered device that emits electricity to a hanging ball.
- A non-powered ball on the opposite side.
- A huge, unpowered cog.
Here are the steps you need to follow to solve Tears of the Kingdom‘s Turakamik Shrine’s first puzzle.
- Use the Ultrahand to make the hanging ball that conducts electricity reach the ball on the opposite end.
- Once they are touching, attach them together.
- This will conduct the power to the huge cog, causing it to spin.
- Hop on the spinning cog to reach the upper platform.
Related:
How To Get The Hero of the Sky Set in Zelda Tears of the Kingdom
On the second platform, you’ll come across the following elements:
- A powered ball hanging.
- A non-powered ball hanging.
- Three platforms stuck to the wall.
Here are the steps you need to follow to solve the Tears of the Kingdom‘s Turakamik Shrine second puzzle.
- Use the Ultrahand to make the non-powered ball swing.
- When the timing is right, make them touch.
- If you don’t like leaving things up to chance, use Recall to bring the swinging ball back and force both balls to meet.
- Once they touch, press A to attach them together.
- Use Ascend to head to the higher platform at the right time.
On the third platform, you’ll come across the following elements:
- A ball is attached to a chain.
- A huge cog mechanism.
- A smaller cog mechanism.
Here are the steps you need to follow to solve Tears of the Kingdom‘s Turakamik Shrine’s third puzzle.
- Use Recall on the cog and jump on it to reach the upper platform, where you’ll find a treasure with a Mighty Zonaite Shield.
- Use the Ultrahand to move the ball and drop it over the first horizontal pillar.
- Use the Ultrahand on the device before the cog and detach the piece of metal that makes both tiny cogs meet.
- Drop this piece of metal between the two horizontal pillars in the opposite room, making them meet.
This should power up the final gate, allowing you to exit the shrine with an extra level 50 shield and Light of blessing.
Tears of the Kingdom is available on the Nintendo Switch.