
Labyrinths are always quite challenging, and North Lomei Labyrinth in Zelda Tears of the Kingdom is no exception. The maze is quite large, and it is difficult to do everything correctly and quickly without hints. It’s easy to lose your way while endeavoring to find all the terminals to fight the boss underground. But after passing all the challenges, you can get the Blessings of Light and a good reward.
Zelda Tears of the Kingdom North Lomei Labyrinth Walkthrough
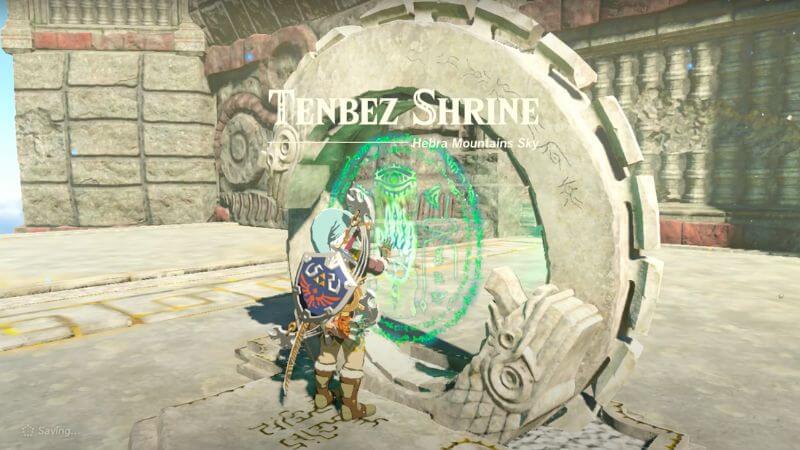
You have two possible ways to complete the quest. Using the first one, you need to go up to the sky where the Tenbez Shrine will be. You can easily get to the labyrinth by skydiving into it. The second way is more complex, as you must go through the mountainous terrain and complete the full labyrinth.
The first method to solve North Lomei Labyrinth in Zelda Tears of the Kingdom involves jumping from the sky to a certain place in the maze to skip a part of it. To do this, use the Paraglider and land near a thick bar to the north of the maze.
If you decide to go through the mountains, here’s how to go through the labyrinth from the main entrance:
- At first, go straight through the gloom until you reach the grate.
- Go right from the grate and then immediately head left. You will come across a staircase, and from it, you need to go to the right and just go ahead.
- Now you have reached a crossroads, and here you should go left and then right. After that, turn left twice when you see gloom.
- Make two turns to the right, and after that, you will notice a lot of gloom. You have to quickly run through two of them before you reach the top of the maze.
- After that, go straight to the junction and make three turns: left, then right, and then left again.
- Going further, you will come to a wall, after which you need to make two turns to the right. This will bring you to another wall near which you need to turn left. From this point on, you can follow the guide if you reach the labyrinth from the sky.
- Go to the top of the thick bar, where you can go inside. There will be a light, and you need to go to it and then turn left and from there, go to the stairs.
- After climbing these stairs, you can jump to the first terminal. After activating it, go north and take all the turns to the east. There will be no further platform, so dive and glide straight to the wall until the wind carries you up.
How to Activate North Lomei Labyrinth Second Terminal
To find and activate the second terminal, go east. It will be best if you first go to the northern terminal and then through the second to the central one. Leave the terminal and follow these instructions:
- Take the second right turn.
- Make a second left.
- Take the first right turn.
- Head to the first left.
- And finally, take the second right turn.
- After that, take all the turns heading west.
This will take you to the next terminal, and to get to the central one, go back the same way to where you activated the second one. From there, you can easily reach the last terminal. Activate the final touchpad and go into the Depths to start the battle with Flux Construct III.
How to Beat Flux Construct III in Zelda Tears of the Kingdom
To defeat Flux Construct III, you have to focus on its energy block. When the boss is in robot form, try to grab the charged energy block with your Ultrahand. In the form of a cube, it will roll at you, so try to dodge and grab the energy block if possible. When Flux Construct III starts flying, use weapons that deal AoE damage.
After the boss has been defeated, use the terminal to get the reward chest. Inside will be the Evil Spirit Greaves which gives four extra armor and increases your stealth.
Related:
How To Complete Walton’s Treasure Hunt in Zelda Tears of the Kingdom
The Zelda Tears of the Kingdom is available on Nintendo Switch.