
Resident Evil 3, despite its short length, is chock full of secrets. Some of them add to the narrative in meaningful ways, and others scratch that itch to find anything and everything just because. Since there are so many different secrets in the game, it can be very easy to miss one. And while Resident Evil 3 tracks collectibles from playthrough to playthrough, it’s quite possible you can play the game multiple times through and still not find what you need.
Well, don’t be afraid. I’m here to help! I’m obsessed with Resident Evil as a franchise, so I’m naturally obsessed with Resident Evil 3 as a game. I have gone through the game meticulously and found every file, charlie doll, lock and safe, weapon, weapon upgrade, and inventory upgrade. So, whether you are doing it for fun or for that oh-so-sweet platinum trophy, let’s get started.
File #1 – Jill’s Report
After dealing with all the bathroom business (wait, that came out wrong), near the entrance to the kitchen is a board on the wall with all kinds of pictures and files. You will find Jill’s Report on this board.
File #2 – Investigation Notes
You will find this file next to Jill’s Report.
File # 3 – Unsealed Envelope
Next to the board is a shelf. This file is sitting on it.
File #4 – Message From a Colleague
This file is next to a pizza box in the kitchen. No, you can’t eat the pizza.

Charlie Doll #1
After Carlos rescues you from Nemesis, you and he will be underground. Carlos will ask you to follow him. Don’t. Be rude and go up the stairs behind you. There will be a Charlie Doll between two newspaper vending machines.
File #5 – U.B.C.S. Ammo Crafting Guide
After the cutscene with Carlos and Mikhail, exit the train. Across from the exit, there will be a bench with the guide on it.
File #6 – Tabloid Front Page
After heading up the stairs to your right, there should be a shop with all types of magazines and papers. You will find the tabloid here.
File #7 – U.B.C.S. Herb Field Manual
Someone in U.B.C.S. really needs to keep track of their manuals. After going up another set of stairs, you will be in an item box room. On the table in the center of the room lies the manual.
Charlie Doll #2
Inside Moon’s Donuts, the building with a small safe room in it, you will find a Charlie Doll behind the counter, next to a microwave.
Charlie Doll #3
Exit Moon’s Donuts and head to the right and up a set of stairs. Keep going until you enter a room with some shelves and a zombie. After killing the zombie, look at the top shelves to find a Charlie Doll.
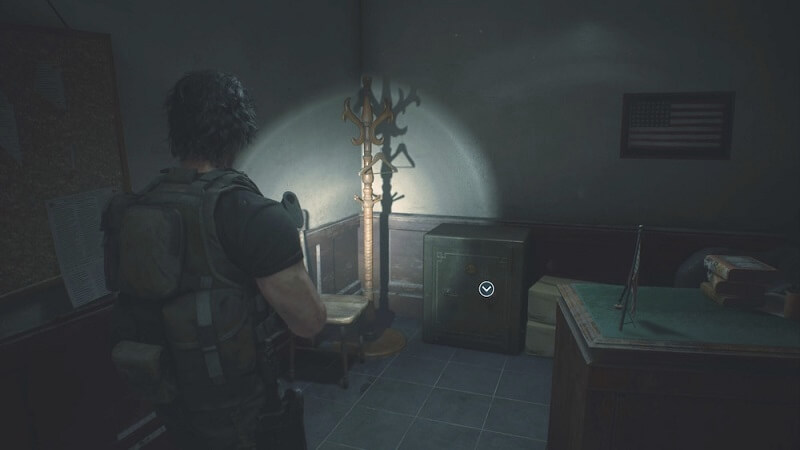
Lock #1 / Red Dot Sight – Handgun
In a corner of the room, there is a safe. The combination is 9 LEFt – 3 RIGHT – 7 LEFT. Inside, you will find your first weapon upgrade of the game.
File #8 – Drugstore Owner journal
On a table next to the safe, you will find this creep’s journal.
File #9 – Kite Bros. Railway Manual
It’s on the table covered with buttons and levers.
Charlie Doll #4
Under that table is the Charlie Doll. Shoot it straight in its face.
File #10 – Subway Employee’s Memo
To the right of the fire hose is a room that has this memo on a table in its center. There is also a shotgun in this room. We will come back. I know, it’s hard.
File #11 – Training Log
After the cutscene where Nikolai rearranges this guy’s face, pick up the log next to his corpse.
File #12 – U.B.C.S. Suicide Note
After exiting that room, head down the alley to the right. You will come to a dead-end with a corpse. Pick up the poor guy’s note.
File #13 – Electrician’s Note
Now, head the opposite way down the alley, the way the story wants you to go and find the note on the wall to your right.
File #14 – Fax From Substation Chief
The fax will be in the Control Room, which has an item box and a typewriter.
Hip Pouch #1
On the desk next to the typewriter.
Charlie Doll #5
Act like you are about to leave the Control Room. Before you go through the door, turn around and look at the top shelf opposite you to see the Charlie Doll.
File #15 – Green Herbs: They Work
After exiting the Control Room and heading down the stairs, this will be on a bench with some green herbs.
File #16 – Substation Internal Memo
Right nearby, next to the locked gate, you’ll find the memo on the wall.
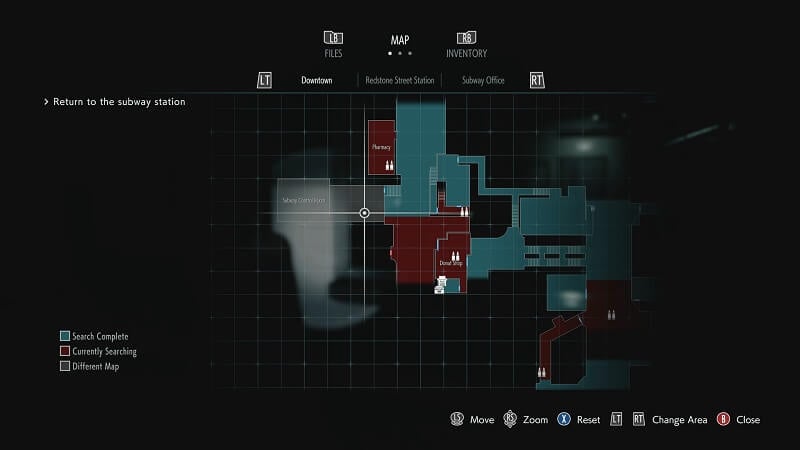
NOTE: After picking up the lockpick, don’t go through the gate. Once you finish restoring the power, you will be hunted by a pest much more dangerous than the bugs you will encounter behind the gate. It is best to backtrack and grab the rest of the collectibles before proceeding.
Lock #2
On the ground floor of the Power Substation, just underneath the Control Room, there is a locker. Unlock it.
Lock #3
In the garage, where you got the bolt cutters, there is another locker. Unlock it.
Lock #4
Do some major backtracking until you arrive at Toy Uncle’s Supershop front entrance. There is a lock on the door. I think you can figure out what to do at this point.
Charlie Doll#6
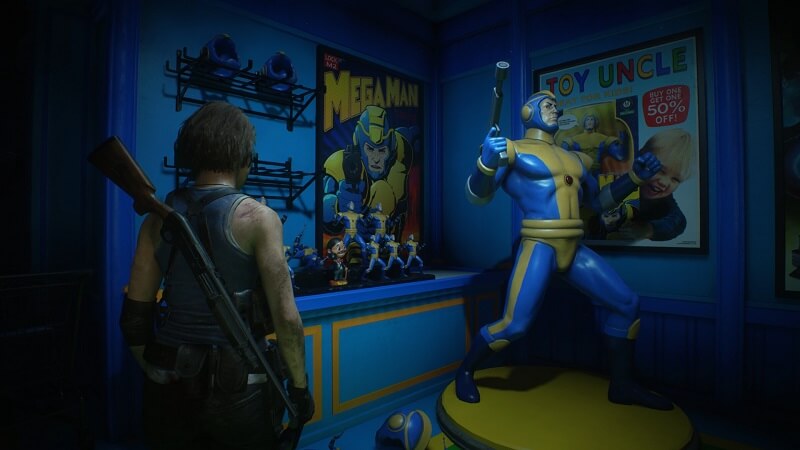
This little guy is on the hilarious Mega Man display in the store. Shoot him.
File #17 – Your Charlie Doll
There is a big poster on the wall across from the door. Check it out to get more information on Charlie Dolls.
Green Jewel
There is also (I’m sure you’ve noticed) an ornate box in the shop. Pick it up, examine it, and get the Green Jewel. We will use this later.
Blue Jewel
Exit the toy store and head across the street to the Supermarket. Use the Bolt Cutters to get inside and find the fancy box. Repeat the same steps above to get the Blue Jewel.
Lock #5
In the donut shop, there is a locker in front of the safe room. Unlock it with the lockpick.
Red Jewel
You may have already picked this up, but, just in case, there is another ornate box inside the safe room. Examine it to get the Red Jewel.
Lock #6
Cross the street from the donut shop to return to the Subway Office for what will not be the last time. Unlock a strongbox that is on a table on the right side of the room.
M3 Shotgun
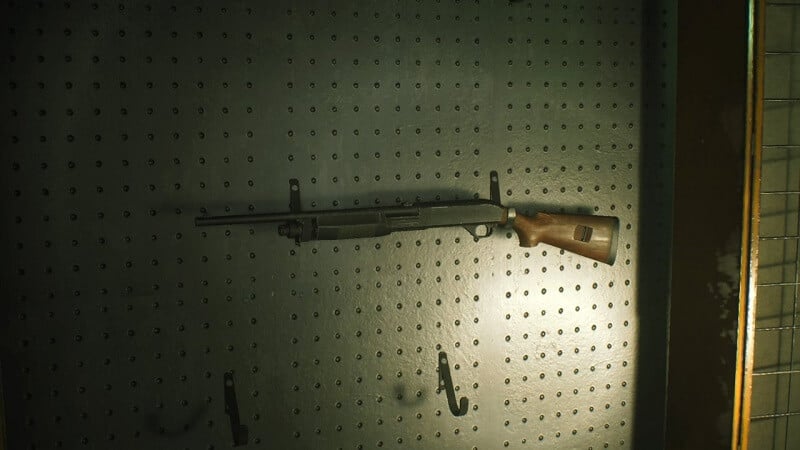
It’s time. Go into the same room as the Subway Employee’s Memo and use the bolt cutter to get the M3 shotgun. Feels nice, right? You feel the power? Good.
Lock #7
There is another locked locker in the same room. Unlock the locked locker with your unlocking lockpick.
Lock #8
Go back to the saferoom in the subway station before you really got into the city. There will be a strongbox in the upper left corner of the room. Use your lockpick to unlock it.
Tactical Stock – M3 Shotgun
Now, at the top right of the room, there is the Clock Tower Monument. This is where we will use all the jewels we have collected to get some sweet loot. After inserting two of the jewels, the Monument will expose the Tactical Stock. Because that’s how Resident Evil games work.
Hip Pouch #2
Place the third jewel to find the second inventory upgrade. Enjoy the added space.
Lock #9
Now, we can get back on track with the story. Return all the way back to the gate outside the Control Room. Go ahead and unlock the gate.
File #18 – Chad’s Notes
While making your way through the infested labyrinth and after activating your first circuit breaker, you will climb a ladder up to some scaffolding. On this scaffolding will be the file.
Extended Magazine – Handgun
For this upgrade, you are going to have to take down Nemesis. I know, scary, right? But there is an easy way to do this, at least on standard difficulty or below. When he pops through that wall, throw a grenade, and he will go down instantly. He will drop a supply crate. Pick it up and examine it for your upgrade.
Moderator – Handgun
Taking down Nemesis when you run into him a second time will reward with a second handgun upgrade. If you have another grenade (you should since you have been looting everything everywhere), throw it. The guy won’t learn his lesson and will collapse once more. Pick up the case and retrieve your upgrade.
Sewers Map
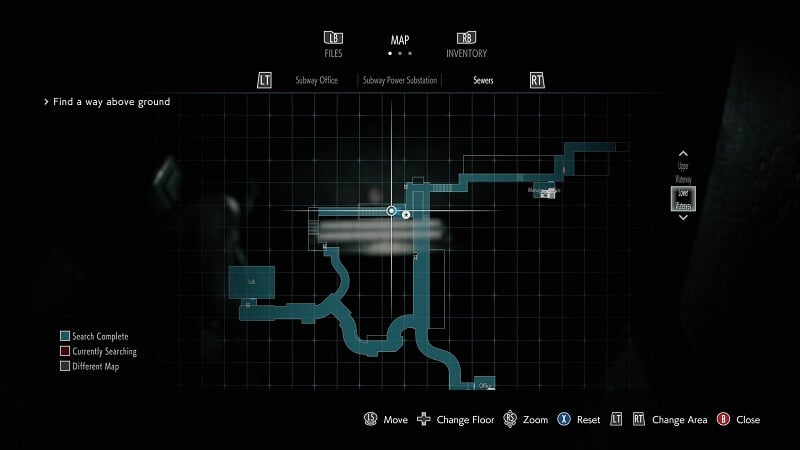
This will be in the Safe Room at the very beginning of the sewers.
File #19 – Increased Sewer Security
There will be a door that is locked by a power supply on the wall. The note details a needlessly complicated effort to keep out unwanted guests.
MGL Grenade Launcher
After you slide down into the lower section of the sewers, head left once you hit a split in the path. You will find a second safe room at the end of that path. You will find this beauty there.
File#20 – Research Assistant’s Logs
You will find this file in the very same room.
File #21 – Invoice from Gun Shop Kendo
You will find this file in the very same room.
File #22 – Sewer Worker’s Notes
Backtrack and then take the right path in the sewers. Eventually, you will encounter what can best be described as the world’s worst waterfall. You will find a file behind the waterfall, but… is it worth it?
Charlie Doll #7
Continue on the path until you reach a dead end with a ladder. Behind some bars nearby you will find this Charlie Doll. Assassinate it.

Lock #10
If you take the ladder up, you will come to a mini lab. There will be a locker in this room in need of some unlocking.
File #23 – A Love Letter?
This will be on a table near the locker. Also, what the hell?
Hip Pouch #3
After backtracking completely and returning to the higher levels of the sewer, you can use your new battery pack to open some doors blocking your path. After puzzling your way through the first door, you will come across a second that leads to the Security Room. There are a lot of goodies in here, but, most importantly, there is an Inventory Upgrade.
Charlie Doll #8
After making your way through the door that stopped our progress in the first place (the one with File #19 next to it), go up the stairs and turn. Above the door will be the Charlie Doll. Show no mercy.
File #24 – Notice of Demolition Delay
This notice will be in the second safe room when you are climbing the demolition site to escape Nemesis. And, since the building is on fire, now is the perfect time to enjoy a good read.

Semi-Auto Barrel – Shotgun
After enjoying a little dose of nostalgia, pick this upgrade up off of one of the shelves in Kendo’s Gun Shop.
Charlie Doll #9
In the first building you enter after opening the locked gate next to Kendo’s, there will be a Charlie Doll on a table just after entering.
File #25 – Raccoon Times Reader’s Column
Make your way upstairs in the same house. There is only one single bedroom (which is weird from a design standpoint for a two-story house). The newspaper will be on the bed.
Lock #11
There will be a strongbox in this same room. Unlock it.
File #26 – Email Outbox
Now, playing as Carlos, we get a good smack of nostalgia. After killing Brad outside the police station from Resident Evil 2, backtrack to where you started playing as Carlos. There will be another path leading down a set of stairs. There will be a room to the right with the file on a table.
Charlie #10
Exit the room and go up the stairs to your right. You will reach a dead-end, but there will be a Charlie Doll against a wall. Demolish it.
File #27 – ID Card Security Protocols
After Tyrell opens the shutters for you, this file is the room to the left side of the station, if you are looking as if you came in through the entrance.
Scope – Assault Rifle
Head to the West Office. If you played Resident Evil 2, you know the way. Once inside, there will be a box that requires you to use Brad’s ID card. The Scope will be inside.
Lock #12 / Hip Pouch #4
You will find this inventory upgrade inside the safe in the West Office. The combination is 9 LEFT – 15 RIGHT – 7 LEFT.
File #28 – Arrest Report
This file will be on tables in the middle of the room, on the side near the door.
File #29 – Internal Memo
Exit the West Office and head down the hall. Take a right before going up the stairs and enter the Dark Room. The file will be here.
Lock #13
In the hallway on the third floor, there will be a locker. The code is DCM.
File #30 – Note to A Friend
This warning will be in the shower room in the Shower Room. If you are like me, you will try and disregard the warning in this note.
Lock #14
One of the lockers in the shower room can be unlocked using the code CAP.
File #31 – 3F Locker
In the Safety Deposit Room back on the first floor, across from the West Office, there will be a photo on the whiteboard to your right just after entering. This photo is useless to you since I gave you the code already, but, hey, you gotta get all the collectibles.
Charlie doll #11
Head to the back of the safety deposit room and, on a shelf, there will be a Charlie Doll. Eviscerate it.
File #32 – Report on the Mansion Incident
Once you finally reach the S.T.A.R.S. office, head into the small office to the left. On the table will be this neat little report on the events of the first game.

File #33 – U.B.C.S. New Weaponry Notice
Playing as Jill again, this file will be on a bench in the very first room after the train incident.
Charlie Doll #12
Exit the room and you will find yourself in a hallway littered with cells. The second cell on the right will have the Charlie Doll. Extirpate it.
Charlie doll #13
After exiting the Subway Tunnels, head to the left and go to a green van. Behind it will be another Charlie Doll. Exterminate it.
File #34 – Clock Tower Brochure
Now head towards the river and locate a bench. The brochure will be on top of it.
File #35 – Spencer Memorial Pamphlet
Now, playing as Carlos again, go to Reception, which will be the first room you enter and filled with zombies. The file will be on a newsstand on the far right of the room, near the locked door.
Charlie Doll #14
After exiting the room, head left all the way down the hallway until you reach a door. Turn left and you will find the Charlie Doll on a gurney. Waste it.
File #36 – Nurse’s Journal: Spet. 25
This file will be on the desk in Lac Reception, near the Tape Player.
Charlie Doll #15
As soon as you enter the roof, immediately turn right and look down. You will find the Charlie Doll on the ground in the corner. Annihilate it.
Tactical Grip – Assault Rifle
On the second floor of the hospital, locate the first broken window, marked with yellow tape. Jump through the window to the courtyard on the first floor to get this upgrade.
Hospital Map
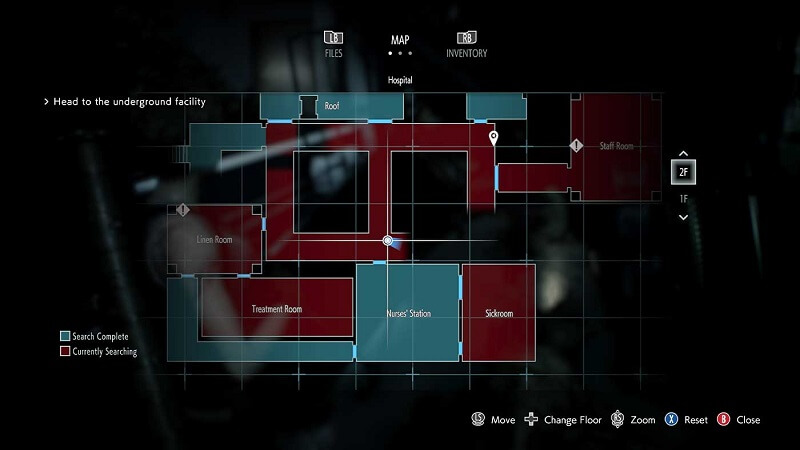
Go back upstairs and continue further down the hallway then before. There will be a door that will lead to the Records Room. The map will be on a message board right next to the entrance.
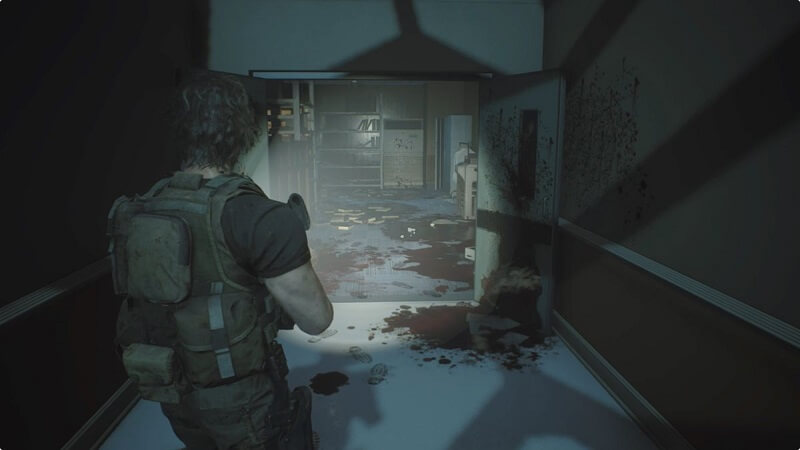
File #37 – Nurse’s Journal: Sept. 27
This file can be found on the right side of the Records Room on a shelf.
File #38 – Nurse’s Journal: Sept. 29
This entry of the journal can be found in the staff room on a desk. Quick question: do you know anyone who tears out pages of their journal and leaves them in different public locations? No? Just the nurse? I thought so.
File #39 – Memos from Administration
This will also be in the staff room, pinned to the wall next to the door.
Lock #15 / Dual Magazine – Assault Rifle
In the Nurse’s Station, there will a safe near the counter. The combination is 9 LEFT – 3 Right. Inside, you will the very helpful Dual Magazine Upgrade.
File #40 – Note about a Tape Recording
This file will be in the same room on a table.
Charlie Doll #16
Enter the Sickroom through the upper door (near the safe) on the left. Turn right and there will be a Charlie Doll trying to escape your wrath in a trash bin. Obliterate it.
File #41 – RE: Lost Items
In the Operating Room on the first floor, there will be a file behind a medical chair.
File #42 – Banquet Invitation
This file will be on the table next to Dr. Bard’s corpse.
File #43 – Email from Nathaniel Bard
It’s on the computer in the same room. You cannot miss this file. It would be remarkable if you did.
Hip Pouch #5
This one is a little more difficult to get given the high pressure of the situation. When the hunter breaks through the door behind the reception desk, head into that room. There will be a hip pouch directly across from the entrance.
G18 Handgun
Now, we are playing as Jill again. This weapon will be on the table next to the door.
Lock #16
Now, let’s go unlock some things. After exiting Reception, take a left until you come to a strongbox. Follow your instincts and unlock it.
Lock #17
In the Emergency Entrance, all the zombies will break through the glass on your right. Take them out and then enter that little section behind what was the glass. There will be a locker. Open it up for some magnum ammo. Isn’t that a nice bit of foreshadowing!
Lock #18
Go to the Staff Room on the second floor. There will be a locker on the left side of the room. Open it up.
Lock #19
Now head to the Linen Room. Across from the entrance to the room, there is a locker. Unlock it.
.44 AE Lightning Hawk
Yes, it’s time. Exit the Linen Room and you will see further down the hallway a bunch of crap appearing to block the path. But there is actually a small gap that Jill can squeeze through because she isn’t a hulking block like Carlos. Once she gets through it, there will be a different window to jump out of and down to the Courtyard. There will be a metal box containing the oh-so-beautiful .44 AE Lightning Hawk. Also, congratulations, you have found every weapon in the game!
Lock #20
Now, head back to Reception. There will be a door basically glowing red. Unlock it. Congratulations, you have unlocked every lock in the game! Isn’t accomplishing things nice?
Charlie Doll #17
Make your way through all the dark rooms and hallways until you come to a more open area. Before the elevator will be a forklift. On it is the Charlie Doll. Slaughter it.
File #44 – Elevator Notice
In the first safe room you enter, this file will be on the table near the typewriter and item box.
Hip Pouch #6
Next to the file.
Charlie Doll #18
During the whole power-out dilemma, you will have to squeeze between two shelves. The second you get through, turn right. There will be a Charlie Doll on a shelf. Decimate it.
Shell Holder – Shotgun
If you continue forward, before you head up the stairs, there will a panel to the right to interact with. Go ahead and pull the lever which will cause the lift to lower, which allows you to walk across. There will be a box. Open it and get your weapon upgrade.
File #45 – Employee Memo
In the room up the stairs before the safe room, there will be a file on some boxes on the left. But beware of the three zombies in the room.
Extended Barrel -.44 AE Lightning Hawk
Once you install the three fuses and take the elevator up to where Nicholai was before, go behind the long console toward the window. You will find a box there. Open it up to find the very last weapon upgrade in the game.
File #46 – Unfinished Activity Log
Same room as the Extended Barrel. Check the computer in the room.
File #47 – NEST 2 Employee Regulations
In the safe room of NEST 2 (the room is at the end of one of the first hallways), this file will be on a table. This will also give you the NEST 2 map.
File #48 – Isaac Graves’ Diary
Go upstairs and take left once you reach another hallway. There will be a zombie at the very end of the hallway. Kill it and grab the file on the ground.
File #49 – Essay on Vaccine Synthesis
In the room with the huge vaccine machine, it will be on a bed.
Charlie Doll #19
Go out on the balcony on the right side of the room. Turn left and, in the corner, there is a Charlie Doll. Erase it from existence.
File #50 – Shipping Notice
After unlocking the door on the first floor with the flash drive, there will be a file on a tray on the left side of the room before you go up the stairs.
File #51 – weaponry Authorization Request
Head upstairs and enter the room on the top. It will be on a desk.
Charlie Doll #20
Head through the other door in the room to a much smaller room. The Charlie Doll will be on the floor. Freaking destroy it. Congratulations, you have erased all Charlie Dolls from history.
File #52 – Scientist’s Dying Message
Go downstairs and make your way through the body bags (good luck). After entering the room at the end, turn right and find a corpse. Next to the corpse is the message.
File #53 – Expression of Concern
This will be in the Incubation Lab on a table.
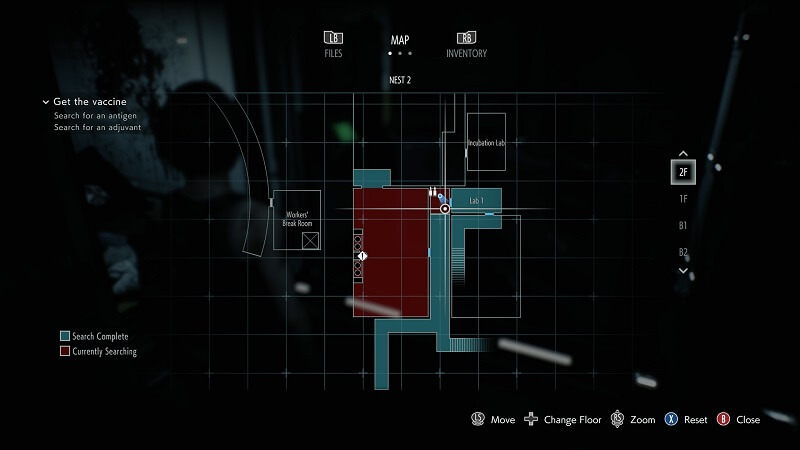
File #54 – Disposal Center
After getting attacked for what seems like the billionth time, you will find yourself in the Worker’s Break Room. There will be a note on the wall next to the door. I wonder if it will come to play in the next boss fight…
File #55 – Weapon Spec Sheet
After defeating Nemesis Stage 2, you will find this file in the safe room. I can’t help but wonder if this will come into play too…
File #56 – Suspicious Contract Memo
This can be very easy to miss. After blowing Nemesis to hell, head up the ladder on the right side of the room. Look on the floor before heading through the door and you will find the file. I guess Nicholai dropped it on his way out.
Congratulations, you have found all the collectibles in Resident Evil 3!
If you are needing a little help getting by, check out these tips on how to survive in Resident Evil 3. Interested in Resident Evil: Resistance? Check out our review here.
In other Resident Evil news, there have been some rumors regarding Resident Evil 8. There has also been news about a Resident Evil 2 Remake actress working on a project with a Resident Evil 3 actor. Exciting stuff!
Are you enjoying Resident Evil 3? What have you thought about the direction of the series lately? Let us know in the comments below!