Close Menu
  • Gaming
    • Game Guides
    • Codes
    • Game News
    • Game Previews
    • Game Reviews
    • Game Features
    • Game Lists
    • Platforms
      • Nintendo
      • PC
      • PlayStation
      • Xbox
      • Mobile
  • Entertainment
    • Movies
    • Movie Features
    • Movie Reviews
    • TV
    • Reality TV
    • Royals
  • Celebrity
  • Human Interest
  • Astrology
  • Videos
  • More
    • Anime
    • Lists
    • Podcasts
    • Reviews
Facebook X (Twitter) Instagram LinkedIn YouTube
  • About Us
  • Join Our Team
  • Meet the Team
  • Privacy Policy
  • DMCA Policy
  • Contact Us
  • Terms of Use
  • Sitemap
  • Editorial Guidelines
  • Advertising Policy
The Nerd Stash
  • Gaming
  • Celebrity
  • Human Interest
  • Videos
The Nerd Stash
Home»Game Guides»How to complete the Sinakawak Shrine in Zelda: Tears of the Kingdom

How to complete the Sinakawak Shrine in Zelda: Tears of the Kingdom

The Sinakawak Shrine in Tears of the Kingdom is one of the first you’ll encounter after leaving Lookout Landing, but it’s not the easiest to…

Jordan MoyerBy Jordan MoyerMay 13, 20235 Mins Read
How to complete the Sinakawak Shrine in Zelda: Tears of the Kingdom
Screenshot via The Nerd Stash (The Legend of Zelda: Tears of the Kingdom)

Skip To...

  • Finding the Sinakawak Shrine in Tears of the Kingdom
  • How to Complete a Sinakawak Shrine Uplifting Device in Tears of the Kingdom
  • How to Get the Bonus Chest
This article is over 2 years old and may contain outdated information.

The Sinakawak Shrine in Tears of the Kingdom is one of the first you’ll encounter after leaving Lookout Landing, but it’s not the easiest to complete. You won’t have to utilize all of your newfound abilities and powers, but you will have to use Ultrahand quite a bit. The Sinakawak Shrine forces you to use your creativity and create solutions out of what you are given in the form of uplifting devices. That being said, sometimes it’s hard to figure out just how you’re supposed to do it all. Keep reading to learn where to find and how to complete the Sinakawak Shrine in The Legend of Zelda: Tears of the Kingdom.

Finding the Sinakawak Shrine in Tears of the Kingdom

Sinakawak Shrine Location
Screenshot via The Nerd Stash (The Legend of Zelda: Tears of the Kingdom)

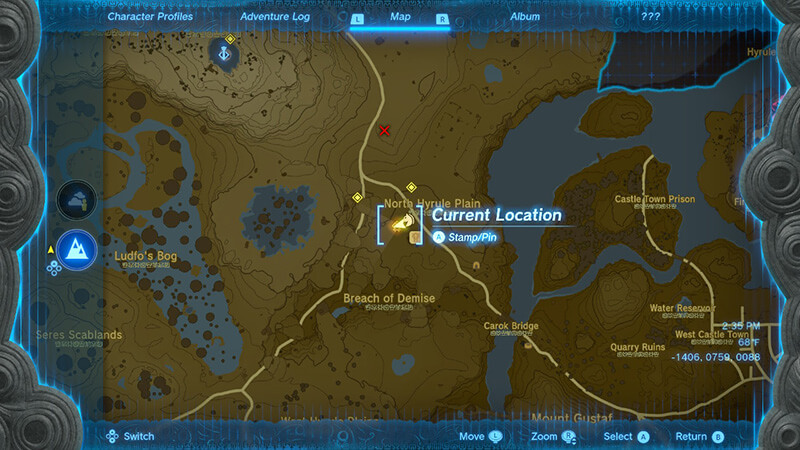
First, you’ll have to figure out where to find the Sinakawak Shrine. When you first leave Lookout Landing and start heading to the West toward the North Hyrule Plains, you will be heading in the right direction. Shortly after you pass by the New Serenne Stable on the main path through the area, you should notice the Sinakawak Shrine to your left, off the path.

How to Complete a Sinakawak Shrine Uplifting Device in Tears of the Kingdom

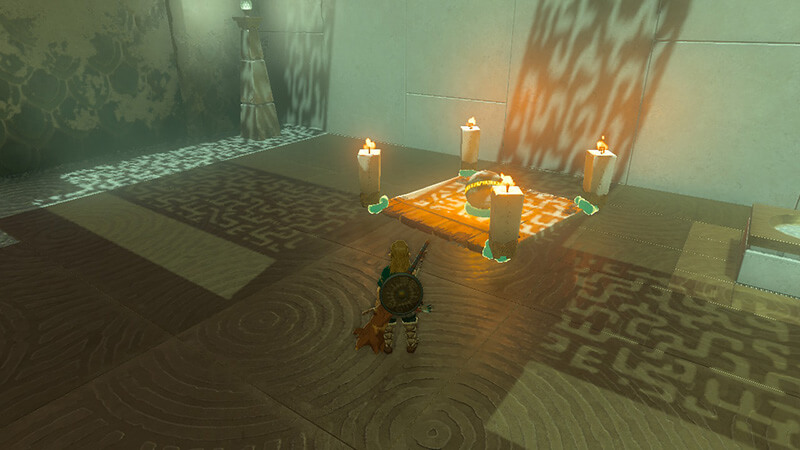
As you make your way inside of the shrine, you will walk into a room that has a few pieces of wood leaned up against a platform, along with some balloons and candles. The primary directive is to create uplifting devices ย in order to raise and lower both yourself and different objects, by utilizing wood, candles, and balloons.

How to complete the Sinakawak Shrine in Zelda: Tears of the Kingdom
Screenshot via The Nerd Stash (The Legend of Zelda: Tears of the Kingdom)

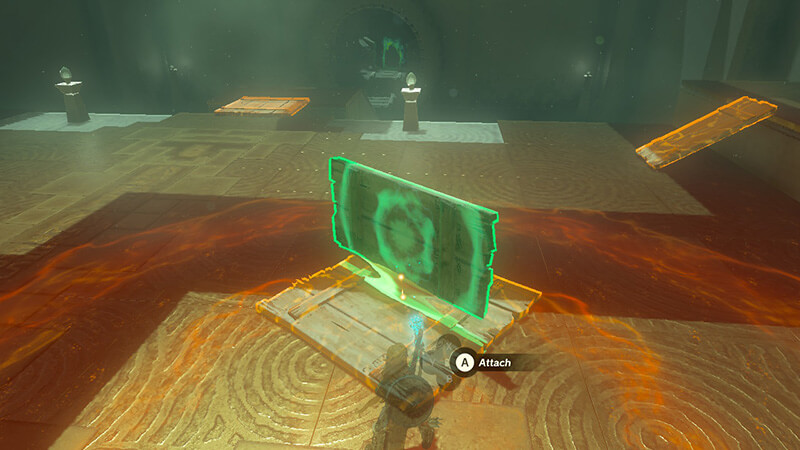
When you enter into the room, the first thing you’re going to need to do is activate Ultrahand and connect a shorter board to a longer board so that they create an upside-down “T” shape.

Uplifting Device #1
Screenshot via The Nerd Stash (The Legend of Zelda: Tears of the Kingdom)

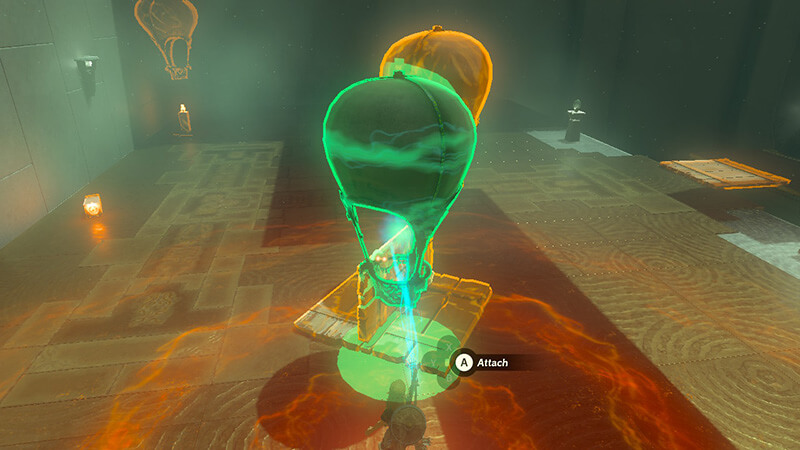
Next, connect Balloons to the edges of the shorter board on alternating sides, as shown in the image above. The final step in completing this uplifting device is to add a candle to the board underneath both of the balloons. Be sure to already be standing on the board when you place the final candle so that the uplifting device will raise you up to the next level of the room.

How to complete the Sinakawak Shrine in Zelda: Tears of the Kingdom
Screenshot via The Nerd Stash (The Legend of Zelda: Tears of the Kingdom)

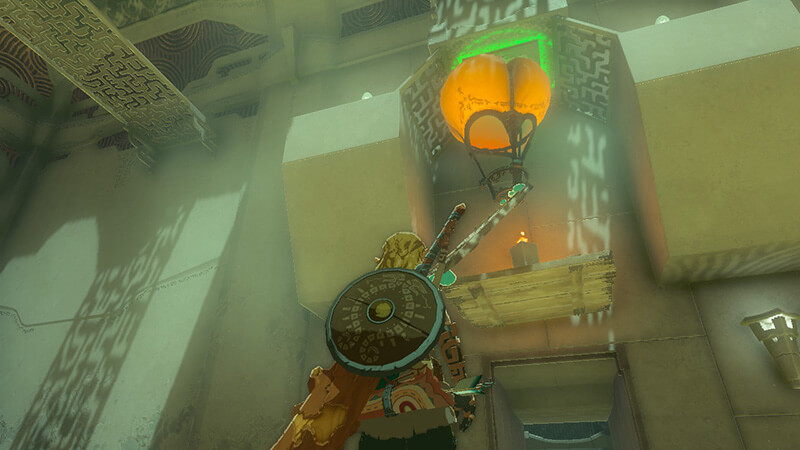
Once you make it up top, position the uplifting device below the switch above the door and allow it to float up to it, unlocking the gate below for you to progress.

Sinakawak Puzzle #1
Screenshot via The Nerd Stash (The Legend of Zelda: Tears of the Kingdom)

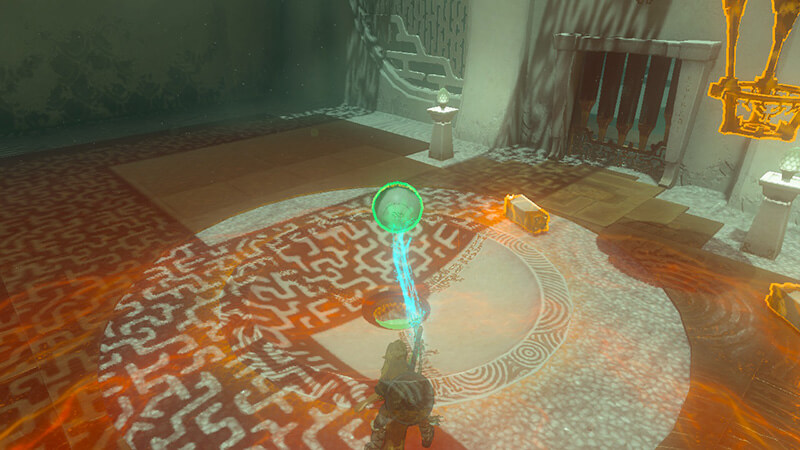
When you make it into the new room, you’re going to need to jump down to the next level. You can safely do this by gliding down with your paraglider and landing by the small ball surrounded by candles. Next to the ball, there will be a wooden board lying on the ground.

Pick up the ball with Ultrahand and attach it to the middle of the board.

Next, you will be connecting a candle to each of the four corners of the board. Once this is done, look around for some balloons.

You will only need one balloon for this particular uplifting device, so find one, grab it with Ultrahand, and pull it back to the uplifting device.

How to complete the Sinakawak Shrine in Zelda: Tears of the Kingdom
Screenshot via The Nerd Stash (The Legend of Zelda: Tears of the Kingdom)

Once you make it back, attack the balloon to one of the edges of the device, so that the candles are close enough to move it. You will notice the uplifting device begin to raise toward the higher level of the room. Now, head back to the ladder on the opposite side of the room and climb back up to where the Device is now.

In order to deconstruct the uplifting device, attack it with a melee weapon, then grab the ball with Ultrahand and drop in in the are in front of the door. This will open up the gate to let you complete the Sinakawak Shrine.

How to Get the Bonus Chest

If you are interested in collecting the bonus chest within the shrine for an extra Opal, you will follow step similar to what you did to complete the shrine, and create another uplifting device. However, this device will be a bit different.

Sinakawak Puzzle #2
Screenshot via The Nerd Stash (The Legend of Zelda: Tears of the Kingdom)

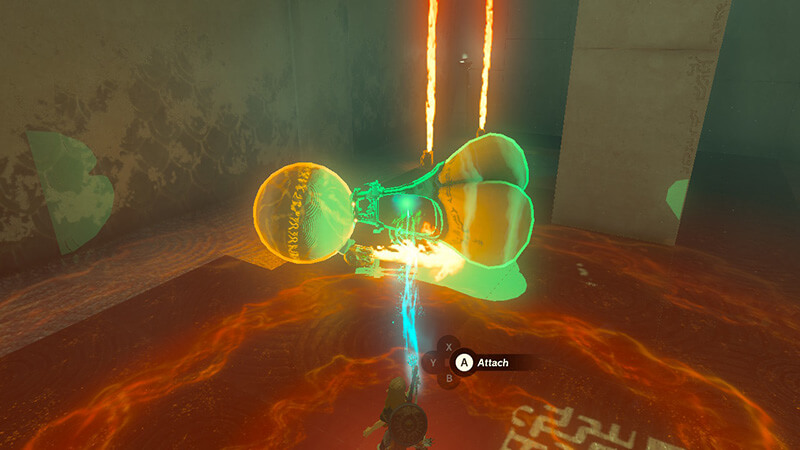
Head back down to where you found the small ball used in your last uplifting device and explore the room until you find the large ball surrounded but fire-spitting Zonai Devices.

Grab a Zonai Device using Ultrahand and attach it to the large ball. This will make the ball roll to the side, making it easier to add a balloon onto it in the right location.

How to complete the Sinakawak Shrine in Zelda: Tears of the Kingdom
Screenshot via The Nerd Stash (The Legend of Zelda: Tears of the Kingdom)

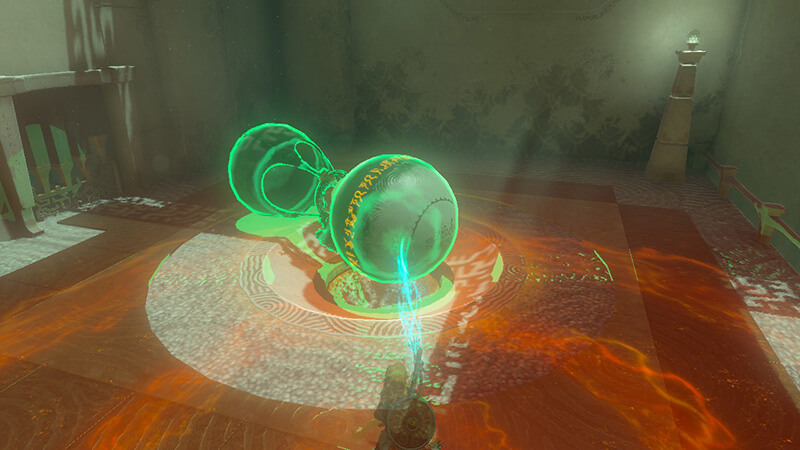
Grab a balloon from near you and attach it to the ball as well so that the Zonai Device will activate the balloon and allow it to raise. Once it does, climb back up the ladder and head over to the ball’s new location.

You can turn off the Zonai Device by attacking it with a melee weapon once. After you do this, grab the ball and drop it into the correct hole, unlocking the gate to the bonus chest.

This is everything you need to know about how to complete the Sinakawak Shrine inย The Legend of Zelda: Tears of the Kingdom.

The Legend of Zelda: Tears of the Kingdom is available exclusively on Nintendo Switch.

Related Topics
Guide Zelda Tears of the Kingdom
Share. Facebook Twitter LinkedIn Reddit Email
Jordan Moyer
  • Website
  • X (Twitter)

Jordan is an experienced fantasy writer who spends hours behind her laptop, and lost in the pages of a book. She strives to be a successful gaming blogger, and has no complaint about the hours of game time she used to increase her knowledge of all things โ€œgeekโ€. She primarily writes gaming articles and fantasy novels. Ark: Survival Evolved is a favorite, along with Diablo 3, Warframe and Minecraft lately, though you canโ€™t forget the good old Magic the Gathering card game! Writing about games truly gives her joy as it gives her another perspective to look at games from, a reason to really look into the mechanics of the game.

SUGGESTED READS

Destiny 2: Where is Xur Today and What Is He Selling
Game Guides

Destiny 2: Where is Xur Today and What Is He Selling (August 8 – August 11)

Killing Floor 3 PC Review
7.5
Game Reviews

Killing Floor 3 Review – Let the Bodies Hit the Floor

Metal Gear Solid Delta Remake Changes
Game Features

Biggest Changes Coming to Metal Gear Solid ฮ”: Snake Eater

Xbox and PlayStation Have Finally Given Up on the Console War, But Here's Why Nintendo Won't
Features

Xbox and PlayStation Have Finally Given Up on the Console War, But Here’s Why Nintendo Won’t

GTA 6 scared of Roblox
Game News

GTA 6’s Publisher is Scared of Roblox, Promises to Deliver More Value With Its Games

Dying Light: The Beast Most Exciting Features
Features

5 Reasons to Be Excited for Dying Light: The Beast

Trending

Say Goodbye to PS6 and the Console War? PlayStation ‘Moves Away’ From Hardware into Platform and ‘Engagement’ Business Model

Indian families in Costco

‘Indian Takeover’ at Costco in Texas Causes Uproar as ‘The Great Replacement Is Unfolding’: ‘Utterly Disgusting’

Woman spitting on another woman in NY

Black Woman Spits on White Woman and Child in New York: ‘Disgusting B-tch’

Florida Man Bashes Boomers Who Bought Up All the Houses, But Now They Canโ€™t Sell Them

Florida Man Bashes Boomers Who Bought Up All the Houses, But Now They Canโ€™t Sell Them, โ€˜I Call Them Privileged Problemsโ€™ย 

The Nerd Stash
Facebook X (Twitter) Instagram YouTube LinkedIn
  • About Us
  • Join Our Team
  • Meet the Team
  • Privacy Policy
  • DMCA Policy
  • Contact Us
  • Terms of Use
  • Sitemap
  • Editorial Guidelines
  • Advertising Policy
© 2025 The Nerd Stash. All Rights Reserved.

Type above and press Enter to search. Press Esc to cancel.