
There are many things to love about Destiny 2: Renegades, but one of its highlights, which is also one of the most fun weapons we’ve gotten in many years, is the Praxic Blade. This Exotic, clearly inspired by the Jedi and Sith lightsabers, is one of the most versatile melee armaments out there, and one that can become part of some interesting builds for your Guardian. Since it is one of the key aspects of this expansion, we’ve made a quick guide to show you how to obtain the Praxic Blade in Destiny 2: Renegades.
Obtaining Your Praxic Blade in Destiny 2
We’re not going to sugarcoat it: getting the Praxic Blade takes a while, especially since you need to reach the late part of the Destiny 2: Renegades campaign, more specifically, reach step 33 of 45. This step will take you to the Fire and Ice mission, which takes you through the Praxic Temple, eventually culminating in adding the Praxic Blade to your inventory. Now, contrary to other missions in the Lawless Frontier, this one’s a bit more challenging due to the parkour segments, encounters, and a few other puzzles. If you’re diving into it, try to do it on Normal difficulty because it isn’t a walk in the park.
In any case, here’s the full walkthrough:
Proceed Through The Quest Until You Have to Enter the Portal
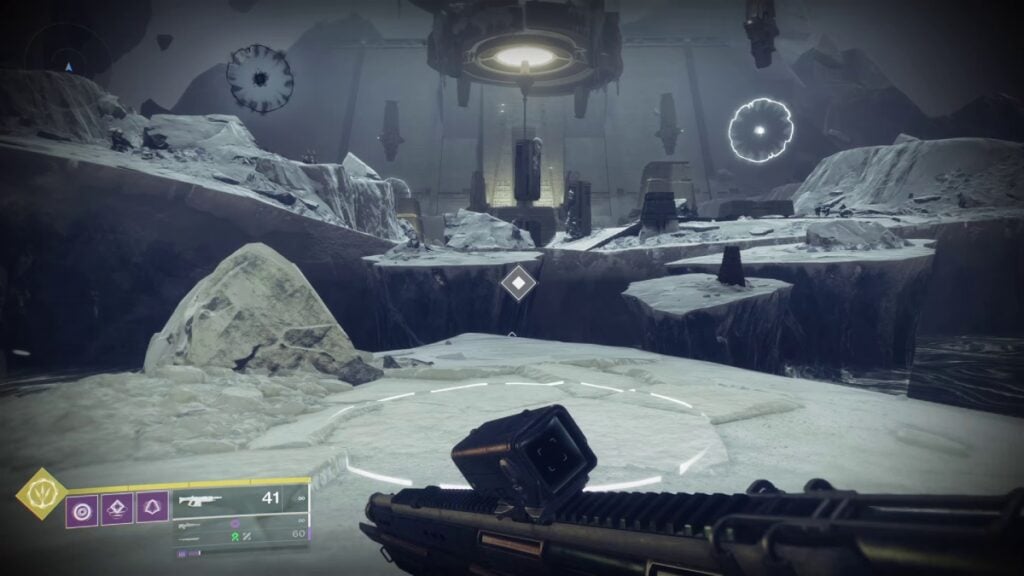
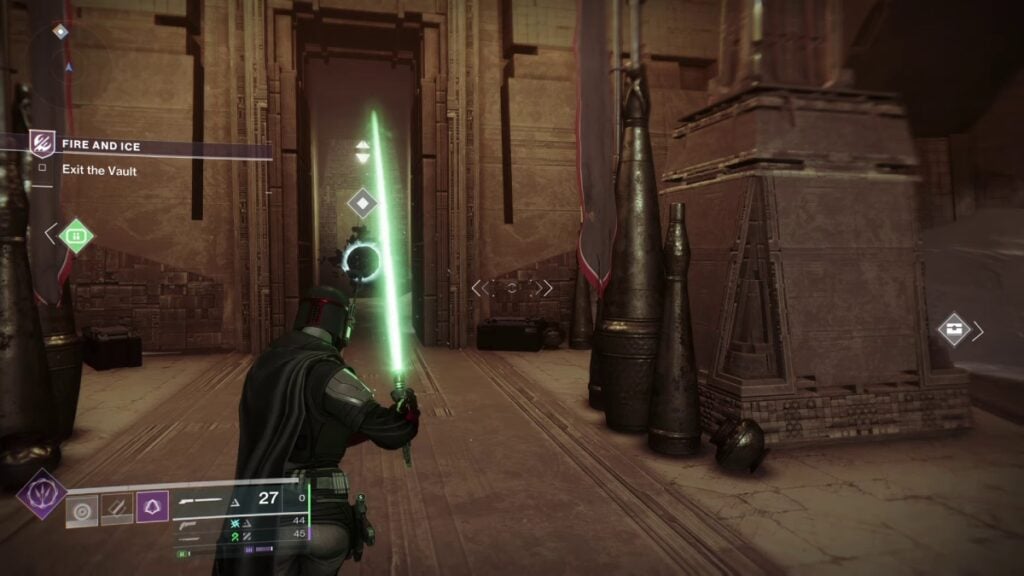
You’ll have to proceed through the main quest until you reach the step that says “Enter the Portal.” There, you’ll have to beat a few enemies and then find the structure you can see in the image below.
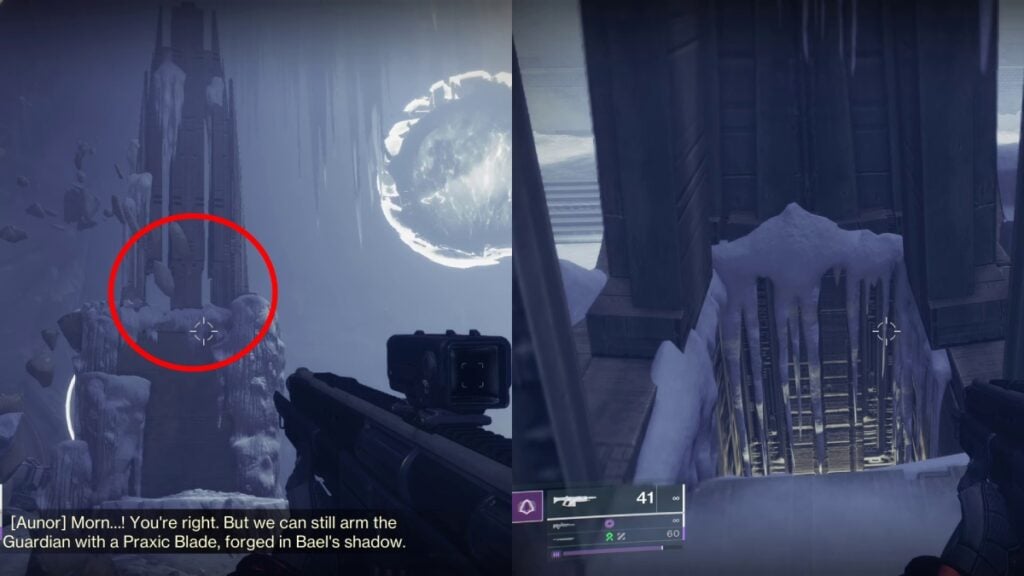
There, just jump to the top of the structure, and you’ll find a hole that will take you to another part of the temple where the real parkour section will begin.
Note: If you get stuck, the game will eventually put a waypoint showing you where to go.
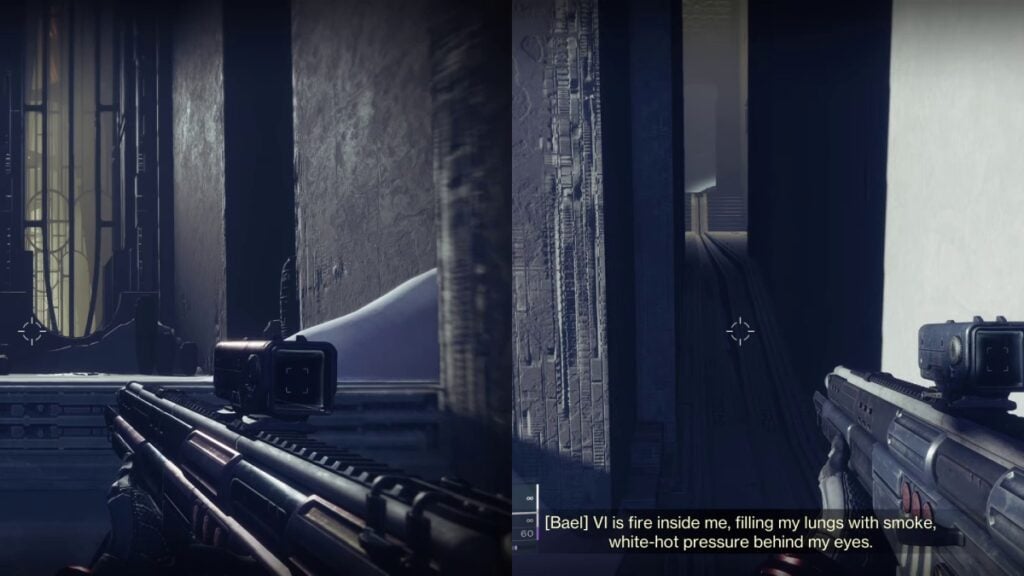
From here, it is a straight shot toward the next area. The challenging part is reaching the structure with the traps. You’ll notice that some parts of the wall will pop out, making you fall into the abyss. There are a few other traps that will damage you and send you flying. Here, it is the usual game of “waiting until the trap goes off and then walking.”
Once you get through this gauntlet, you’ll enter a little passage in the wall where there isn’t a trap.
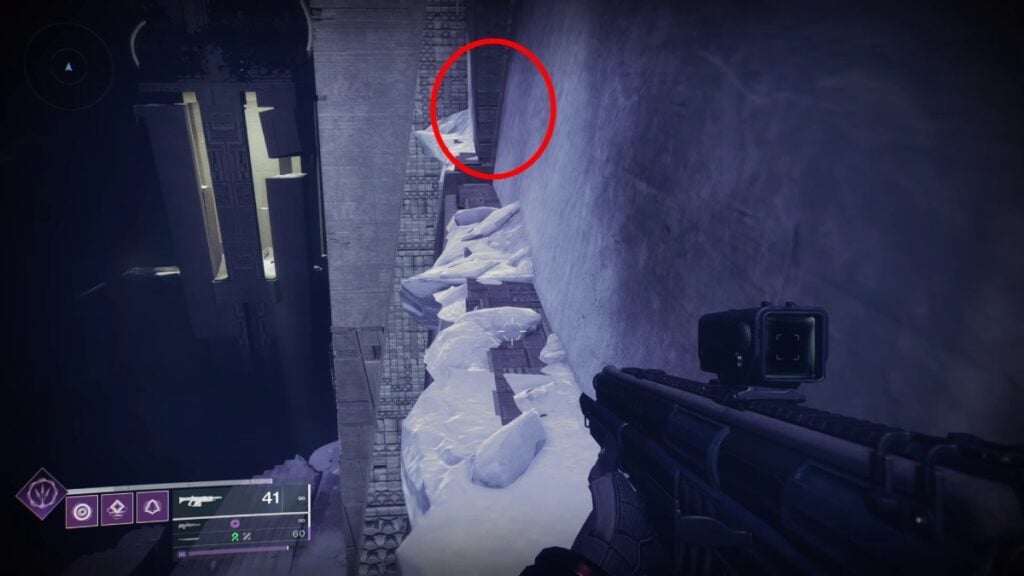
Enter the passage and go straight. Here, you might think that it is another straight shot until you reach the next area, but the mission will try to trick you. Instead of going straight, wait until you reach the final flight of stairs and turn right to locate a narrow passage, leading you to the next part of the temple.
From there, it is yet another environmental puzzle, but an easy one at that. You’ll notice how some parts of the floor will start to disappear, so just jump to reach a safe location. When you reach the labyrinth-like area, just follow the parts of the room that don’t disappear and look for the gates that don’t close. It is pretty easy.
Things will get a bit trickier once you reach an open area with some Taken snipers firing at you. However, it is yet another parkour challenge of sorts, so just keep jumping to a new platform until you reach the next area.
The last part of the parkour segment is a vertical area with many traps that will send you flying. This part will trick you into reaching the top. Yet, that’s not what you have to do, as the exit to the next area is a floor below the top. When you reach the highest spot, turn around and jump through the window.

Once you go through the window, jump on a few more platforms, and you’ll reach the combat-oriented part of the mission.
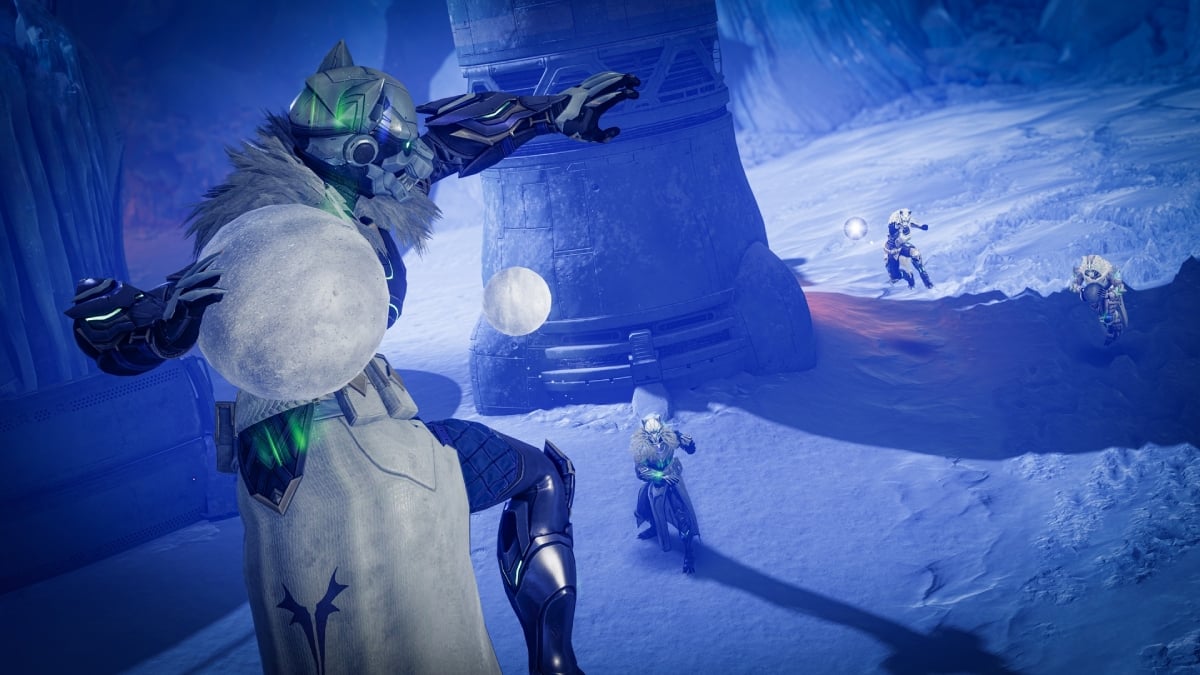
Balance the Dark and Light Spheres
You’ll enter a room with four floating spheres: two Light ones and two Dark ones. Here, you need to defeat enemies until they drop Paired Energy or Opposite Energy.
You need to deposit Paired Energy into the Light spheres and Opposite Energy into the Dark spheres. However, there’s a catch. You must balance all spheres, so if you drop one Paired Energy into a Light sphere, drop the next energy into the other sphere. The game will tell you if one of the spheres is slightly out of balance, meaning that the next energy you drop should be in the other sphere.
Once you complete the puzzle, interact with the item in the middle, watch the cutscene, and prepare for the final part of the mission.
Defeat the Disciple of Harrow
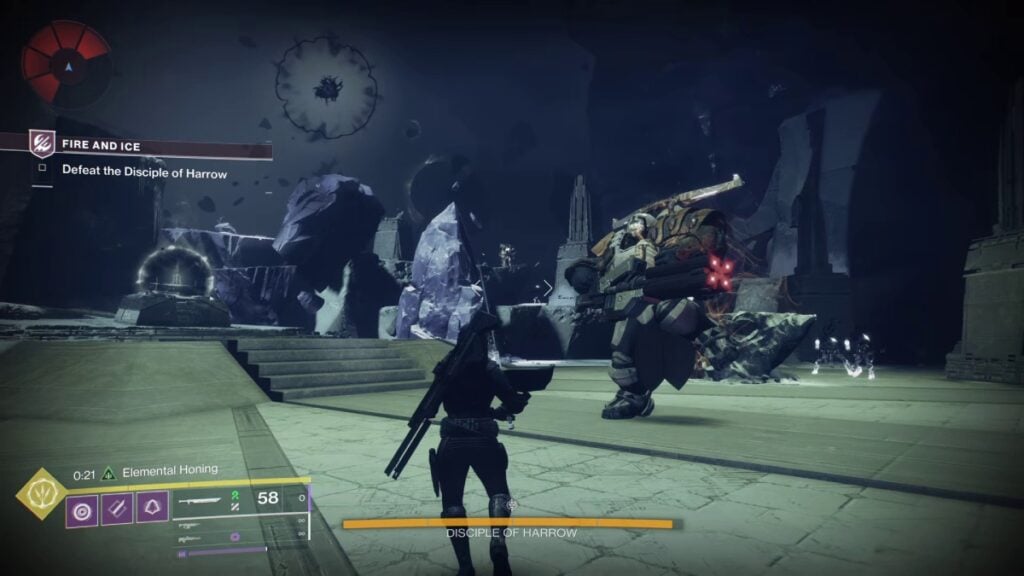
The Disciple of Harrow, which is the final boss you need to beat before obtaining your Praxic Blade in Destiny 2, has several phases. Like other bosses in the game, the first phase is pretty easy, as all you need to do is take its first HP bar down. Once you do that, it will go into its invulnerability phase and summon a shield generator.
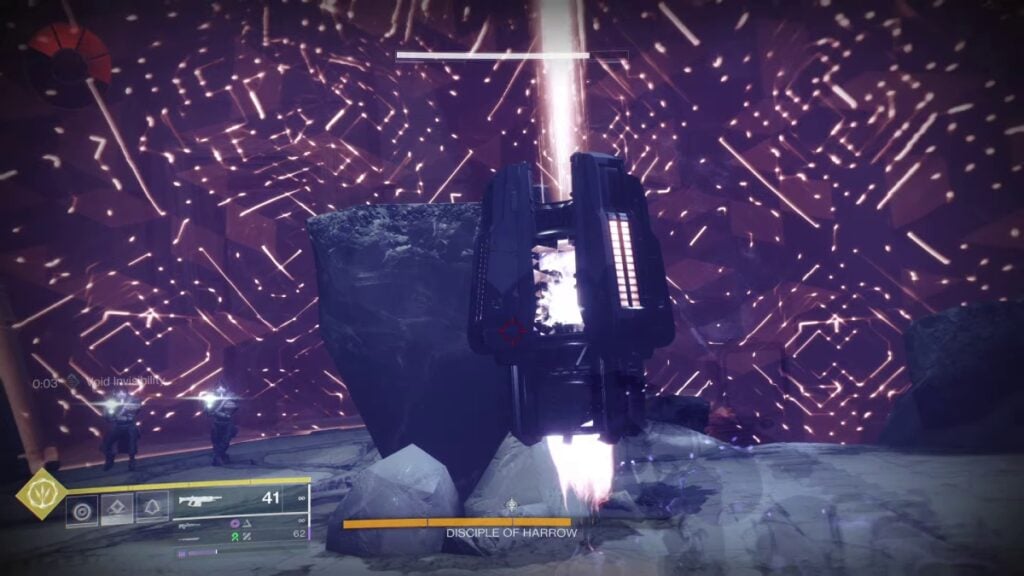
Enter the dome and shoot the generator to get rid of the boss’s invulnerability. You’ll have to do this again for the next phase.
For the final phase, two Dark spheres will spawn in the arena. It is similar to the previous puzzle in the sense that you need to drop Opposite Energy and balance out the spheres.
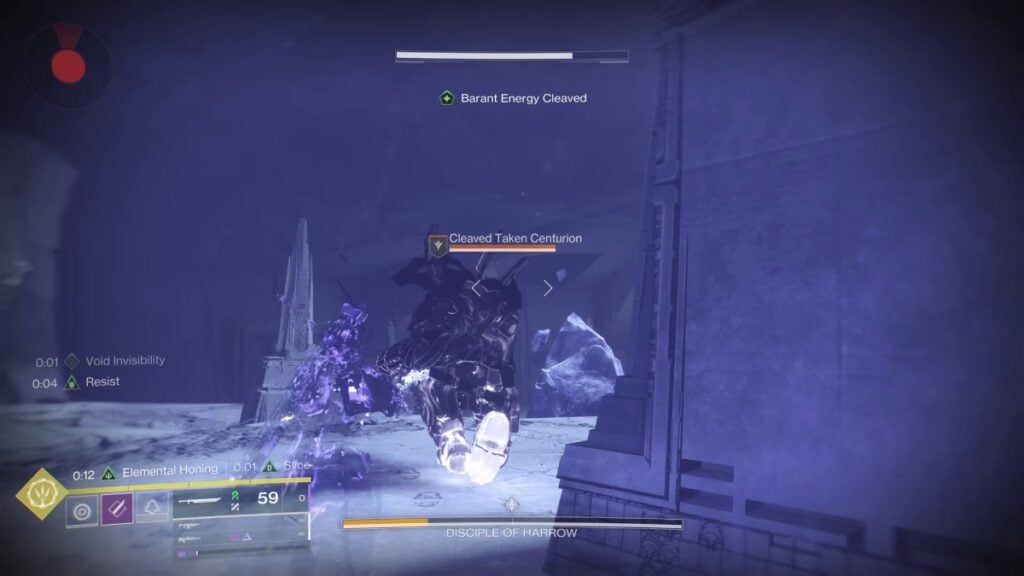
To obtain Opposite Energy, you need to defeat the Cleaved Taken Centurion enemies. Defeating one will drop four Opposite Energy, and you can throw two to each sphere. You’ll have to do this twice before removing the Disciple of Harrow’s invulnerability. Once you do that, use everything you have against the boss to kill it, clear the area of any remaining combatants, and get ready to obtain your Praxic Blade.
If you did everything correctly, you should have your Praxic Blade in your inventory. You can now use it in your build. Just remember that it uses Special Ammo that refills on hit, and it also has a ranged attack in the form of a blade throw. You can also obtain more crystals, combat forms, and other mods for your Blade, but we’ll leave that for another guide.


