Close Menu
  • Gaming
    • Game Guides
    • Codes
    • Game News
    • Game Previews
    • Game Reviews
    • Game Features
    • Game Lists
    • Platforms
      • Nintendo
      • PC
      • PlayStation
      • Xbox
      • Mobile
  • Entertainment
    • Movies
    • Movie Features
    • Movie Reviews
    • TV
    • Reality TV
    • Royals
  • Celebrity
  • Human Interest
  • Astrology
  • Videos
  • More
    • Anime
    • Lists
    • Podcasts
    • Reviews
Facebook X (Twitter) Instagram LinkedIn YouTube
  • About Us
  • Join Our Team
  • Meet the Team
  • Privacy Policy
  • DMCA Policy
  • Contact Us
  • Terms of Use
  • Sitemap
  • Editorial Guidelines
  • Advertising Policy
The Nerd Stash
  • Gaming
  • Celebrity
  • Human Interest
  • Videos
The Nerd Stash
Home»Game Guides»How to Complete Mission: Transient in Destiny 2: The Edge of Fate

How to Complete Mission: Transient in Destiny 2: The Edge of Fate

A few puzzles here and there

Julio La PineBy Julio La PineJuly 16, 20253 Mins Read
Destiny 2 Mission Transient Guide
Image Source: Bungie via The Nerd Stash

After completing the first steps of The Edge of Fate‘s campaign, you’ll need to explore Kepler to recover different items, which also involves doing a few extra missions. One of these mandatory quests is called Mission: Transient, and while it isn’t the most challenging in Destiny 2, it has a few gimmicks you need to get familiar with. Here, we’ve created a quick guide to help you complete it efficiently.

Mission: Transient Walkthrough

The start of Mission: Transient isn’t that different from other Destiny 2 quests. You’ll need to enter the new area, listen to your allies, and defeat a few enemies. However, you’ll soon encounter the first puzzle, which involves lasers and some shooting.

Destiny 2 relocator item
Image Source: Bungie via The Nerd Stash

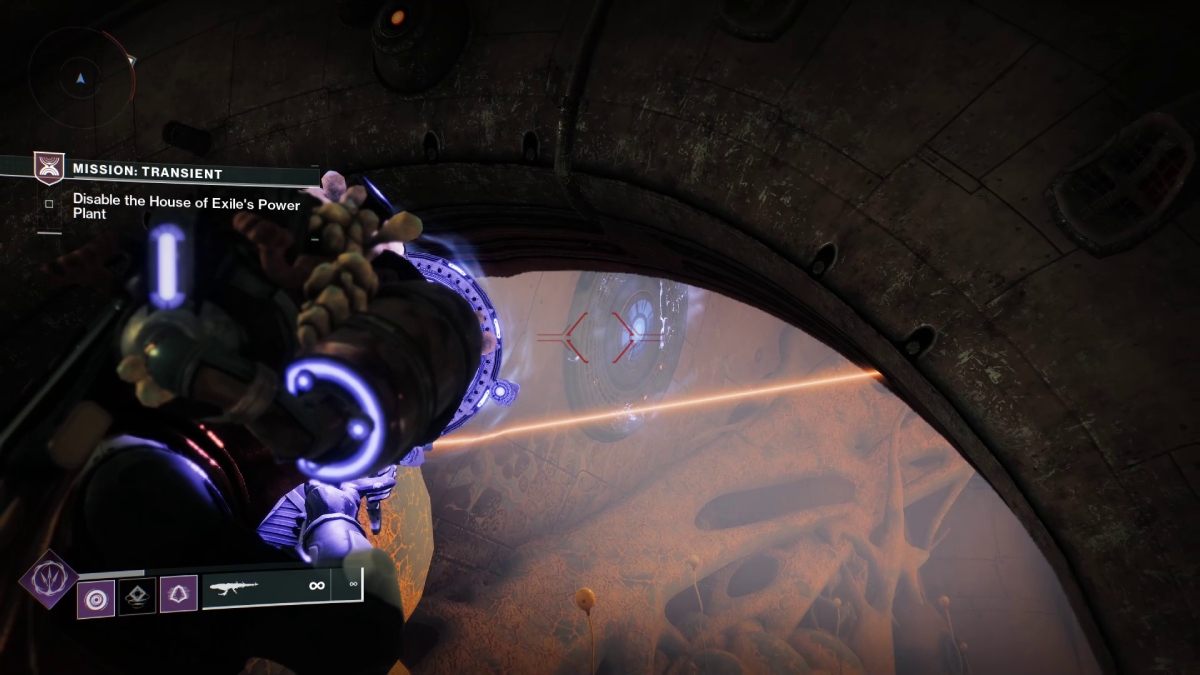
To progress through the laser door, you’ll need to use the Relocator. Don’t worry, you’ll have it unlocked already, as it is part of the quest that leads you to Mission: Transient. Grab the item from the small room and approach the laser door slowly. Be careful not to touch the lasers. Aim with the Relocator and then shoot at the generator on the other side. After that, grab the teleporter that is activated, and you’ll be inside another zone.

Guardian deactivating barriers
Image Source: Bungie via The Nerd Stash

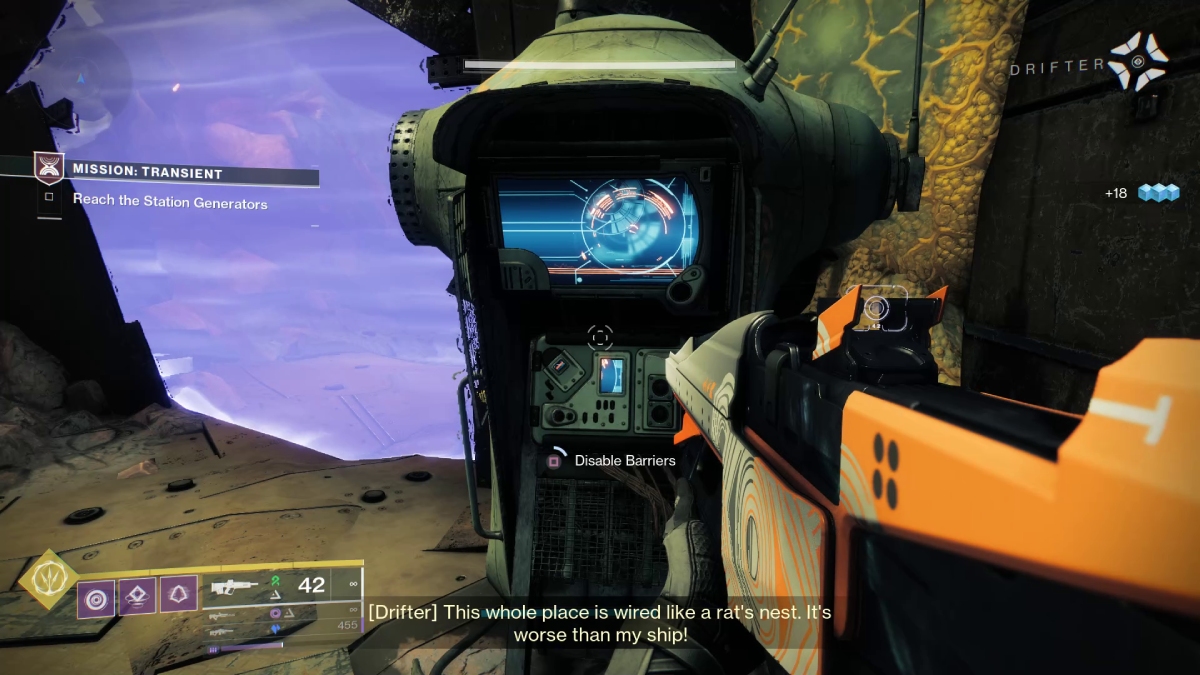
Place your rally banner and then head inside the room to defeat a few enemies, and then disable the barriers as seen in the above image. After that, you’ll get the notification about respawning being disabled. Once that happens, a lot of enemies will appear and you’ll have to repel them. However, there will be a few other things happening at the same time.

Splinter Mines defusing
Image Source: Bungie via The Nerd Stash

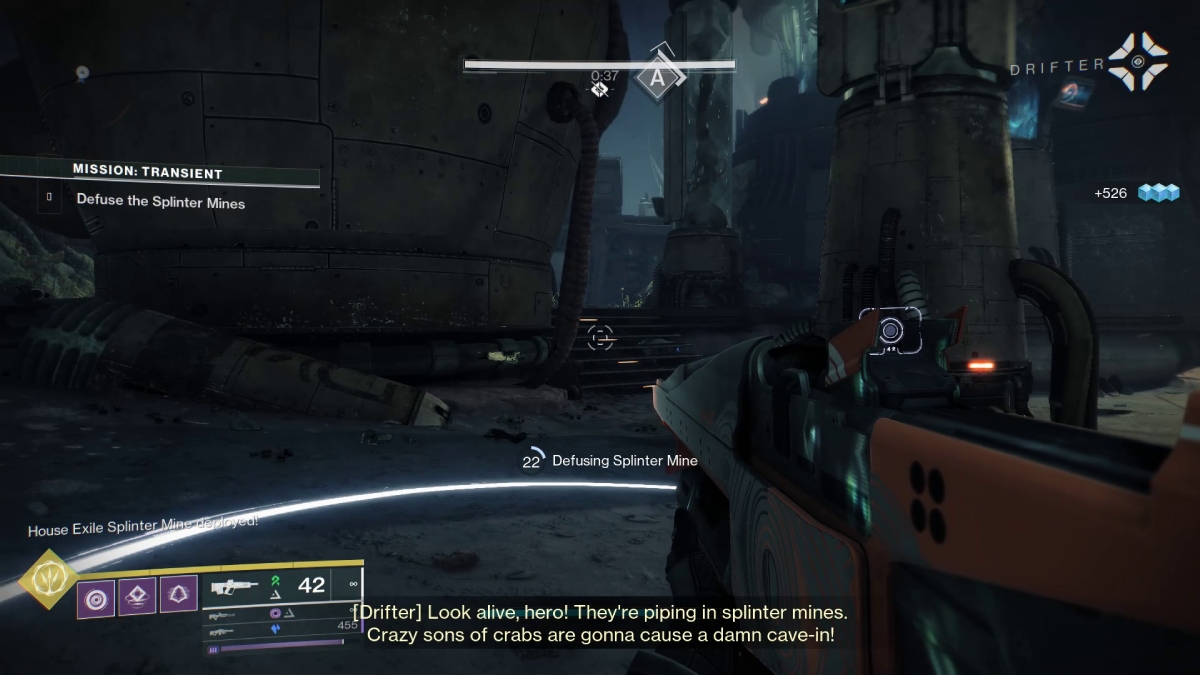
Four splinter mines will spawn around the arena, which is actually the hardest part of Mission: Transient, yet something some Destiny 2 veterans might be used to. All you have to do to defuse them is stand below them until they deactivate. It is important to remember that you must stay inside the circle at all times. Each mine has a 40-second timer, so once you finish one, the next one will activate, and you must run toward it. After you defuse all four mines, head to the next room for the final puzzle.

Destiny 2 Mission Transient Batteries
Image Source: Bungie via The Nerd Stash

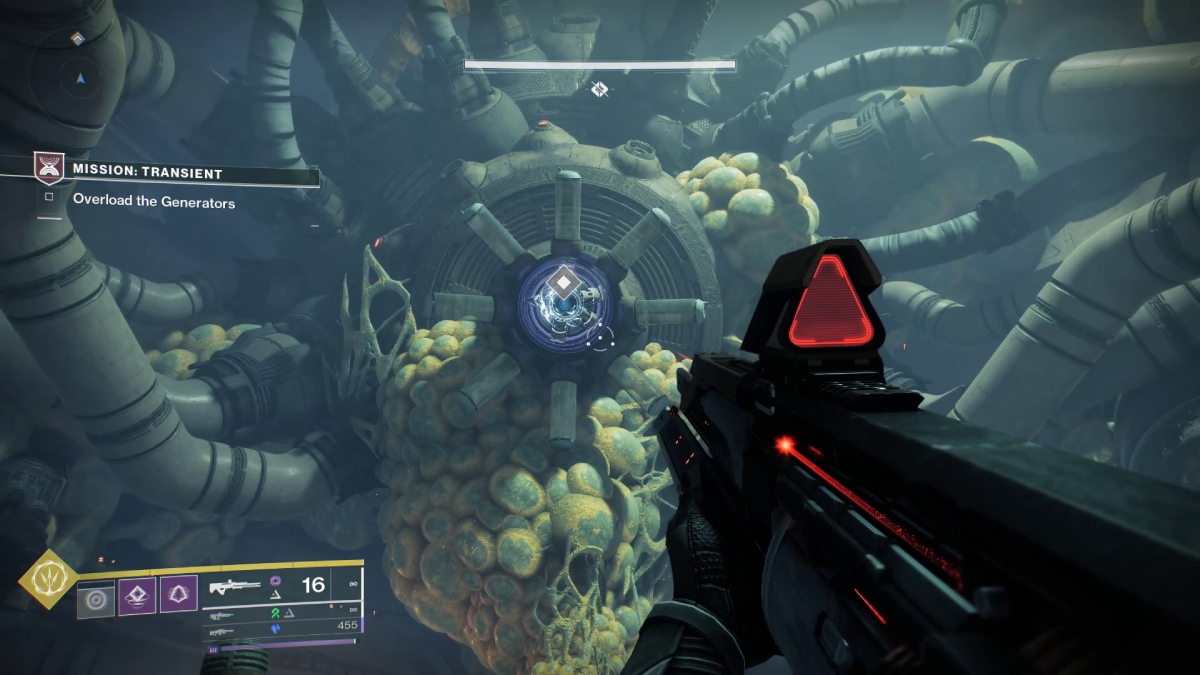
Here, you’ll need to overload two batteries. To do so, find a Matterspark to turn into it. Then, follow the edges of the room until you reach the batteries. Once you are in front of them, spam RT/R2 to overload them.

A generator in Kepler
Image Source: Bungie via The Nerd Stash
How To Complete The Edge of Fate Campaign in Destiny 2
Related: How To Complete The Edge of Fate Campaign in Destiny 2

The last step of the puzzle is returning to the center of the room and shooting the generator. Once you do that, a boss will spawn, and all you have to do is defeat it. This one isn’t particularly challenging, even on Legendary difficulty. Beating the boss will complete Mission: Transient.

Related Topics
Destiny 2 Guide
Share. Facebook Twitter LinkedIn Reddit Email
Julio La Pine
  • Website

Been gaming since '99! I am a huge JRPG fan and my favorite franchise is Final Fantasy. I love writing about games and I hope I can do it for the rest of my days!

SUGGESTED READS

Dead Space Creator Wants Developers to 'Save Money' With AI Training: 'Let The Lawyers Figure It Out'
Game News

Dead Space Creator Wants Developers to ‘Save Money’ With AI Training: ‘Let The Lawyers Figure It Out’

Keeper PC Review
9
Features

Keeper Review – A Lighthouse’s Duty Never Ends

New Dragon Ball Game, Other Major 40th Anniversary Projects to Be Revealed in January 2026
Game News

New Dragon Ball Game, Other Major 40th Anniversary Projects to Be Revealed in January 2026

Warframe nightcap rank up
Game Guides

Warframe Nightcap Guide (How to Rank Up Nightcap)

Vampire The Masquerade Bloodlines 2 PS5 Review
7
Features

Vampire: The Masquerade – Bloodlines 2 Review – The Hollow Call of the Night

Fellowship Early Access Launch
Game News

Here’s Everything You Can Play During the Fellowship Early Access Launch

Trending
Dead Space Creator Wants Developers to 'Save Money' With AI Training: 'Let The Lawyers Figure It Out'

Dead Space Creator Wants Developers to ‘Save Money’ With AI Training: ‘Let The Lawyers Figure It Out’

Keeper PC Review
9

Keeper Review – A Lighthouse’s Duty Never Ends

New Dragon Ball Game, Other Major 40th Anniversary Projects to Be Revealed in January 2026

New Dragon Ball Game, Other Major 40th Anniversary Projects to Be Revealed in January 2026

Warframe nightcap rank up

Warframe Nightcap Guide (How to Rank Up Nightcap)

The Nerd Stash
Facebook X (Twitter) Instagram YouTube LinkedIn
  • About Us
  • Join Our Team
  • Meet the Team
  • Privacy Policy
  • DMCA Policy
  • Contact Us
  • Terms of Use
  • Sitemap
  • Editorial Guidelines
  • Advertising Policy
© 2025 The Nerd Stash. All Rights Reserved.

Type above and press Enter to search. Press Esc to cancel.