Skip To...
One of the first things you’ll do after reaching the Rospro Pass area after the Sky Islands in The Legend of Zelda: Tears of the Kingdom is to begin the Tulin of Rito Village quest. The quest takes a pretty decent amount of time, as well as guiding you to the Mayaumekis Shrine and even allowing you to revisit an old friend. The quest follows Tulin on a quest to discover the truth behind the blizzards that have been plaguing Rito Village. Keep reading to learn how to complete the Tulin of Rito Village Quest in The Legend of Zelda: Tears of the Kingdom below.
Meet Tulin in Rito Village in Zelda Tears of the Kingdom
During the Regional Phenomena quest, one of your tasks is to visit Rito Village and complete the Rito Village main quest. Little do you know, at the time, that you will be visiting Tulin and his parents. If you recall any previous games, Tulin didn’t play a huge role in the story, but this time, Tulin will be present quite often.

When you arrive in Rito Village and attempt to speak with Tulin, you will find him in an argument with his parents, and his father will send you to Harth to find more information. You can find Harth’s location marked by the two bonfires pointed out by Teba. There, you will find the Hebra Trailhead Lodge.
Talk to Harth

When you arrive at Hebra Trailhead Lodge, you can find Harth inside the lodge. He will tell you that the Sky Monsters have been disruptive. He also tells you about a skill of Tulins that allows him to perform a strong gust of wind.
After speaking for a few more minutes, you learn that Tulin was last seen with Gesane and Laissa on a trip to find food and that you should look for him in the Hebra South Summit Cave, to the Northeast of the Hebra Trailhead Lodge. You can find the cave entrance marked by a bonfire.
Finding Tulin of Rito Village in the Hebra South Summit Cave

When you approach the cave’s entrance, you will see the large bonfire that Harth told you about and Gesane standing a bit behind it. Laissa will tell you that Tulin went farther on with Gesane and that you’ll have to follow the cave farther to find him.
While you are in the cave, be sure to note the various pond filled with fish and mushrooms growing on the cave walls. These will all come in handy later on; it is best to collect as many of them as possible.
When you approach the room in the center of the cave with a campfire sitting in the middle, walk up to the campfire and open your inventory. Grab a Hylian Pine Cone and throw it into the fire, creating a massive gust of air that can force your paraglider up into the top of the cave.
Once you arrive at the top of the cave, you will find Gesane standing watch over some of the collected food. He informs you that you’ve just missed Tulin and that he went to follow a pack of monsters. He can be found near a lone cedar tree on Talonto Peak. Leave the cave and head toward the area Gesane told you about.

As you approach Talonto Peak, you can find the lone cedar tree standing tall in the Hebra Mountains above, with some large enemies below. You can wait for them to pass and climb up the nearby structure to safely shoot at them with your bow from a distance. Though, be sure to have at least a Spicy Pepper meal or two so that you have some extra cold resistance.

As you approach the lone cedar tree, you will find Tulin, who is upset that a monster has taken his bow. Follow Tulin to help him get his bow back after you learn about Tulin’s Power of Wind.
It would be wise at this point to be sure that you have some fire fruit on you, as they tend to do well against cold-type enemies.
Find Whatever Is Causing the Blizzard

Harth will talk to you and Tulin of Rito Village for some time and eventually send you up into the sky to learn about the secrets of the blizzards. You will have to jump from platform to platform, utilizing Tulin’s Gust of Wing, your paraglider, and your Ascend ability to make your way around the Rising Island Chain and up to the blizzard’s core.

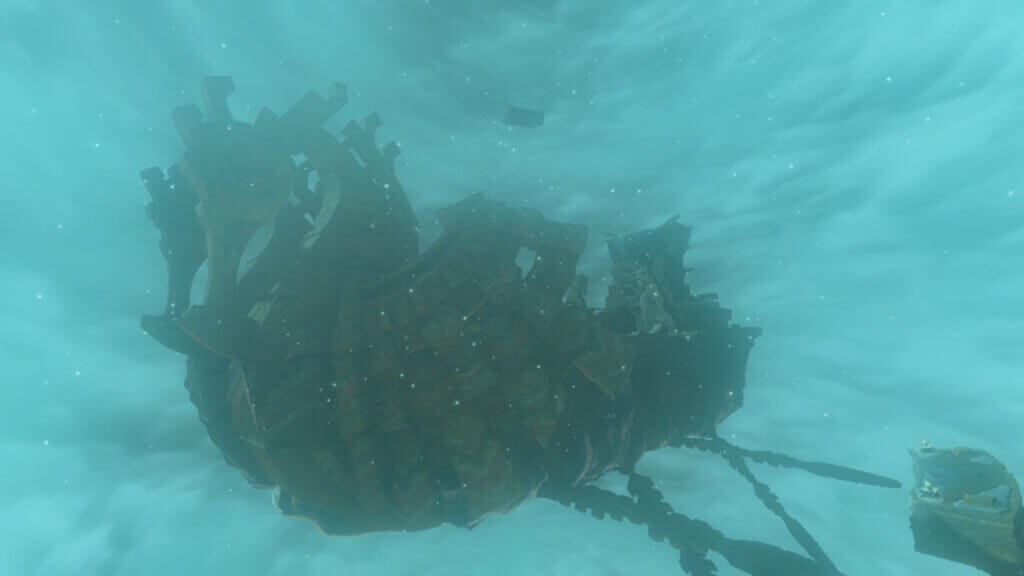
Sooner than later, you will come across a few boats floating through the sky. The tops of these boats can be used as trampolines to be shot up higher into the sky. Additionally, you will come across portions of ice in the ground on different platforms. These can be attacked or jumped on in order to break them to reveal more trampolines underneath.
Along the way, you will find the Mayaumekis Shrine, along with the Kahatanuam Shrine. Completing each will reward you with an additional Light of Blessing.
Help Tulin of Rito Village unlock the hatch in the Wind Temple

When you arrive at the Wind Temple, you will unlock a fast travel point, along with a new puzzle that consists of unlocking a large hatch in the center of the temple. You will have to unlock 5 different locks in order to open the hatch.

Beginning with the lock closest to the hatch, grab onto an icicle using Ultrahand and connect it to the broken level to your right as you look at the wall pictured above. Inside, you will find a large device. In order to unlock it, you will have to direct Tulin of Rito Village in Tears of the Kingdom to fire his Gust of Wind directly into the mouth of the device, unlocking it.

Now, let’s head to the B1 temple. Here, you will find several lasers. Duck under them and climb the wall to avoid the last one. You can collect a Ruby from the chest behind them. Now, head back past the lasers and to a chasm with ice covering the walls around it. Using Tulin’s Gust of Wind, jump to the other side with your paraglider. Take out the Construct in front of you, then use a campfire and a Hylian Pine Cone to fly up into the room above you.

Here, you can grab two different slabs of stone to connect them to the device in front of the locked door, shown in the image above. Have Tulin cast a gust of wind on it in order to unlock the door to the next lock device.
Unlock the device the same way you did with the previous one.
The next lock will require you to jump off the side of the ship and float back in with your paraglider. Here, you only need to defeat a Construct, then unlock the device here.
Next, head out the other side of the ship and back in through a different door next to the one you left through. When you arrive in the room, use Ultrahand to move a couple of icicles over the large round device blocking your path. Now, cast Recall on the wheel to allow you to climb over to the other side. Once there, connect the two gears to each other to open the locked door.
Inside, you can unlock the device the same way you did with the other two and find the fourth one right up the stairs from where you are now.
Finally, use the gust of wind above the hatch on the main floor of the ship to blast you up into the air and over to the location of the final device. Here, you will have to use Ultrahand in order to open one of the large doors on the floor. Inside, you will find the locking device in plain sight and ready to be unlocked.

Now, head back to the hatch to activate it, and watch as the boss appears. Fight the boss until his death and watch as the blizzard ends, and Tulin meets an ancestor of his, completing the Tulin of Rito Village Zelda Tears of the Kingdom’s main quest.
This is everything you need to know about how to complete Tulin of Rito Village in The Legend of Zelda: Tears of the Kingdom.


