Close Menu
  • Gaming
    • Game Guides
    • Codes
    • Game News
    • Game Previews
    • Game Reviews
    • Game Features
    • Game Lists
    • Platforms
      • Nintendo
      • PC
      • PlayStation
      • Xbox
      • Mobile
  • Entertainment
    • Movies
    • Movie Features
    • Movie Reviews
    • TV
    • Reality TV
    • Royals
  • Celebrity
  • Human Interest
  • Astrology
  • Videos
  • More
    • Anime
    • Lists
    • Podcasts
    • Reviews
Facebook X (Twitter) Instagram LinkedIn YouTube
  • About Us
  • Join Our Team
  • Meet the Team
  • Privacy Policy
  • DMCA Policy
  • Contact Us
  • Terms of Use
  • Sitemap
  • Editorial Guidelines
  • Advertising Policy
The Nerd Stash
  • Gaming
  • Celebrity
  • Human Interest
  • Videos
The Nerd Stash
Home»Game Guides»Destiny 2: How To Complete the Test of Truth and Lies

Destiny 2: How To Complete the Test of Truth and Lies

Quite puzzling.

Jordan MoyerBy Jordan MoyerNovember 8, 20233 Mins Read
Destiny 2: How To Complete the Test of Truth and Lies
Image Source: Bungie via The Nerd Stash
This article is over 1 years old and may contain outdated information.

Bungie threw us for a loop when they released a fourth and final puzzle in the Destiny 2 Imbaru Engine, featuring the Test of Truth and Lies to reveal the Season of the Wish. So, now, after you complete the Gift of Navigation, there’s finally more to the Imbaru Engine. To complete the Test of Truth and Lies, you must solve a small puzzle with seemingly no rhyme or reason. However, we’ve got all the answers for you right here. With just a few adjustments of some runes, you’ll be on your way to learning about the 15th Wish in no time.

After putting the three green flames into the entrance to gain entry into the puzzle room, you will enter a room with four strange statues and another 4 runes behind each. Starting in order from the top left statue and heading clockwise, you should interact with the following runes:

1. Top Left Puzzle
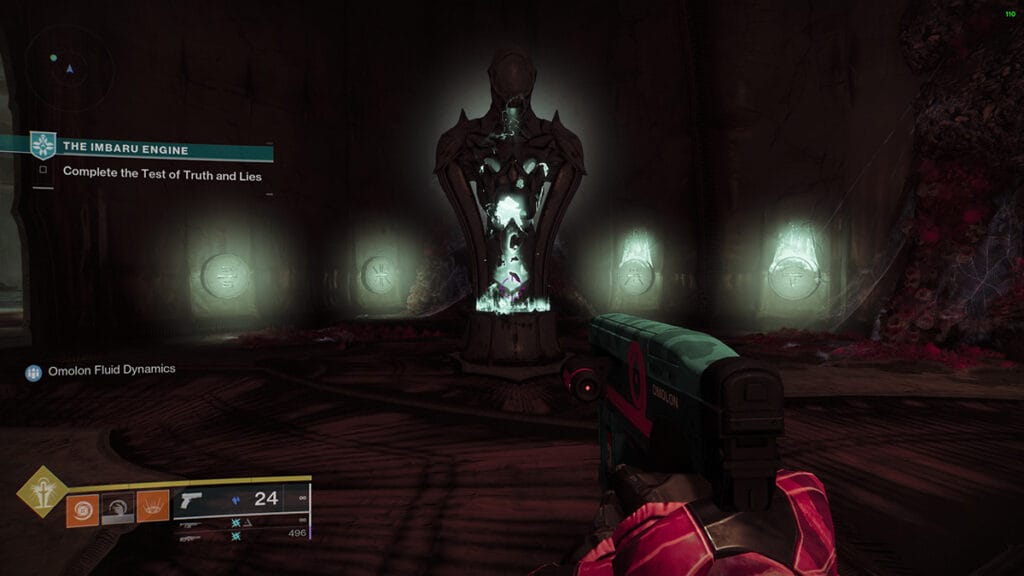
Top Left Puzzle in the Test of Truth and Lies
Image Source: Bungie via The Nerd Stash

Looking straight at the puzzle, you should ignite the two runes to the far right. Once you’ve done that, avoid interacting with the statue, but head onto the next statue in the top right-hand corner of the room.

2. Top Right Puzzle
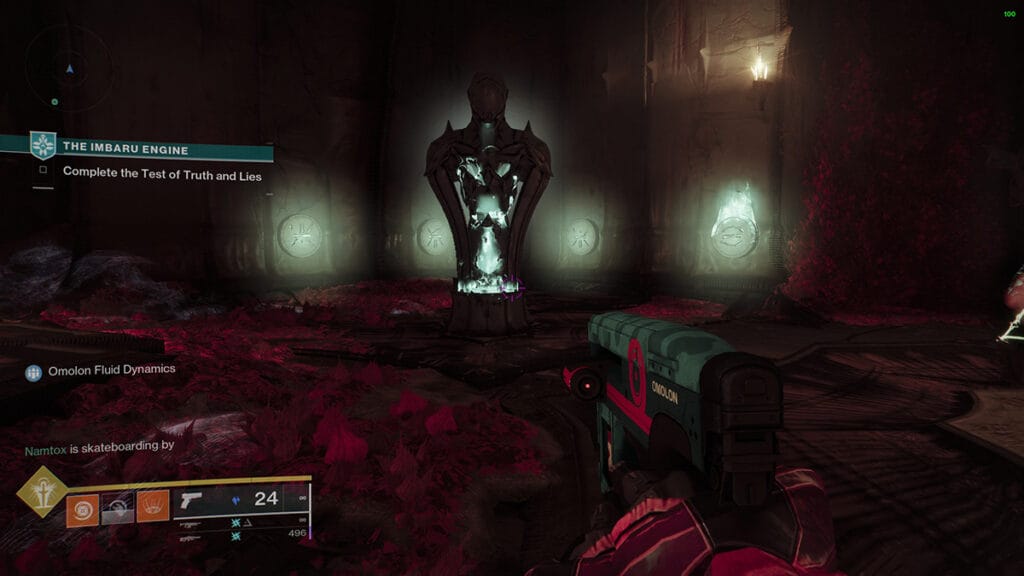
Top Right Test of Truth and Lies puzzle in Destiny 2
Image Source: Bungie via The Nerd Stash

Looking at the puzzle in the top right-hand corner of the room from where you entered, there is only one rune that you must ignite. This rune is the one on the far right-hand side. Once you’ve ignited it, head over to the next portion of the puzzle in the bottom right-hand corner of the room.

3. Bottom Right Puzzle
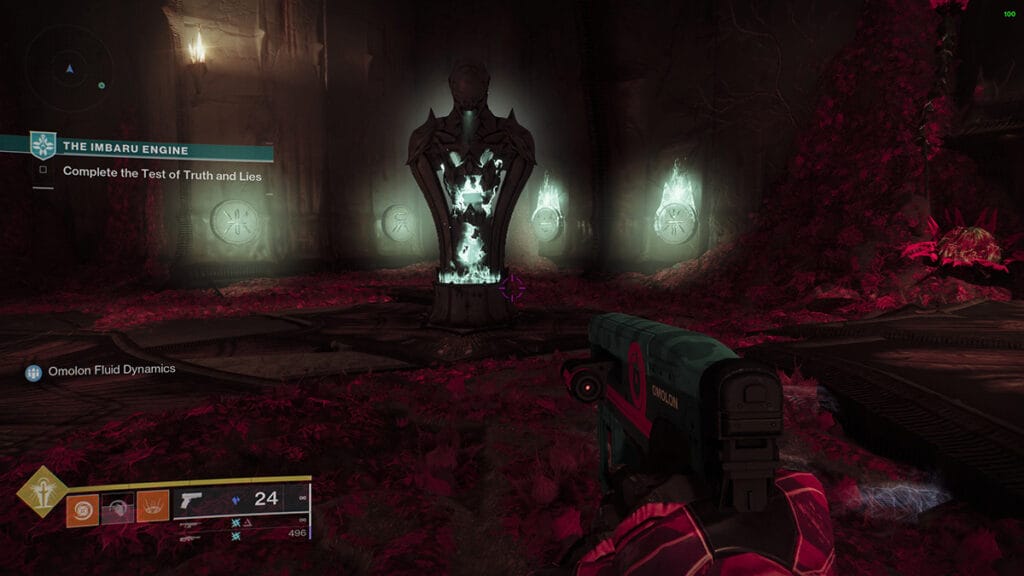
Bottom Right Puzzle in The Test of Truth and Lies
Image Source: Bungie via The Nerd Stash

Now, heading to the bottom portion of the room, we have two more puzzles to complete before finishing the Test of Truth and Lies. For the third puzzle, we must ignite two runes again identical to how we did the first puzzle. The two runes on the far right right behind the puzzle should be ignited.

4. Bottom Left Puzzle
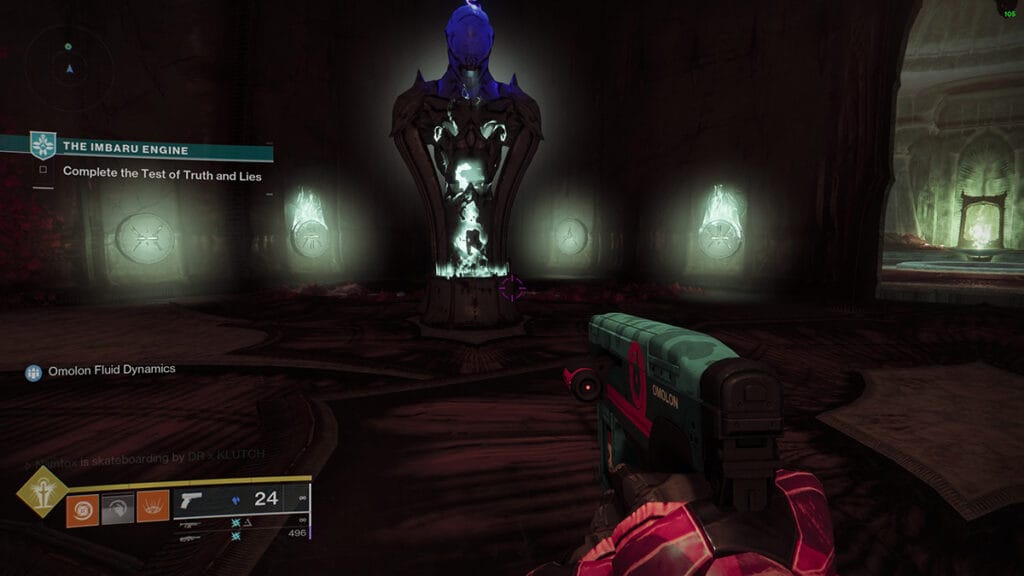
Bottom Left-hand Puzzle
Image Source: Bungie via The Nerd Stash

The fourth and final puzzle in the Test of Truth and Lies appears in the bottom left-hand corner of the room. Unlike the other three, this puzzle requires you to ignite two runes that aren’t adjacent to each other. From the left, you should ignite the second and then the fourth runes.

Completing the Test of Truth and Lies
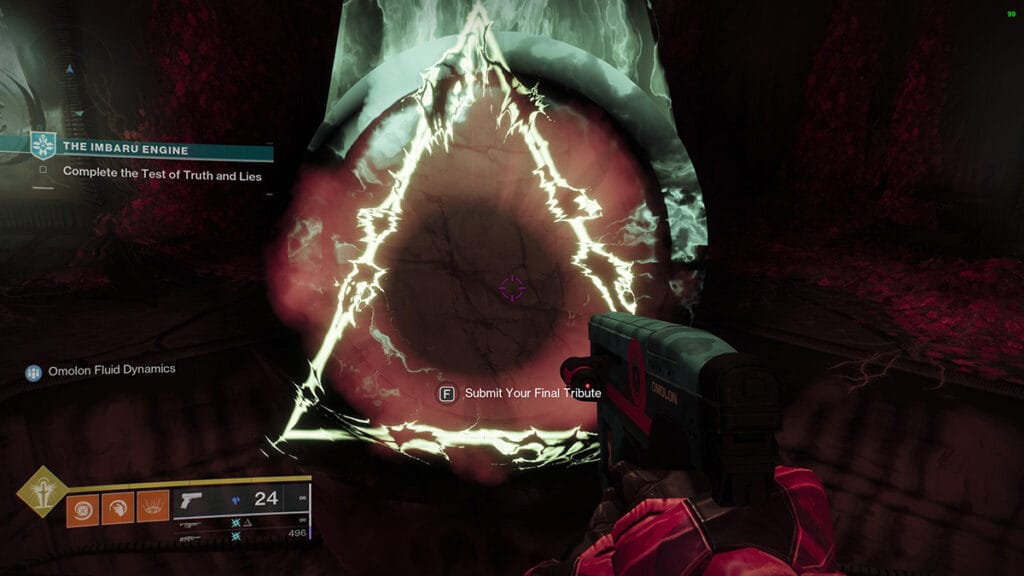
Submit Your Final Tribute
Image Source: Bungie via The Nerd Stash

Once you’ve finished setting up the puzzles correctly, head to the center of the room where the triangle-shaped object stands. Walk up to it and interact with it to Submit Your Final Tribute and complete the Test of Truth and Lies in Destiny 2. This will unlock a room that takes you to a dragon egg where you can listen to some of Ikora’s dialogue and be on your way, earning some cool new things to spice up your character’s look.

Related Topics
Destiny 2 Guide
Share. Facebook Twitter LinkedIn Reddit Email
Jordan Moyer
  • Website
  • X (Twitter)

Jordan is an experienced fantasy writer who spends hours behind her laptop, and lost in the pages of a book. She strives to be a successful gaming blogger, and has no complaint about the hours of game time she used to increase her knowledge of all things “geek”. She primarily writes gaming articles and fantasy novels. Ark: Survival Evolved is a favorite, along with Diablo 3, Warframe and Minecraft lately, though you can’t forget the good old Magic the Gathering card game! Writing about games truly gives her joy as it gives her another perspective to look at games from, a reason to really look into the mechanics of the game.

SUGGESTED READS

Amazon Cancels Lord of the Rings MMO, Opens 'AI Games' Job Listing
Features

Amazon Cancels Lord of the Rings MMO, Opens ‘AI Games’ Job Listing

Fellowship Early Access
Game Previews

Fellowship Early Access Impressions – Dungeoneering Done Right

Orbyss launch trailer
Game News

Orbyss Launches on Steam, Expanding Its Meditative Puzzle Vision

Battlefield 6 battle royale redsec
Game News

Battlefield 6 Fans Split After Learning Iconic Feature is Now Locked to Free Battle Royale: ‘Guess We Know Where All the Real Resources Went’

Ball X Pit
Features

Ball X Pit Redefines Simple Fun and Is Proof That Great Games Don’t Need Complexity

Arc Raiders Preview
Features

Arc Raiders: The Final Preview – The Last Stretch

Trending
Amazon Cancels Lord of the Rings MMO, Opens 'AI Games' Job Listing

Amazon Cancels Lord of the Rings MMO, Opens ‘AI Games’ Job Listing

Fellowship Early Access

Fellowship Early Access Impressions – Dungeoneering Done Right

Orbyss launch trailer

Orbyss Launches on Steam, Expanding Its Meditative Puzzle Vision

Battlefield 6 battle royale redsec

Battlefield 6 Fans Split After Learning Iconic Feature is Now Locked to Free Battle Royale: ‘Guess We Know Where All the Real Resources Went’

The Nerd Stash
Facebook X (Twitter) Instagram YouTube LinkedIn
  • About Us
  • Join Our Team
  • Meet the Team
  • Privacy Policy
  • DMCA Policy
  • Contact Us
  • Terms of Use
  • Sitemap
  • Editorial Guidelines
  • Advertising Policy
© 2025 The Nerd Stash. All Rights Reserved.

Type above and press Enter to search. Press Esc to cancel.