Close Menu
  • Gaming
    • Platforms
      • Nintendo
      • PC
      • PlayStation
      • Xbox
  • Entertainment
    • Movies
    • TV
    • Royals
  • Celebrity
    • Hollywood
  • Human Interest
  • Astrology
  • More
    • Reviews
Facebook X (Twitter) Instagram LinkedIn YouTube
  • About Us
  • Join Our Team
  • Meet the Team
  • Privacy Policy
  • DMCA Policy
  • Contact Us
  • Terms of Use
  • Sitemap
  • Editorial Guidelines
  • Advertising Policy
The Nerd Stash
  • Gaming
  • Celebrity
  • Hollywood
  • Human Interest
The Nerd Stash
Home»Gaming»How to Enable Multiplayer on Minecraft Java

How to Enable Multiplayer on Minecraft Java

Minecraft is a fantastic game to play solo or multiplayer. Those wishing to play with their friends or on other servers may be dismayed if the…

AugustBy AugustAugust 24, 20212 Mins Read
How to Enable Multiplayer on Minecraft Java
This article is over 4 years old and may contain outdated information.

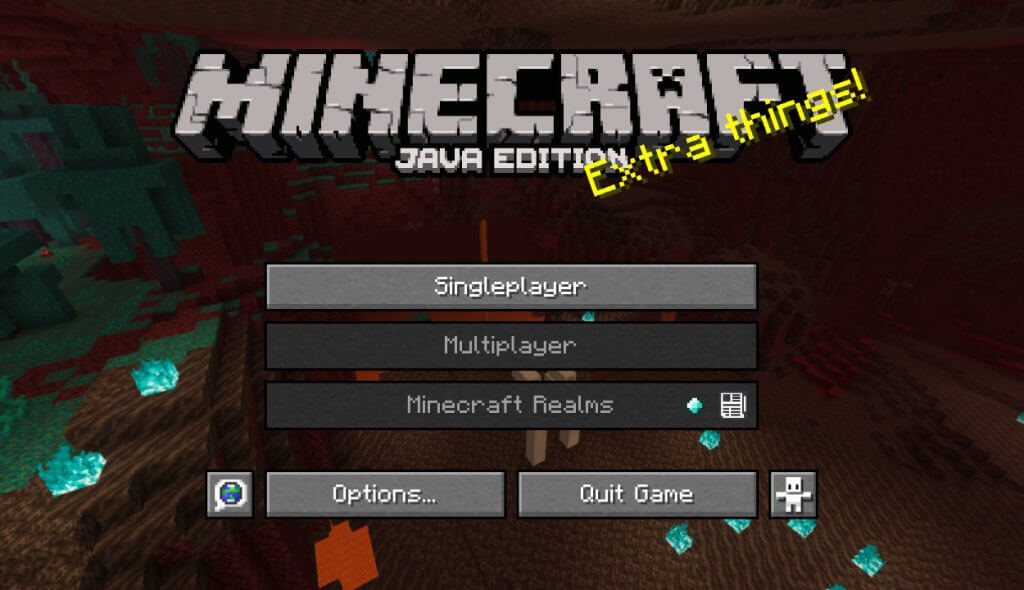
Minecraft is a fantastic game to play solo or multiplayer. Those wishing to play with their friends or on other servers may be dismayed if the option isn’t available, however. On the Java Edition of Minecraft, some players may notice the “Multiplayer” and “Minecraft Realms” buttons on the title menu are disabled. Hovering the mouse cursor over these buttons will generate the message, “Multiplayer is disabled. Please check your Microsoft account settings.” It may sound complicated, but fixing it won’t take long. Read on to learn how to enable multiplayer on Minecraft Java Edition.

Enabling Multiplayer on Minecraft Java Edition

Minecraft Java Enable Multiplayer Microsoft Privacy

The problem lies beyond Minecraft itself, so climb up from the Nether and make your way over to the official Minecraft website. You’ll need to resolve this tech issue out of game. Thankfully it doesn’t take too many steps to resolve most of the time. To enable multiplayer on Minecraft Java, it’s important that you log into the account used to purchase Minecraft. Here’s what you need to do after navigating to the official Microsoft website and completing the sign-in process:

  1. Click on the profile icon and choose “My Microsoft Account”
  2. Click “Privacy” and navigate to “Manage your privacy settings”
  3. Navigate to the “Privacy & online safety” screen
  4. Find “You can join multiplayer games” and click “Allow”

Related:

How to Find Netherite and Where to Look in Minecraft

If this fix doesn’t change the Minecraft title screen, log back out and then back into Minecraft using your connected Microsoft account. Doing so typically fixes the issue. If the issue persists, it’s best to consult with a support team to diagnose and remedy the problem. The only thing getting between you and your friends should be an angry Piglin mob or piles of treasure, not connectivity issues.

Related Topics
Guide Minecraft
Share. Facebook Twitter LinkedIn Reddit Email
August

August Webb is a Staff Writer and former Lead Guide Editor of TNS. When not working, she's playing a visual novel, fanning over an indie gem, or lost in the world of VR.

SUGGESTED READS

Where to Find All Echobones & Catch Panthalus in Palworld 1.0
Gaming

Where to Find All Echobones & Catch Panthalus in Palworld 1.0

Transport Fever 3 Features
Gaming

Transport Fever 3 Is Gearing Up for Launch With New Footage Showcasing Several Features for Transport Tycoon Fans

9.5
Gaming

Rhythm Heaven Groove Review – Harmonic Perfection

Marvel Rivals Season 9 Hands-On Preview
Gaming

Marvel Rivals Season 9 Hands-On Impressions: Feels Like a Whole New Game

Diablo 4 x Overwatch Collab
Gaming

Diablo 4 x Overwatch Impressions: Something of an Inconsistent Bag

Late game blink theory in Dota 2
Gaming

Why Dota 2 Modern Late Game Doesn’t Forgive A Single Blink

The Nerd Stash
Facebook X (Twitter) Instagram YouTube LinkedIn
  • About Us
  • Join Our Team
  • Meet the Team
  • Privacy Policy
  • DMCA Policy
  • Contact Us
  • Terms of Use
  • Sitemap
  • Editorial Guidelines
  • Advertising Policy
© 2026 The Nerd Stash. All Rights Reserved.

Type above and press Enter to search. Press Esc to cancel.