Close Menu
  • Gaming
    • Game Guides
    • Codes
    • Game News
    • Game Previews
    • Game Reviews
    • Game Features
    • Game Lists
    • Platforms
      • Nintendo
      • PC
      • PlayStation
      • Xbox
      • Mobile
  • Entertainment
    • Movies
    • Movie Features
    • Movie Reviews
    • TV
    • Reality TV
    • Royals
  • Celebrity
  • Human Interest
  • Astrology
  • Videos
  • More
    • Anime
    • Lists
    • Podcasts
    • Reviews
Facebook X (Twitter) Instagram LinkedIn YouTube
  • About Us
  • Join Our Team
  • Meet the Team
  • Privacy Policy
  • DMCA Policy
  • Contact Us
  • Terms of Use
  • Sitemap
  • Editorial Guidelines
  • Advertising Policy
The Nerd Stash
  • Gaming
  • Celebrity
  • Human Interest
  • Videos
The Nerd Stash
Home»Game Guides»How To Take Photos in My Time at Sandrock

How To Take Photos in My Time at Sandrock

Remember to get your good side.

Nat CollazoBy Nat CollazoNovember 7, 20233 Mins Read
How To Take Photos in My Time at Sandrock
Image Source: Pathea Games via The Nerd Stash
This article is over 1 years old and may contain outdated information.

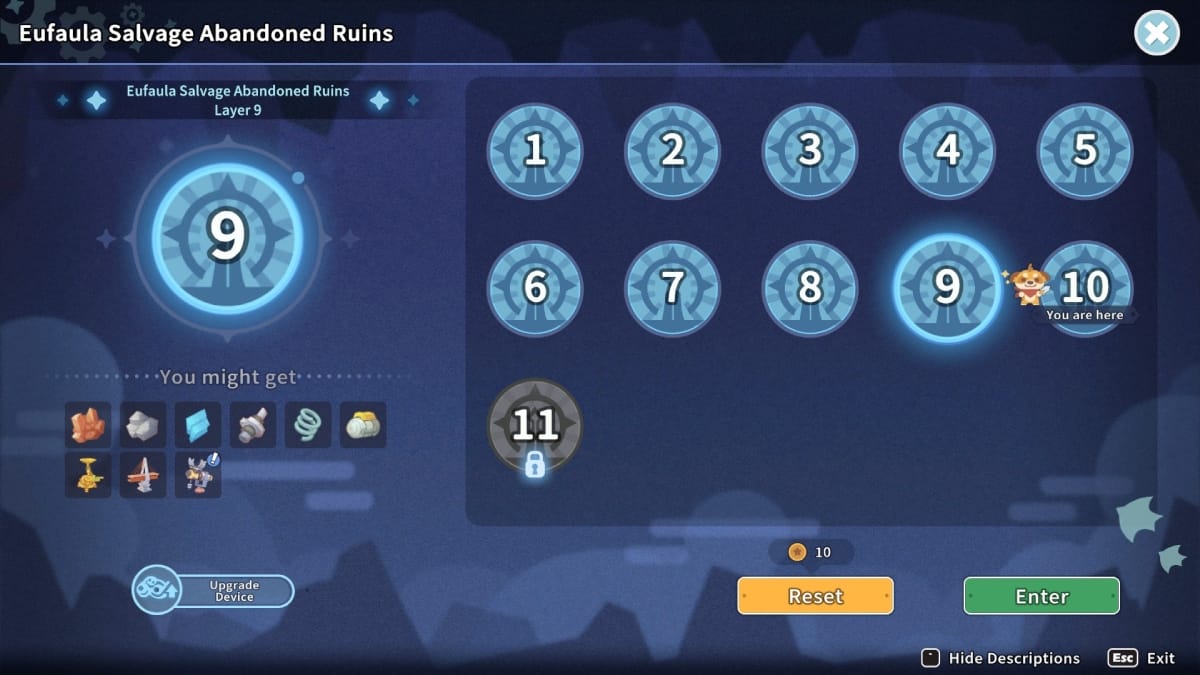
Having a dedicated photo mode is part of what makes modern-day video games so much fun. In most games, this is a feature that you can use right at the beginning of the game. In My Time At Sandrock, you have to first get the device in the game world before you can start taking photos. Getting the camera isn’t as simple as you might think it is, and taking pictures is a whole different beast entirely. To get started, you’ll want to head over to the Eufaula Salvage Abandoned Ruins.

How To Get The Camera In My Time At Sandrock

Once you get to the Eufala Salva Abandoned Ruins, you’ll be able to start mining for different resources. Three of these resources are the ones you need to create the camera. That said, follow these instructions to get the camera in My Time At Sandrock:

  1. Collect the camera pieces.

    In the mine, you will need to press F on your keyboard to survey the area for resources hidden in the rubble. It will take a few tries, but you need to find Camera Piece 1, Camera Piece 2, and Camera Piece 3.

    How To Take Photos in My Time at Sandrock

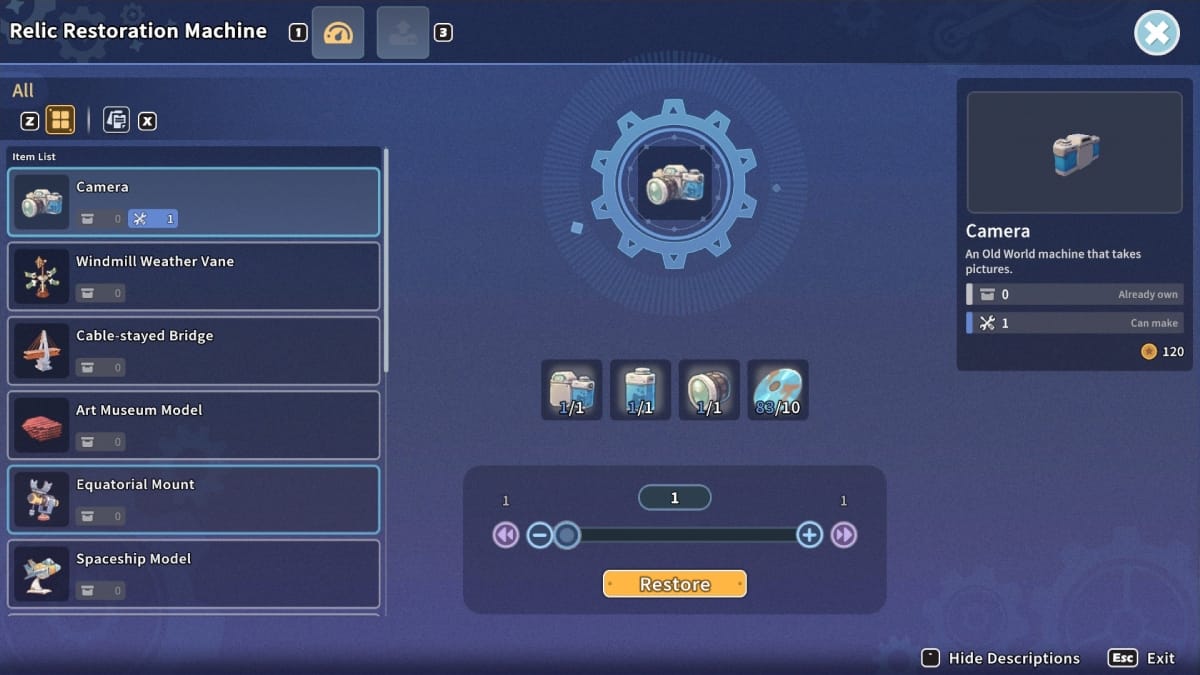
  2. Create the camera at the Museum.

    Once you have all three pieces, you can assemble the camera at the Museum.

    How To Take Photos in My Time at Sandrock

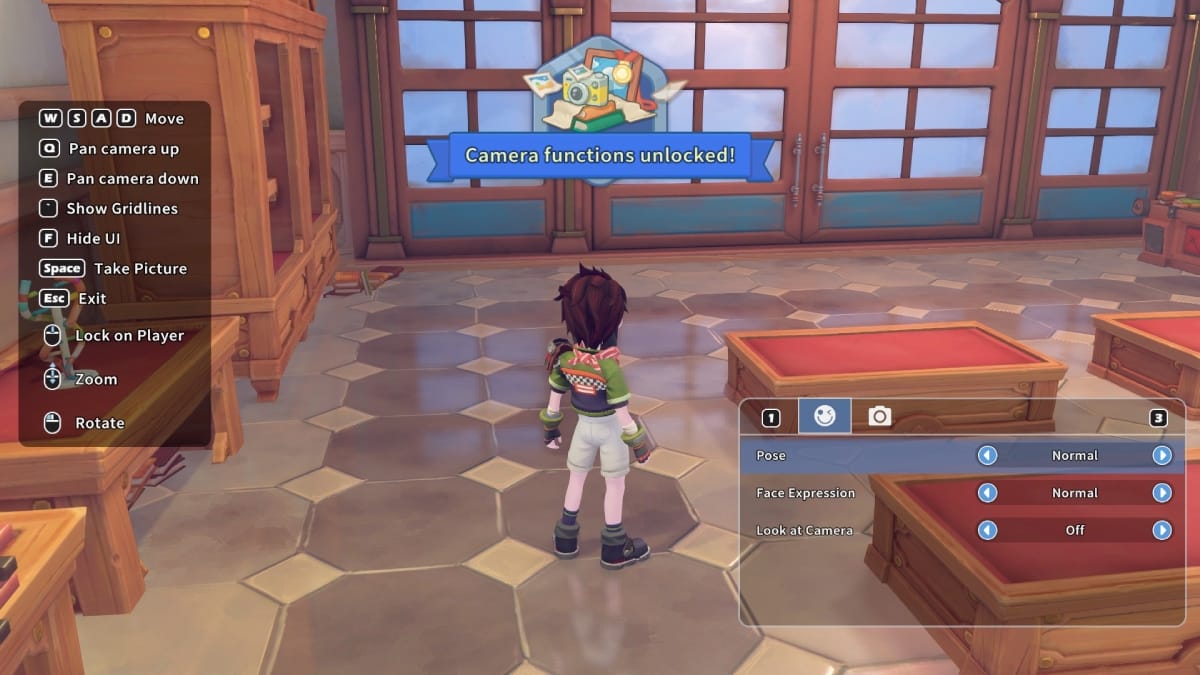
  3. Put the Camera in your hotbar and select it.

    Once you select the Camera, you’ll unlock the Camera function.

    How To Take Photos in My Time at Sandrock

  4. Take photos whenever you want!

    You can do this by pressing Tab on your keyboard, LB on your Xbox controller, L1 on your PlayStation controller, or L on your Nintendo controller.

    How To Take Photos in My Time at Sandrock

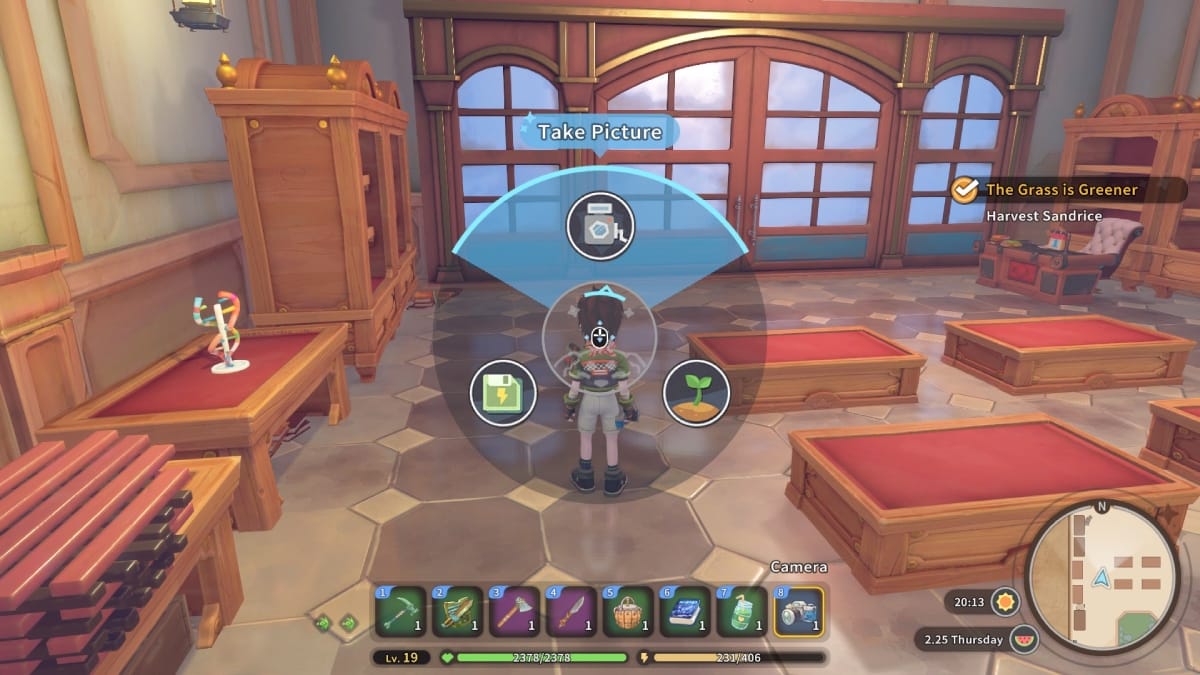
While it’s absolutely possible that we just had bad luck, it took us several dives into the Abandoned Ruins before finally coming out with the pieces we needed. If you note the image above, we reached Level 19 purely through the experience gained going through the Abandoned Ruins, so you’ll definitely want to carve out some time to do this.

How To Use Photo Mode

How To Take Photos in My Time at Sandrock
Image Source: Pathea Games via The Nerd Stash

As we explained above, you can open up your quick menu by pressing Tab on your keyboard, LB on your Xbox controller, L1 on your PlayStation controller, or L on your Nintendo controller. Open up the camera, and you’ll be met with the window to take photos.

The instructions themselves are as follows:

ButtonAssignment
W A S DMove
QPan camera up.
EPan camera down.
`Show gridlines.
FHide UI.
SpaceTake picture.
EscExit
Center Mouse ButtonLock on the player.
Scroll WheelZoom
Left Mouse ButtonRotate

Related:

My Time at Sandrock: Starter Guide

My Time at Sandrock is now available for PC, Xbox One, Xbox Series X/S, PS4, PS5, and Nintendo Switch.

Related Topics
Guide My Time at Sandrock
Share. Facebook Twitter LinkedIn Reddit Email
Nat Collazo
  • Website
  • X (Twitter)
  • Instagram

I am a game journalist and guide writer with ten years of experience as well as the CEO/ Founder of Frowns Marketing, a marketing company that caters to indie games, tabletop games, and board games to help developers get more wishlists, backers, and players!

SUGGESTED READS

Destiny 2: How To Fix Error Code Chicken
Game Guides

Destiny 2: How To Fix Error Code Chicken (Updated for The Edge of Fate)

Destiny 2 The Edge of Fate Error Code Cat
Game Guides

Destiny 2: How to Fix Error Code CAT (Updated for The Edge of Fate)

Destiny 2 The Final Shape Battleye Error
Game Guides

Destiny 2: How To Fix Battleye Error Code Plum (Updated for The Edge of Fate)

The Edge of Fate Launch Patch Notes
Game News

Destiny 2: The Edge of Fate Patch Notes

Destiny 2 Centipede Error Fix
Game Guides

Destiny 2: How to Fix Error Code Centipede (Updated for The Edge of Fate)

Thrive Heavy Lies the Crown Preview - A Balance Between Power and Play
Game Features

Thrive: Heavy Lies the Crown Preview – A Balance Between Power and Play

Trending
A picture of the sneaky California couple stealing flowers.

Sneaky California Couple Bags Dozen Flowers in Brazen Midnight Heist: ‘Totally Unhinged’

Minnie laptop as a dad joke

Michigan Girl Dies Inside After Dad Gifts Her Minnie Laptop Instead of Mini Laptop, ‘Ruining Your Child’s Birthday is So Funny’

A picture at the South Carolina restaurant.

Racist South Carolina Restaurant Owner Tells Black Pastor He’s Not Welcome There: ‘Your Racism Is Showing’

Outrage in Metairie as Man Allegedly Plans to Report Undocumented Workers After Job Is Done: ‘This Is Disgusting'

Outrage in Metairie as Man Allegedly Plans to Report Undocumented Workers After Job Is Done: ‘This Is Disgusting’

The Nerd Stash
Facebook X (Twitter) Instagram YouTube LinkedIn
  • About Us
  • Join Our Team
  • Meet the Team
  • Privacy Policy
  • DMCA Policy
  • Contact Us
  • Terms of Use
  • Sitemap
  • Editorial Guidelines
  • Advertising Policy
© 2025 The Nerd Stash. All Rights Reserved.

Type above and press Enter to search. Press Esc to cancel.