Skip To...
Even in beginner mode, Terminal Chapter 3: Descent is still no walk in the park. Unlike Chapter 1 on beginner mode, many of the puzzles have you thinking outside the box. It’s made worse by the fact that you can’t get help from your friends on Roblox either. If you group with some buddies, you’ll be put in separate elevators, and the solutions won’t be the same. Luckily, the way you go about solving Terminal Chapter 3: Descent on beginner mode is always the same.
Solving the Hatch Puzzle in Terminal Chapter 3: Descent
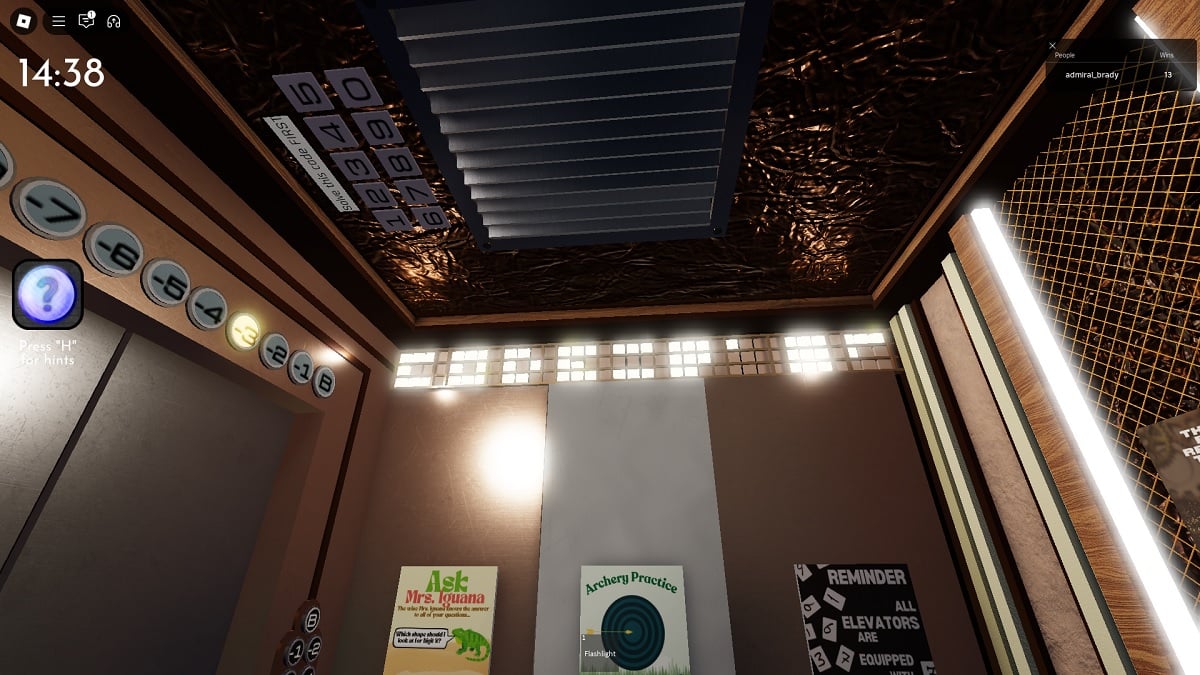
First, look up to find a hatch and a keypad. That’s the first puzzle to solve. On the walls between the back wall and elevator door, you’ll see a series of lights right at the edges. If you squint a little, you’ll see it says “CODE =” followed by shapes made by the lights.
There are four shapes, each separated by a small gap. Count the lights of the first light, then the second, and onward. You’ll have four numbers, but more importantly, the code to the escape hatch above you.
Solving the Shape Puzzle in Terminal Chapter 3: Descent
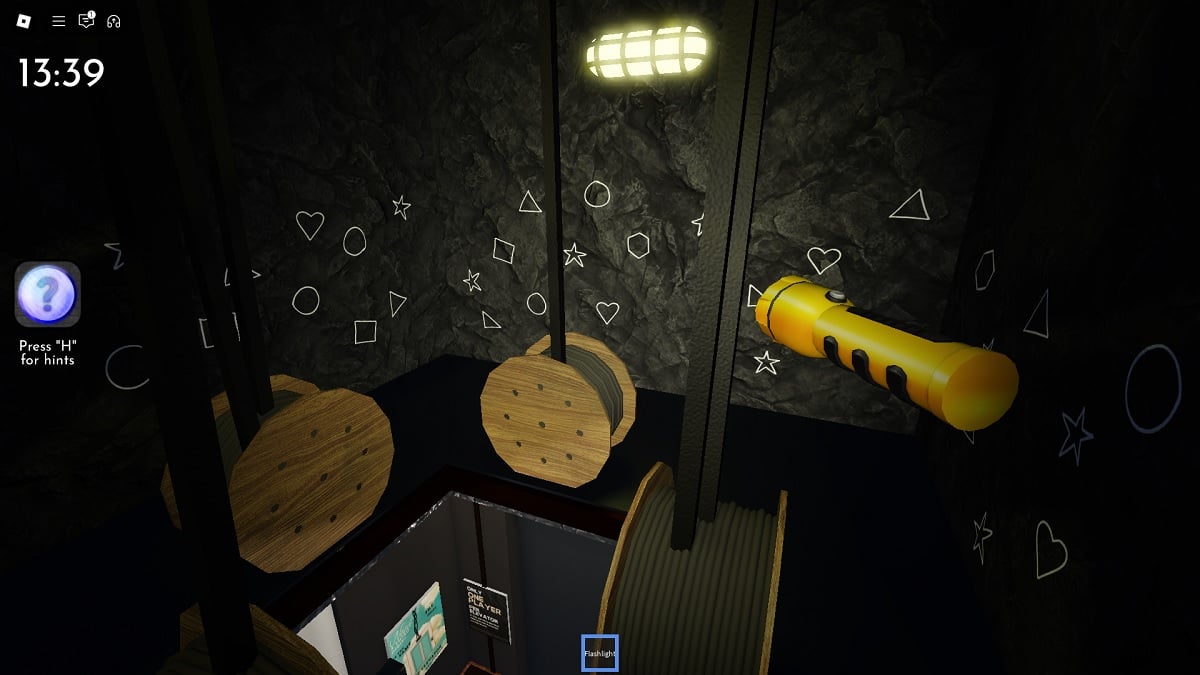
At the top of the elevator, you’re going to see two things: a series of shapes drawn on the walls and a message. The message wants you to count the shapes. Go ahead and make note of how many shapes there are of each.
As for the order, it’s the same for everyone, but the amount is different. Start with the number of circles, then triangles, squares, and stars last. That’ll be your 4-digit code for the elevator.
Unlocking the Nursery in Terminal Chapter 3: Descent
Stepping through the elevator in Terminal Chapter 3: Descent will bring you to a circular room. There are four small rooms and a door to the Nursery, but requires four keys. You’ll get those from solving the mini-puzzles inside the small rooms.
Ignore those for now and instead pick up any colored boxes, paint cans, and notes you can find. You’ll only find some of them for now; the rest are in the other rooms. Oh, and they’re all out in the open, so it’s impossible to miss.
Afterwards, unlock each puzzle room, gather the remaining boxes, paint cans, and notes, before you solve each puzzle.
The Newsroom Puzzle
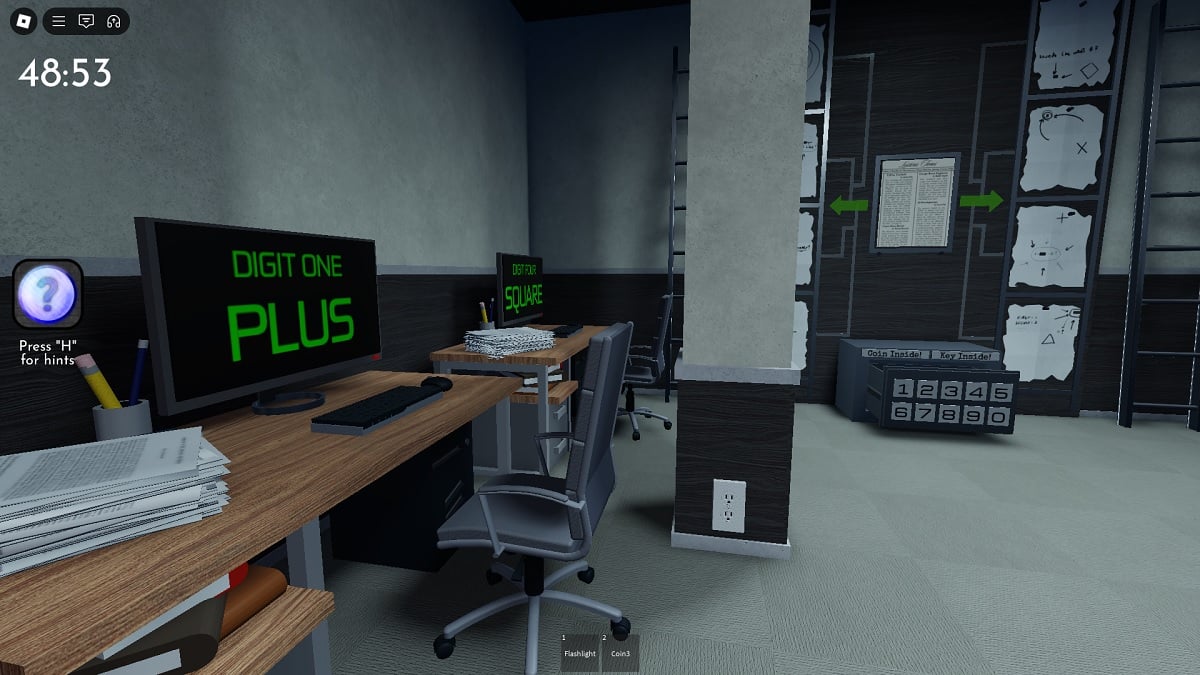
Unlocking the Newsroom is a bit of a brain teaser. See the rows of numbers? Break them up into columns instead and you’ll notice a pattern. Columns one and three have you count by ones, while columns two and four have you counting by twos. The code will be: 4896.
Now, the notes you’ve collected are on the wall and below is a lockbox. On the nearby monitors, you’ll get a clue for each digit:
- Digit 1: Plus
- Digit 2: Minus
- Digit 3: Diamond
- Digit 4: Square
Look for the symbol in the notes to find the 4-digit code and you’ll get the code 7849.
The Arcade Puzzle
To unlock the Arcade, take a look at each word listed for each digit. Jot down the first letter of each word and you’ll get a number.
- Digit 1: Tomato, Watermelon, Onion = TWO
- Digit 2: Fudge, Ice, Vanilla, Espresso = FIVE
- Digit 3: Otter, Narwhal, Eagle = ONE
- Digit 4: Fuchsia, Ochre, Umber, Rose = FOUR
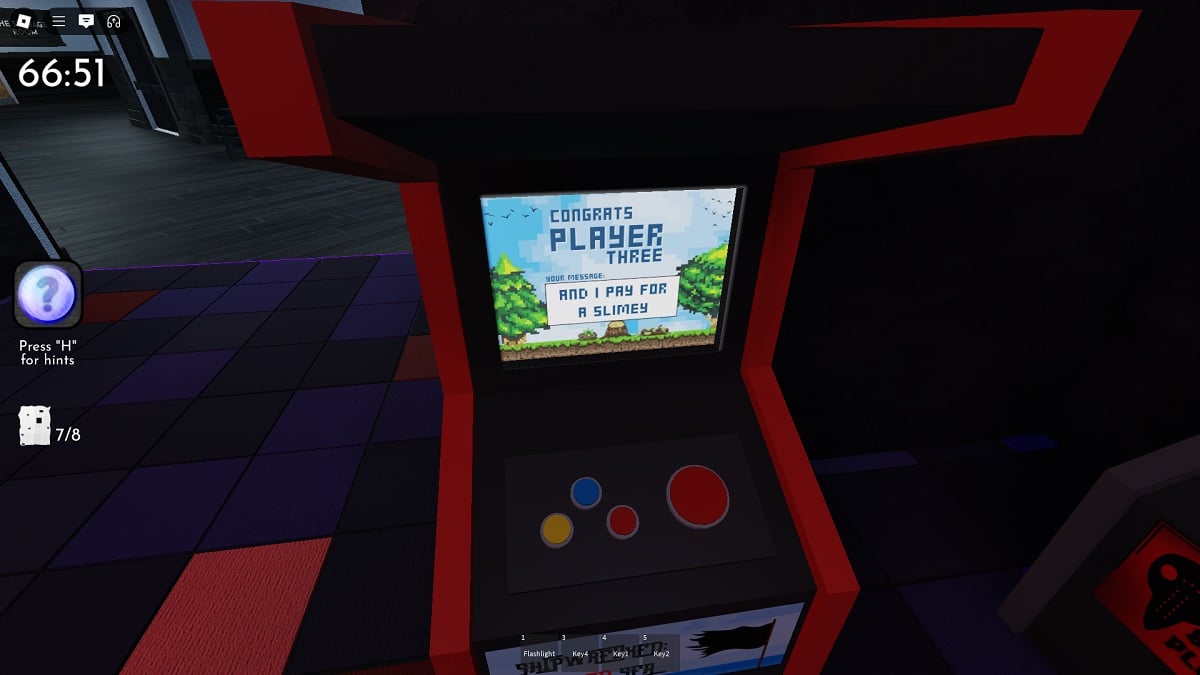
Grab the coin on the counter, which you use on the working arcade cabinets. There are three other coins to earn by completing the other puzzles. Each arcade cabinet gives you a message, which you use with the Ticket Exchange to find the code for the cash register. It’s SUCKER.
The Art Studio Puzzle
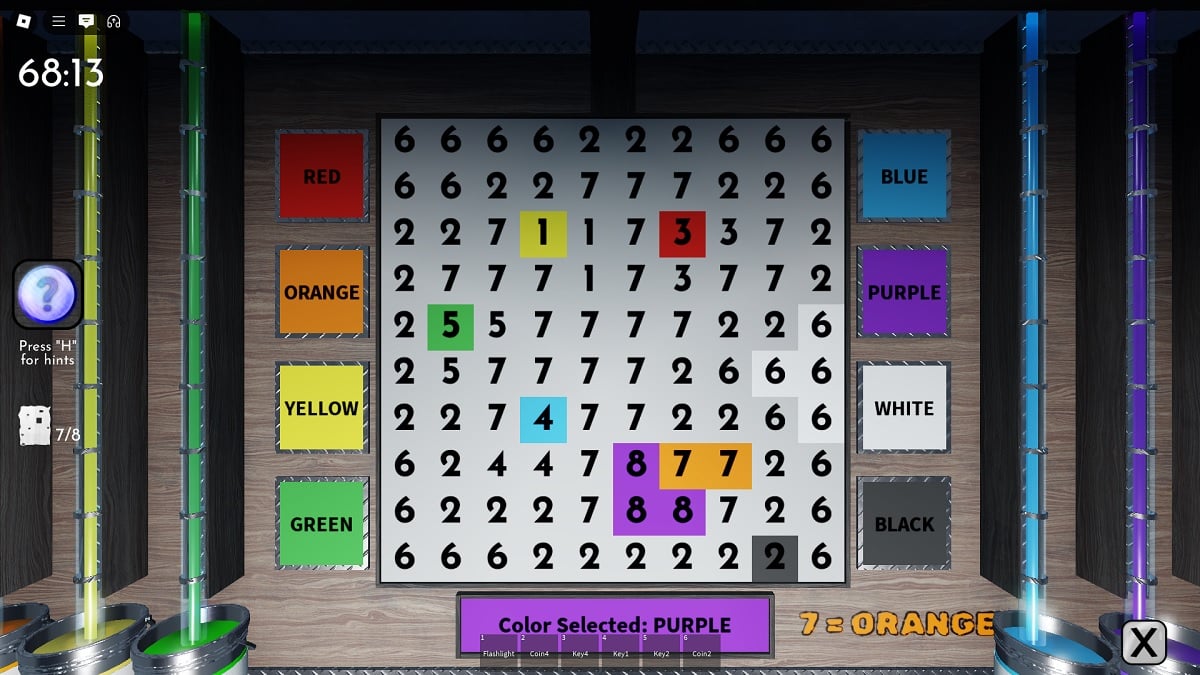
Accessing the Art Studio is the easiest part. Above the keypad is a word. Count the straight lines of each letter to learn the 4-digit code. Inside is a metal chest and a keypad nearby. To find it, you need to complete the paint-by-numbers on the wall.
- 1 = Yellow
- 2 = Black
- 3 = Red
- 4 = Blue
- 5 = Green
- 6 = White
- 7 = Orange
- 8 = Purple
On the nearby easel, the code will appear: 8450. There’s a key, a coin, and another note inside.
The Storage Room Puzzle
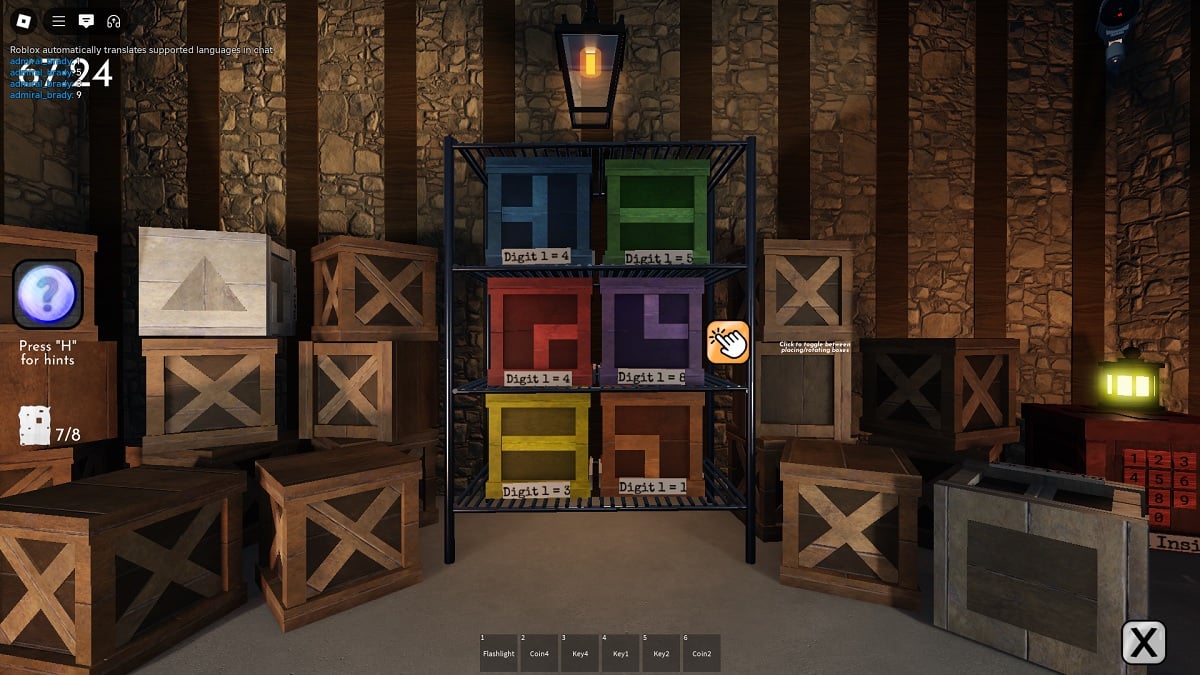
For the storage room code, take a look at the prompt. Each object listed is the location of the digit, in order. You’ll get the code 4781. Inside the Storage Room, you’ll see a rack that lets you place boxes in specific orders.
In doing so, you’ll get a 4-digit code for the large box nearby that contains a key and another note for the Newsroom. The code is 5923. Adjust the boxes again to get the code for the small blue box containing the remaining paint can, which is 4695.
Solving the Nursery Puzzle in Terminal Chapter 3: Descent
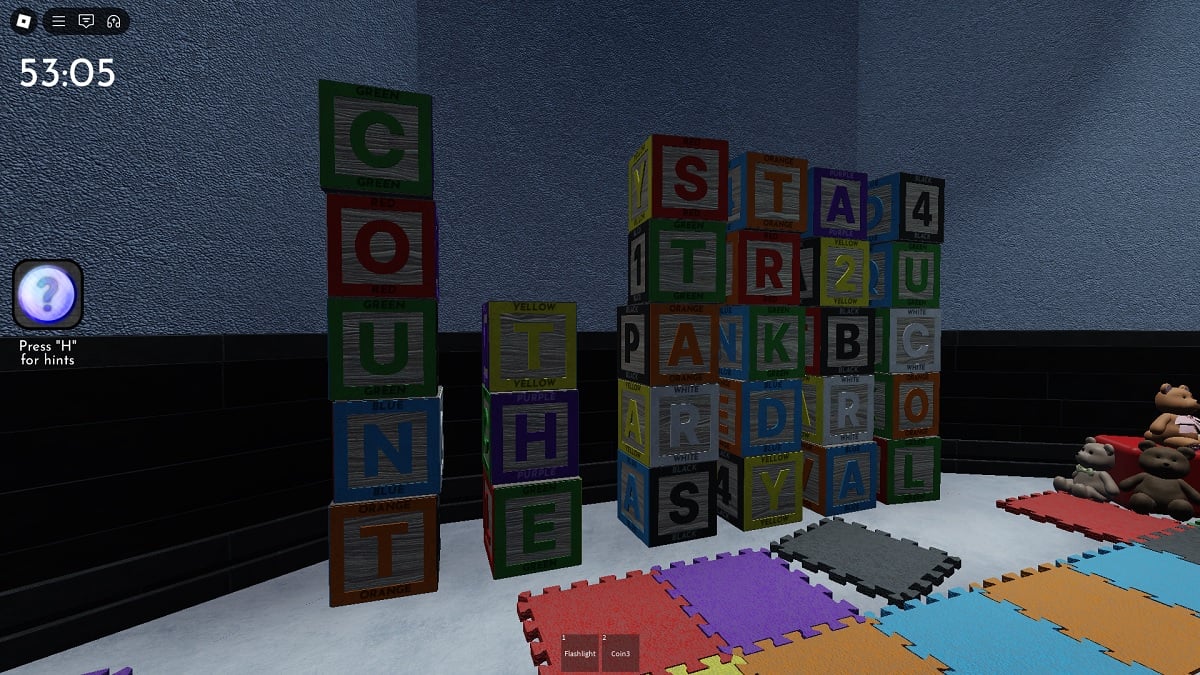
With all four keys, unlock the door to the Nursery, the last and final puzzle in Terminal Chapter 3: Descent. Take note of the stacked blocks and the red tower that leads to another keypad overhead.
At the bottom of the red tower is a small poster. If you adjust the blocks outside in accordance to the poster, you’ll learn the four digit code at the top. Punch in the code 9247 and press the green button and away you go!

