Close Menu
  • Gaming
    • Platforms
      • Nintendo
      • PC
      • PlayStation
      • Xbox
  • Entertainment
    • Movies
    • TV
    • Royals
  • Celebrity
    • Hollywood
  • Human Interest
  • Astrology
  • More
    • Reviews
Facebook X (Twitter) Instagram LinkedIn YouTube
  • About Us
  • Join Our Team
  • Meet the Team
  • Privacy Policy
  • DMCA Policy
  • Contact Us
  • Terms of Use
  • Sitemap
  • Editorial Guidelines
  • Advertising Policy
The Nerd Stash
  • Gaming
  • Celebrity
  • Hollywood
  • Human Interest
The Nerd Stash
Home»Gaming»How To Take Photos in My Time at Sandrock

How To Take Photos in My Time at Sandrock

Remember to get your good side.

Nat CollazoBy Nat CollazoNovember 7, 20233 Mins Read
How To Take Photos in My Time at Sandrock
Image Source: Pathea Games via The Nerd Stash
This article is over 2 years old and may contain outdated information.

Having a dedicated photo mode is part of what makes modern-day video games so much fun. In most games, this is a feature that you can use right at the beginning of the game. In My Time At Sandrock, you have to first get the device in the game world before you can start taking photos. Getting the camera isn’t as simple as you might think it is, and taking pictures is a whole different beast entirely. To get started, you’ll want to head over to the Eufaula Salvage Abandoned Ruins.

How To Get The Camera In My Time At Sandrock

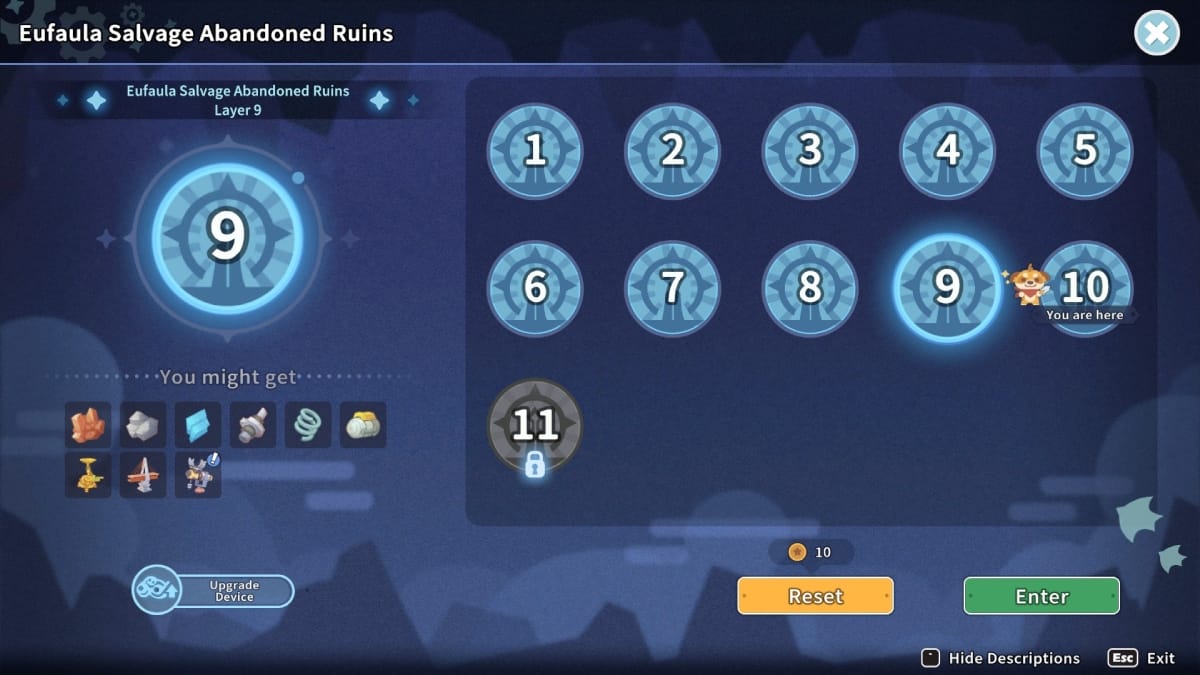
Once you get to the Eufala Salva Abandoned Ruins, you’ll be able to start mining for different resources. Three of these resources are the ones you need to create the camera. That said, follow these instructions to get the camera in My Time At Sandrock:

  1. Collect the camera pieces.

    In the mine, you will need to press F on your keyboard to survey the area for resources hidden in the rubble. It will take a few tries, but you need to find Camera Piece 1, Camera Piece 2, and Camera Piece 3.
    How-To-Take-Photos-in-My-Time-at-Sandrock

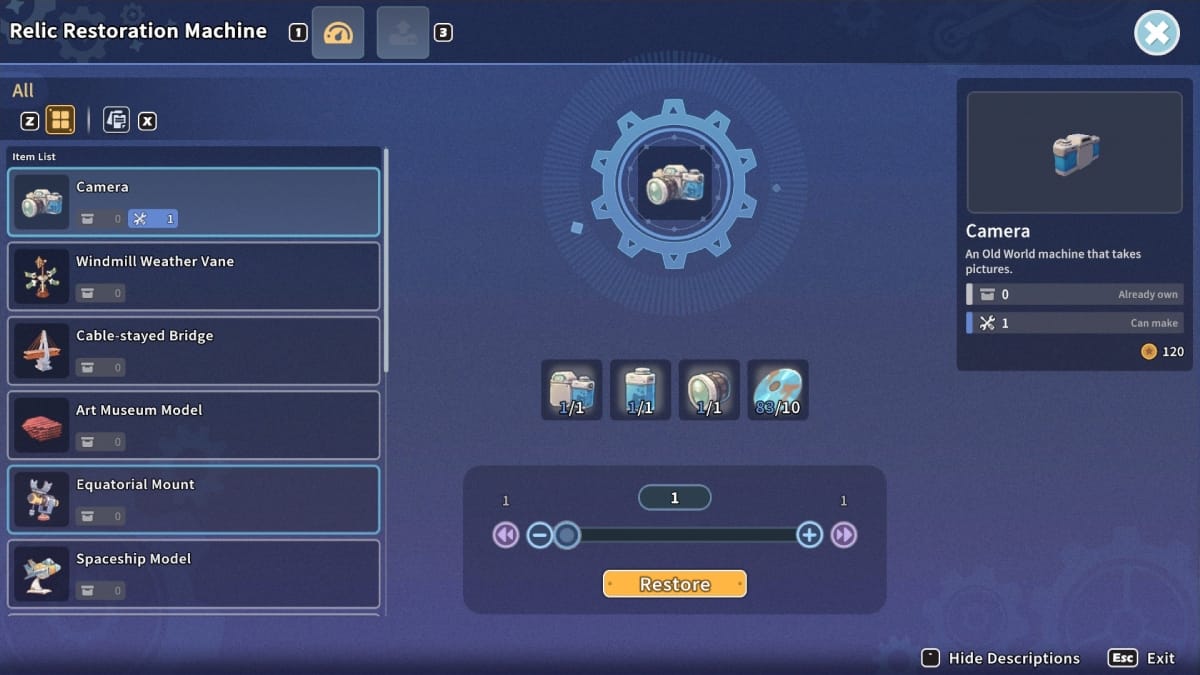
  2. Create the camera at the Museum.

    Once you have all three pieces, you can assemble the camera at the Museum.
    How To Take Photos in My Time at Sandrock

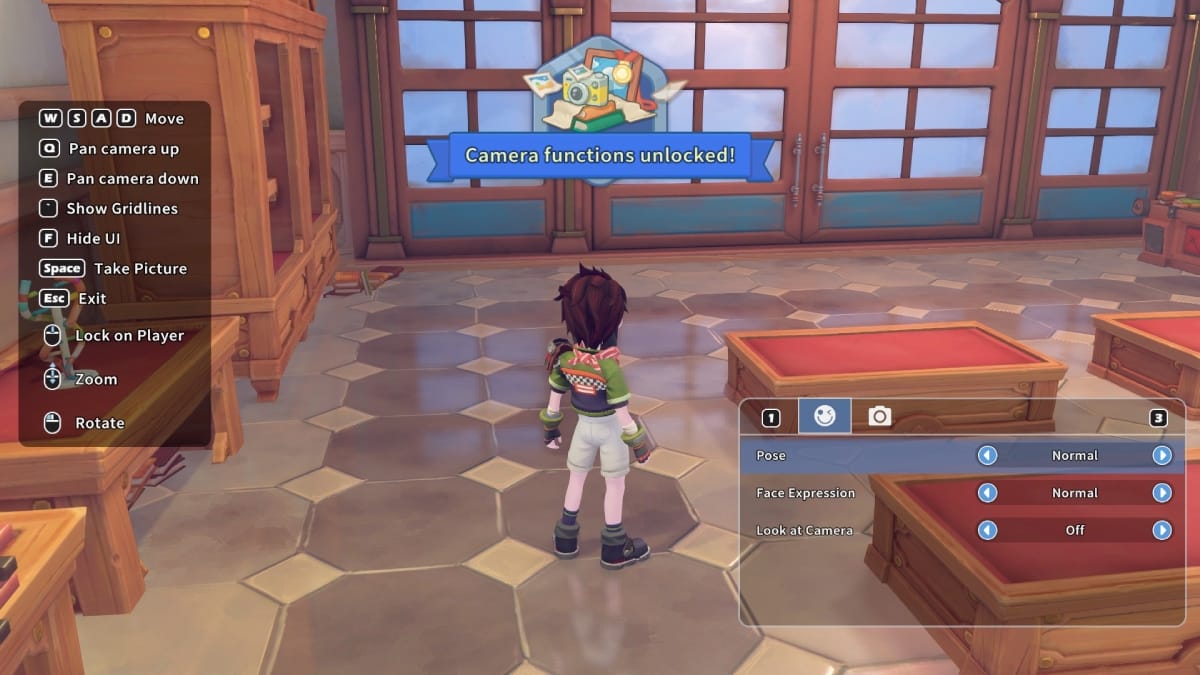
  3. Put the Camera in your hotbar and select it.

    Once you select the Camera, you’ll unlock the Camera function.
    How To Take Photos in My Time at Sandrock

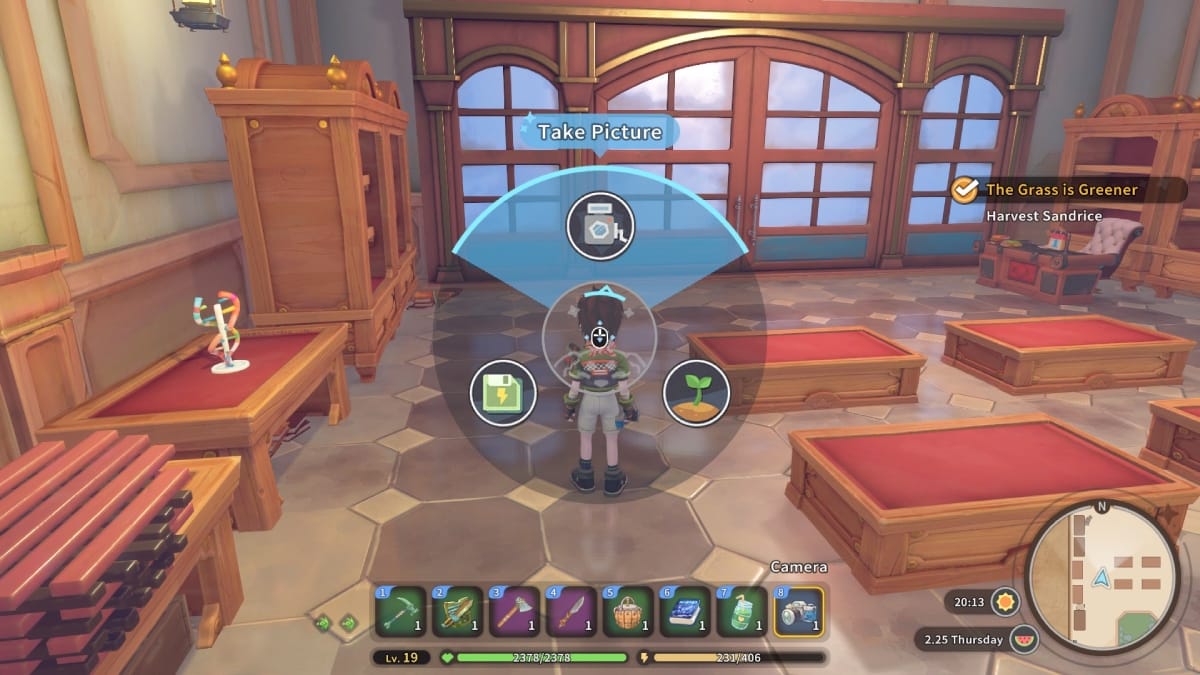
  4. Take photos whenever you want!

    You can do this by pressing Tab on your keyboard, LB on your Xbox controller, L1 on your PlayStation controller, or L on your Nintendo controller.
    How To Take Photos in My Time at Sandrock

While it’s absolutely possible that we just had bad luck, it took us several dives into the Abandoned Ruins before finally coming out with the pieces we needed. If you note the image above, we reached Level 19 purely through the experience gained going through the Abandoned Ruins, so you’ll definitely want to carve out some time to do this.

How To Use Photo Mode

How To Take Photos in My Time at Sandrock
Image Source: Pathea Games via The Nerd Stash

As we explained above, you can open up your quick menu by pressing Tab on your keyboard, LB on your Xbox controller, L1 on your PlayStation controller, or L on your Nintendo controller. Open up the camera, and you’ll be met with the window to take photos.

The instructions themselves are as follows:

ButtonAssignment
W A S DMove
QPan camera up.
EPan camera down.
`Show gridlines.
FHide UI.
SpaceTake picture.
EscExit
Center Mouse ButtonLock on the player.
Scroll WheelZoom
Left Mouse ButtonRotate

Related:

My Time at Sandrock: Starter Guide

My Time at Sandrock is now available for PC, Xbox One, Xbox Series X/S, PS4, PS5, and Nintendo Switch.

Related Topics
Guide My Time at Sandrock
Share. Facebook Twitter LinkedIn Reddit Email
Nat Collazo
  • Website
  • X (Twitter)
  • Instagram

Nat is a journalist with over ten years of online publishing experience. They are a massive fan of hanging out with both their wife and cat which would ideally be all the time. Nat received an undergraduate degree in English Literature from Florida International University, then returned to complete a graduate degree in Mass Communications before moving across the country to settle in New England.

SUGGESTED READS

Coin Master: All Village List and Their Build Cost
Gaming

Coin Master: All Village List and Their Build Cost (2026)

Best Project Zomboid Mods Build 42 Stable
Gaming

Top 10 Best Project Zomboid Mods (Updated for Build 42 Stable)

Best Character Builds in Project Zomboid
Gaming

Best Character Builds in Project Zomboid (Updated for Build 42 Stable)

Fire Emblem Fortune's Weave Nintendo Direct
Gaming

Everything Announced at the Fire Emblem: Fortune’s Weave Direct

SEGA Gamescom Line-Up 2026
Gaming

SEGA Unveils Its Gamescom 2026 Line-up

Leaked Microsoft Documents Reveal Xbox 360 Games Are Indeed Coming to PC Alongside Disc-to-Digital Plans
Gaming

Leaked Microsoft Documents Reveal Xbox 360 Games Are Indeed Coming to PC Alongside Disc-to-Digital Plans

The Nerd Stash
Facebook X (Twitter) Instagram YouTube LinkedIn
  • About Us
  • Join Our Team
  • Meet the Team
  • Privacy Policy
  • DMCA Policy
  • Contact Us
  • Terms of Use
  • Sitemap
  • Editorial Guidelines
  • Advertising Policy
© 2026 The Nerd Stash. All Rights Reserved.

Type above and press Enter to search. Press Esc to cancel.