
Interliminality is essentially one big maze, full of entities with strange proportions and deadly intentions. Isn’t that always the case with these spooky horror games? Why this place was built is a complete mystery, but what you do know is that you need to escape. Every level of Interliminality: Chapter 1 has a puzzle to solve and this walkthrough will keep you on track or else you’ll just be another dead Roblox player!
Opening Scene: The Empty Convenience Store

In the very first level—well, the opening scene, technically—you’ll be in an empty, abandoned store. Most of the shelves have been shoved around, creating a chaotic maze you have to navigate. Or do you? Because there’s a trick to avoid the maze!
The other good news is that you don’t have to worry about anything chasing you; it’s completely safe. I promise! You can avoid the entire maze by jumping onto the shelves and just make your way to the elevator on the right wall, at the back. Crawl underneath the shelf and use the elevator button to move on.
Level 0: Interliminality Film & Media Offices
Welcome to the very offices of the Interliminality organization. It’s pretty eerie, to be honest, but this level won’t have any surprised lurking. You’ll see the Entity called the Director as you travel further into the offices, but he’ll go away.
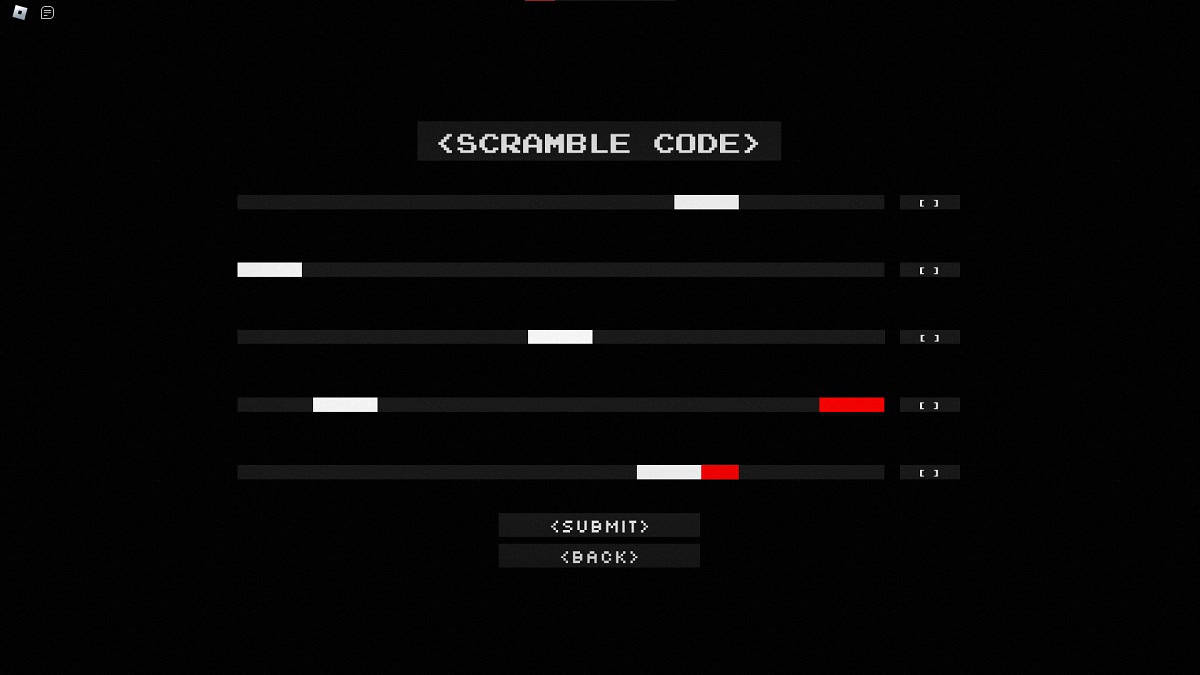
However, there is a puzzle. As you head deeper into the build—it’s a straight shot, no detours—you’ll come to a locked door. Use the terminal to your left. The trick is to select the brackets to bump the white stripes so that they line up with the red stripes. Through the door is another elevator.
Level 1: The Office, Interliminality Chapter 1 Walkthrough
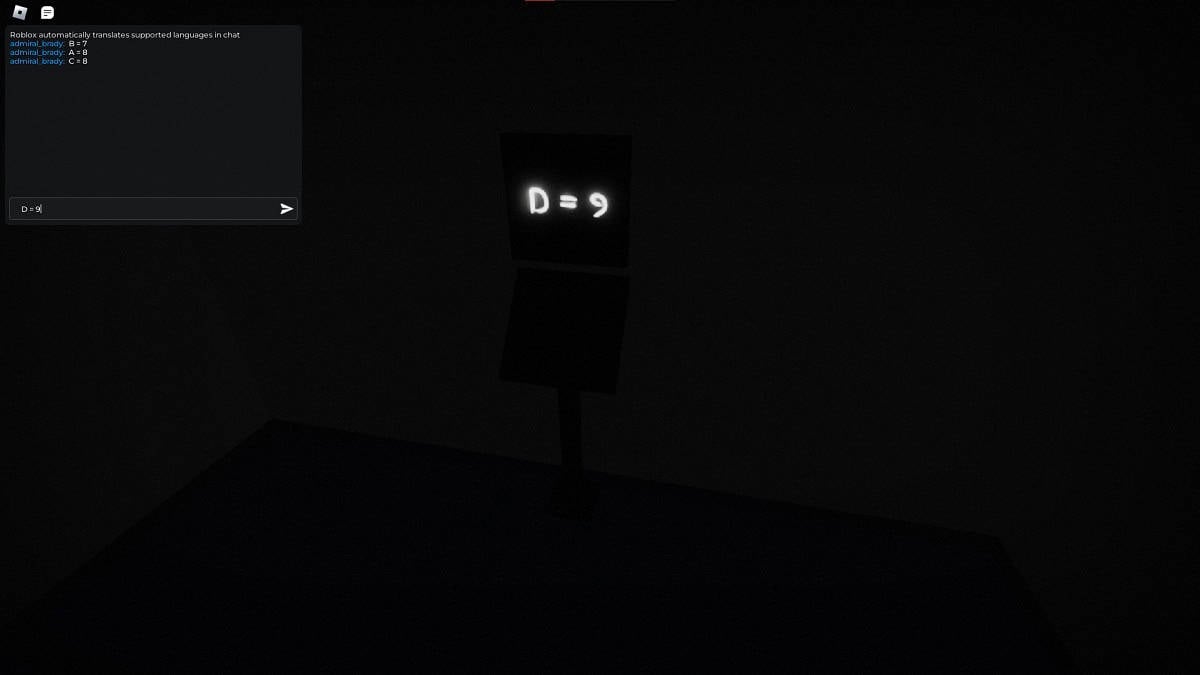
Here’s where Interliminality really takes off because the Director is roaming the hallways nearby. When you step out of the elevator, you’ll come to a two-way intersection—a door to your right that needs a four-digit code and a room to your left. The code you need is in the hallways to your left, and they’re unique to everyone, unfortunately.
Throughout the maze, you’ll find four more of those terminals from the previous level. Unscramble the puzzle and you’ll get all four codes. but the Director will stalk the halls, so keep your distance and stay out of the light. If you die, that’s okay! You won’t be forced to redo any puzzles; the codes will stay the same.
Level 2: Light and Dark
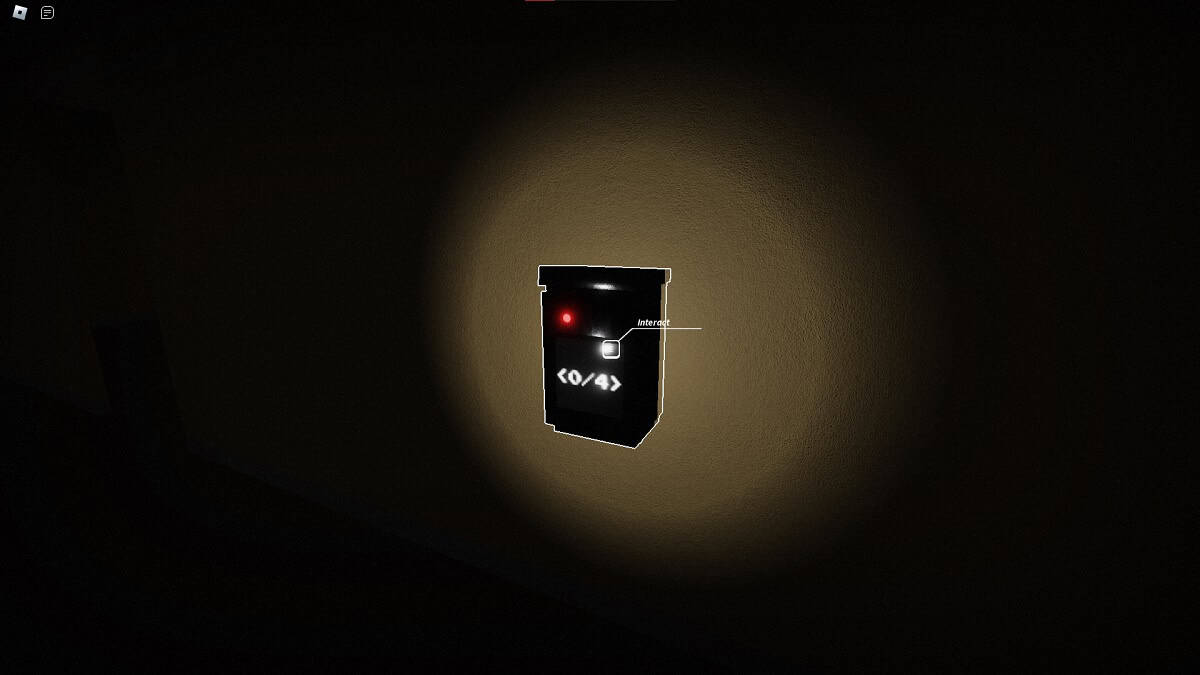
That was nerve racking, but this level gets worse and is simultaneously the same deal. This is where the Skin Stealer makes an appearance and chases you about, just like the Director. The gear here, again, is to escape through the elevator, but not before activating four buttons.
This one is much easier solo since you only have to worry your own image getting stolen. If you just pick a wall to follow, you will inevitability come across the buttons. I would do a quick scan around each room, then move on. More often than not, I saw the buttons from several rooms away. They glow! Also, like before, the puzzle won’t reset if you die.
Level 3: Things, Interliminality Chapter 1 Walkthrough
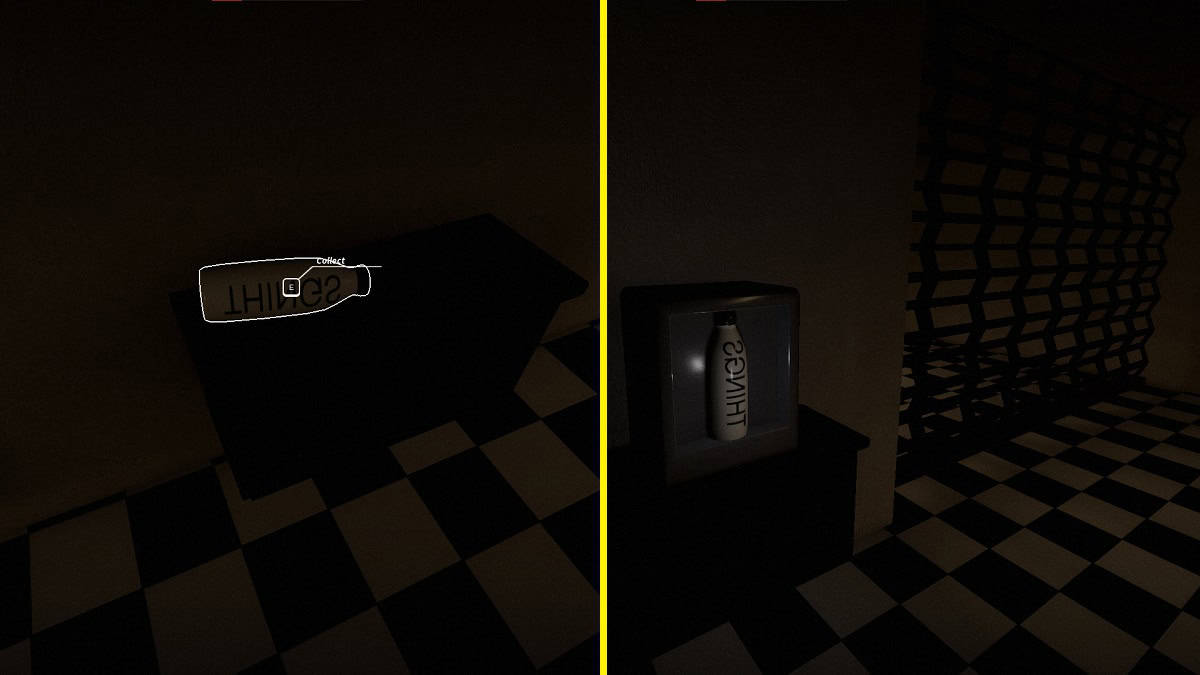
In the next level, “Things” is, well, all about finding things in Interliminality. This is a pretty chill level since no entities appear. These “things” are actually plastic bottles and you need to find all three. You then take them to a small box next to the store front gate near the beginning of the level, one at a time.
To find all the bottles of Things, your best strategy is to use the maze trick I explained before. Choose one of the walls to follow and stick to it. No stone will be left unturned since it takes you through every single room.
Level 4: Metro Station
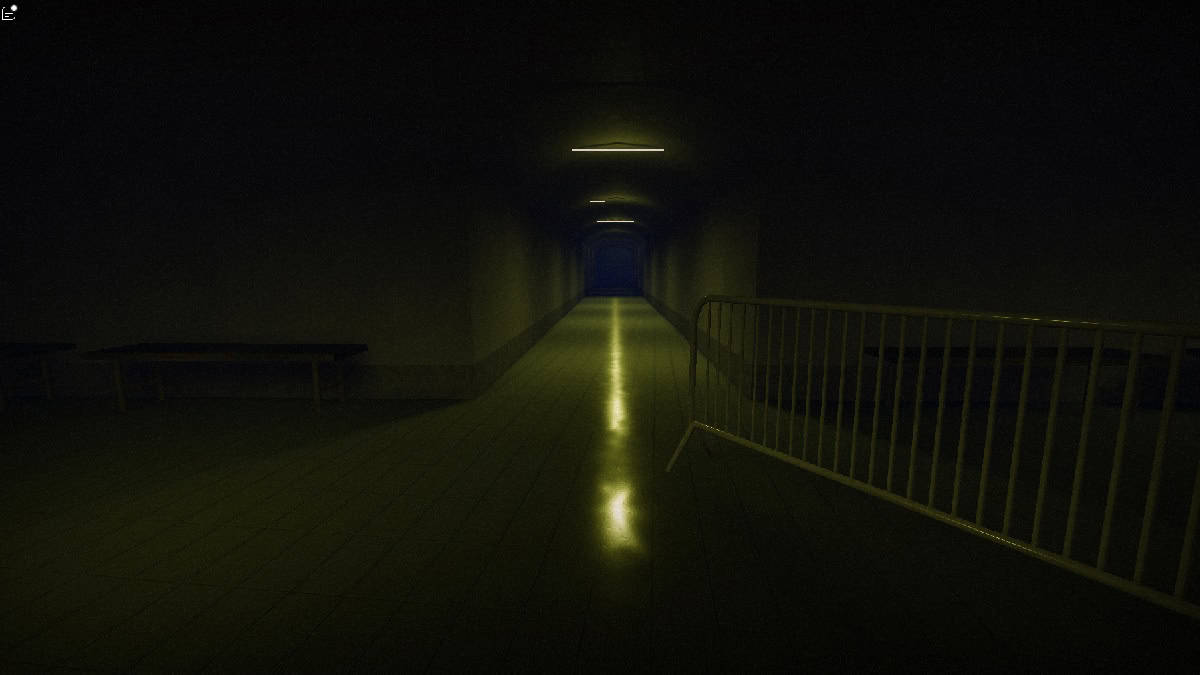
Although there aren’t any entities to worry about in the Metro Station, it’s actually really easy to get lost. It’s an elaborate maze (again), but stick to these directions:
- Leave the elevator and follow the hallway until you come to a two-way intersection.
- Turn left and around the nearby wall (there will be a dead end) and keep walking until you come to a large, open room with a bunch of pedestrian barriers.
- From where you enter, keep to the right wall and it’ll take you to another narrow hallway.
The hallway itself does have a lot of dead ends too, but there’s only one path. It’ll take you straight to the elevator and onto the next level of Interliminality: Chapter 1.
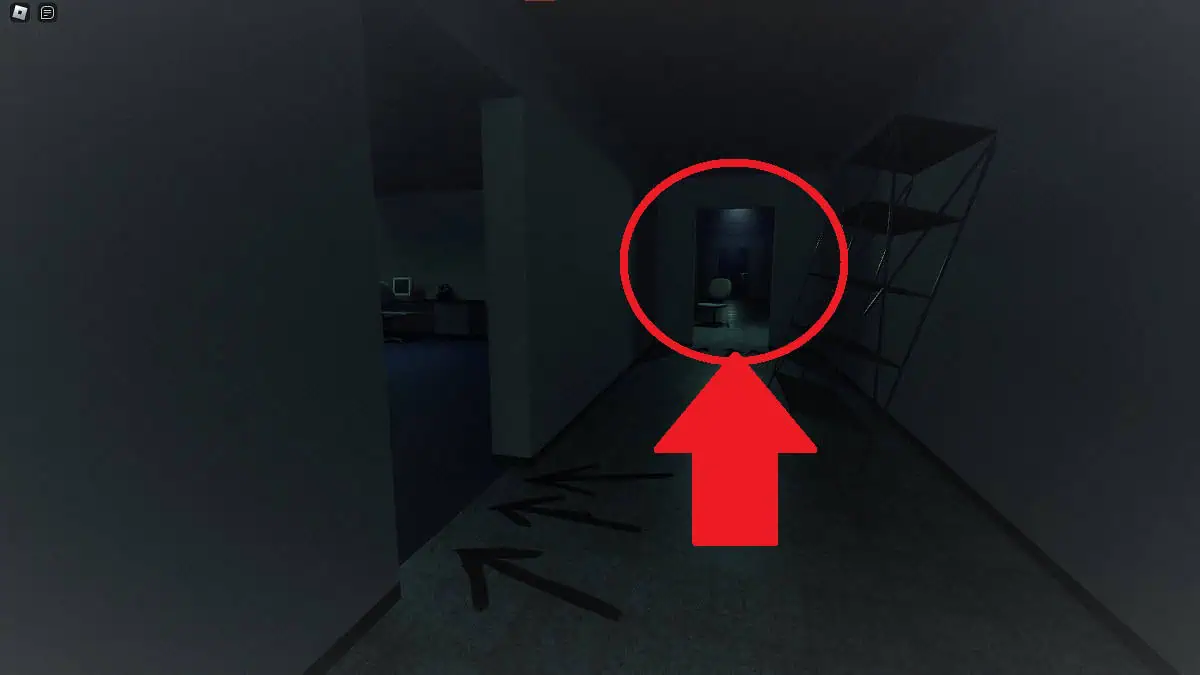
Level 5: After Hours, Interliminality Chapter 1 Walkthrough

The next level is a school and it’s home to the Strife, a ghostly entity with multiple eyes and no legs. Its skin is white with splotches of red—probably the blood of his victims. He’ll periodically appear in front of you. When he does, do not move. Although you can still move the camera.
Not only is your goal to not die, you want to find the door with arrows pointing to it. Rather than wander around the school, follow the exit signs on the ceiling and it’ll lead you straight there.
More importantly, if you turn around and head straight down the hall, with the locked door to your back, you’ll find a classroom with arrows pointing to it on your right. Enter that room, follow the arrows, and you’ll find a switch. That unlocks the door and you’re on your way to the next elevator.
Level 6: The School Pool

Here’s another chill level, which is sorely needed after that last one. The Strife plays a deadly game of Simon says. You only need to worry about finding seven keys. While they’re randomly placed, you’ll always find keys in these three locations:
- On the bleachers
- On the ground in front of the bleachers
- And around the edge of the pool.
I scanned each section one at a time, starting with the bleachers, then moving closer to the pull. Head into the hallway at the back of the pool and use the keys to unlock all seven padlocks. Take the elevator down once more!
Level 7: Reality, Interliminality Chapter 1 Walkthrough
Look familiar? You’re back at the Interliminality Film & Media Offices or, presumably, “reality.” Naturally, something is off. Hop over the desk blocking the doorway and enter the hallway. You’ll see two doorways with arrows. Keep going straight and ignore the door on your left.
As you enter a large office room, you’ll see a shrine dedicated to the founder of Interliminality, the Director. There’s a door to your right; walk through and take the elevator down, which also marks the end of our walkthrough for Roblox Interliminality: Chapter 1.


