Skip To...
Out of all the skills we have in Project Zomboid, farming has to be one of the most underrated. While most of us just want to live out our zombie-killing fantasies and see our survivors rise from unemployed Knox Country citizens to someone out of a Resident Evil game, others just want a peaceful life in this zombie-riddled world. For the latter, creating a farm in Project Zomboid might be a great long-term project. However, it is easier said than done.
Things You Need to Start Farming in Project Zomboid
[Disclaimer: This guide contains information from the PZwiki as well as hands-on experience, and it includes the farming mechanics of Build 41]
Initially, you might not have the need to farm in Project Zomboid. If you start during the initial infection months, there will be a lot of fresh food around Knox Country. Also, you can find canned food, which lasts for a long time. However, once all of that is gone, you should start looking for new options; that’s where farming comes into play.
While making a farm takes a lot of time and requires specific items, the payout is great. Before taking care of the land or building fences around your farm, you need the following items:
- Seed packets.
- You can find them inside some houses and at some farms, but you’ll have better chances by looking inside warehouses and hunting stores.
- A trowel, hoe, shovel, or garden fork.
- A watering can. You can also use water bottles or buckets, but the watering does more for the roleplaying aspect.
- Fertilizer.
- This one is hard to come by, and you’ll usually find it inside warehouses. While it is optional, it is quite helpful.
- At least two gardening spray cans to create insecticide and mildew spray.
- A permanent source of water, such as rain-collecting barrels.
- Composters.
Creating Your First Farm
You can create your farm anywhere in Project Zomboid. Assuming there’s soil, of course. For my example, I used a house on the outskirts of Muldraugh. While any house is a great option, I recommend doing it in a secluded location to avoid zeds trampling all over your crops.
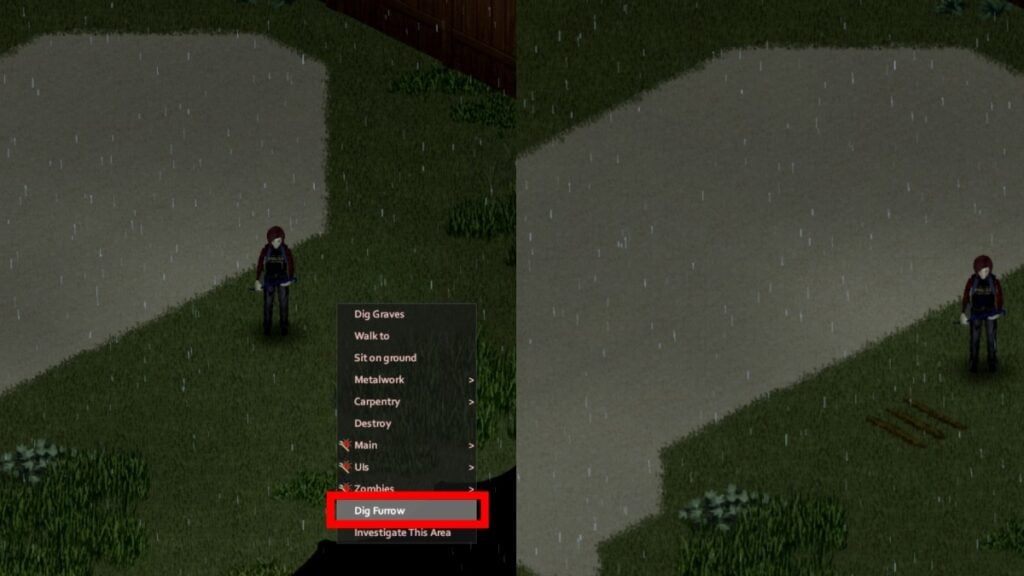
Once you have the perfect spot, do the following steps:
- Click on the ground while having the shovel, trowel, hoe, etc., in your inventory.
- Select Dig Furrow.
- Dig as many as you need for your crops.
Once you have your furrows, grab your seed packets and open them. I recommend opening one at a time because each one contains 50 seeds.
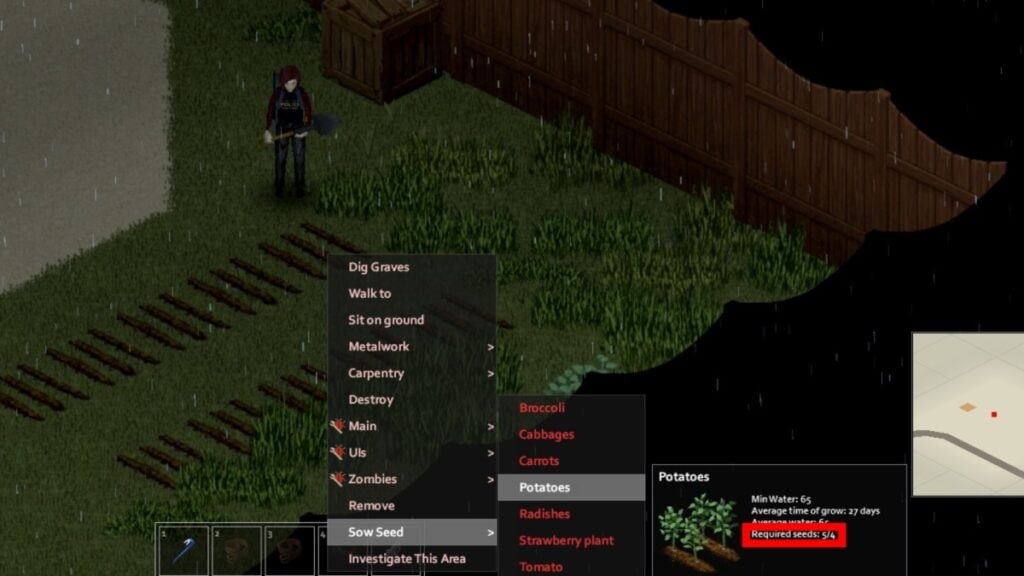
With the seeds in hand, click on the furrow and select Sow Seed. It is important to see how many seeds each crop requires.
- Broccoli = 6 seeds.
- Cabbage = 9 seeds.
- Carrot = 12 seeds.
- Potato = 4 seeds.
- Radish = 6 seeds.
- Strawberry = 12 seeds.
- Tomato = 4 seeds.
If you’re lucky enough to find different packets, I recommend focusing on potatoes and tomatoes.
After you sow the seeds, it is time to water your crops. For this, we’ll use whatever object that can hold water. In my case, I used a watering can. Remember, if you run out of water, water-collecting barrels are your best friends.
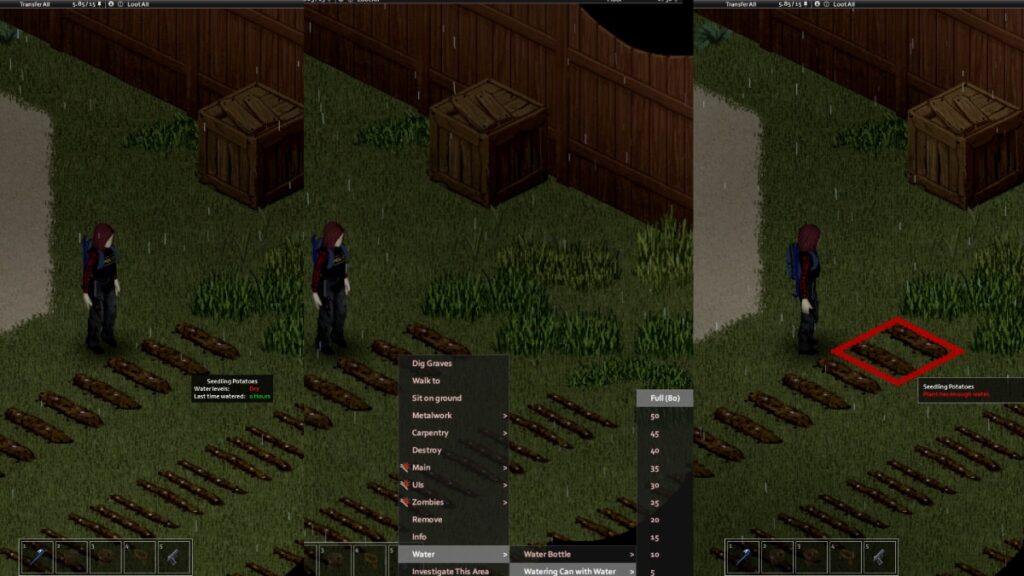
As you can see in the above image, all you must do is click on your crop and select Water. After that, you can pick any of the options. If it is your first time watering a crop, selecting Full will do the trick. Once that’s done, you’ve done the basic steps to create a farm in Project Zomboid. However, there are a few more things you need to watch out for.
Taking Care of Your Crops
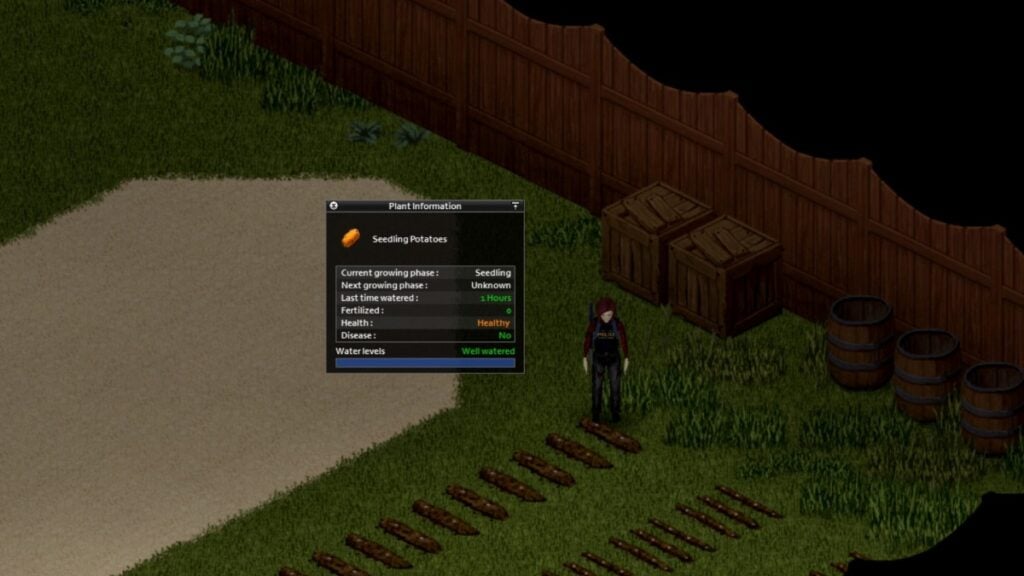
Since Project Zomboid tries to emulate realism in most of its activities, farming isn’t an exception. It is crucial to check your crops constantly. To do so, click on your crop and select Info, which will open a screen similar to the one in the above image. There, you can see the crop’s phase, water levels, whether it has fertilizer or not, and most importantly, its health and diseases.
For the latter, that’s where we’ll use the spray cans. If you picked the Farmer occupation at the start, you should have the recipes to create insecticide and mildew spray. If not, you can read a farming magazine to unlock them. This is what you need to create each:
- Insecticide Spray:
- Empty Spray Can
- Water (3 units)
- 5 Cigarettes.
- Mildew Spray:
- Empty Spray Can
- Milk
It is important to have both at hand in case your crops get a disease. To cure them, you can click on the crop and use the required spray on it.
Last but not least, if you want to speed up your crops’ growth, you can use fertilizer on them. It is hard to come by, but it is worth having some around, especially if you’ve run out of food. Furthermore, each crop’s growing time varies. Here are the average times for each without fertilizer:
- Broccoli = 23 days.
- Cabbage = 10 days.
- Carrot = 11 days.
- Potato = 20 days.
- Radish = 12 days.
- Strawberry = 24 days.
- Tomato = 24 days.
While you can harvest a crop in its sixth phase, it is better to wait until the seventh phase to get seeds in return. This way, you can have a permanent source of food just by farming. The ingredients might not be the best, but as long as you have some cooking experience, you can create some interesting post-apocalyptic dishes with your harvest.


