Skip To...
Operation Wallclimber is one of the tougher missions in Armored Core 6: Fires of Rubicon. In it, the player takes the fight to the Rubicon Liberation Front’s fortress. With multiple powerful enemies to fight, it’s easy for players to watch their ammo and AP slip away, even for players familiar with the previous games. The good news is, there’s a lot of COAM to be won here, as well as a Battle Log to claim. Here’s everything you need to know about beating Operation Wallclimber and the Juggernaut heavy mobile artillery platform.
Operation Wallclimber Mission Guide
There are two main targets for the first part of the mission: the City Gatling Cannons and the Tetrapod MT. Taking them out won’t be easy because there are 12 stationary turrets on the Wall itself, as well as a number of MTs scattered throughout the city. Players who don’t destroy the turrets will find themselves harassed by lasers while they try to complete their objectives, so it’s worth dealing with them first.
Beware of Turret Fire
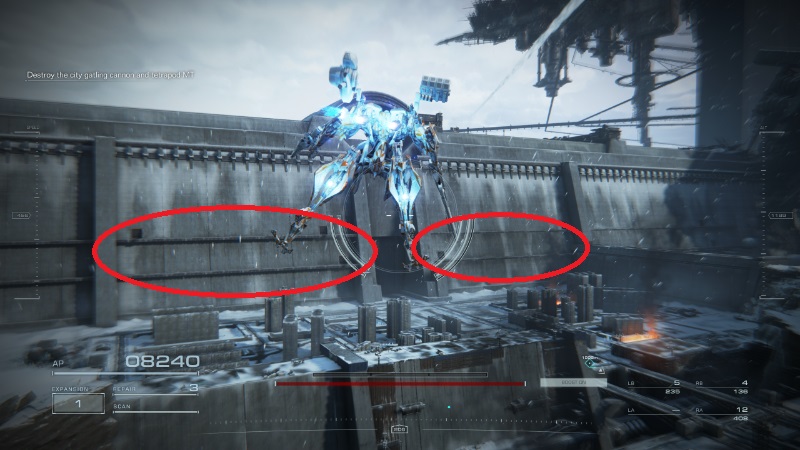
The wall turrets are highly accurate, long-range, and do significant damage, so ignoring them is a mistake. Mercifully they’re slow to fire and recharge. Ignore the Gatling Cannons and Tetrapod at first, flying along the outskirts of the city until you arrive at the wall itself.
Destroy the Turrets
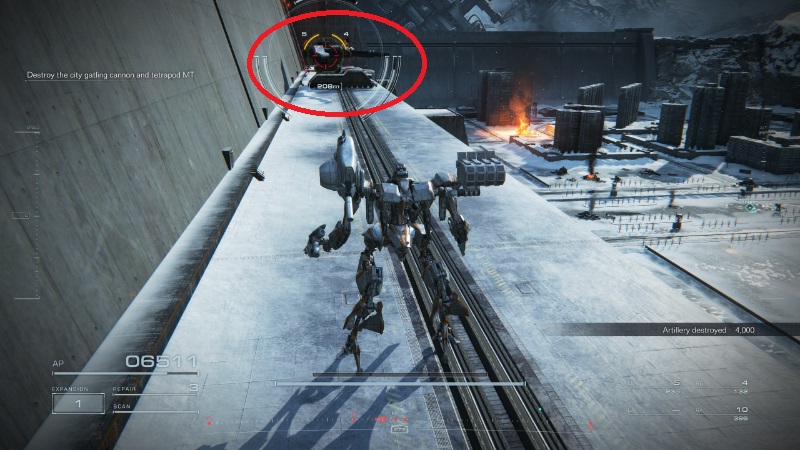
Work your way along the first and second levels of the wall, destroying all 12 turrets. Once they’re gone, backtrack into the city to deal with the Gatling Cannons. This method lets you concentrate on your targets without worrying about fire from other areas, which makes Operation Wallclimber much easier.
Eliminate the Gatling Cannons
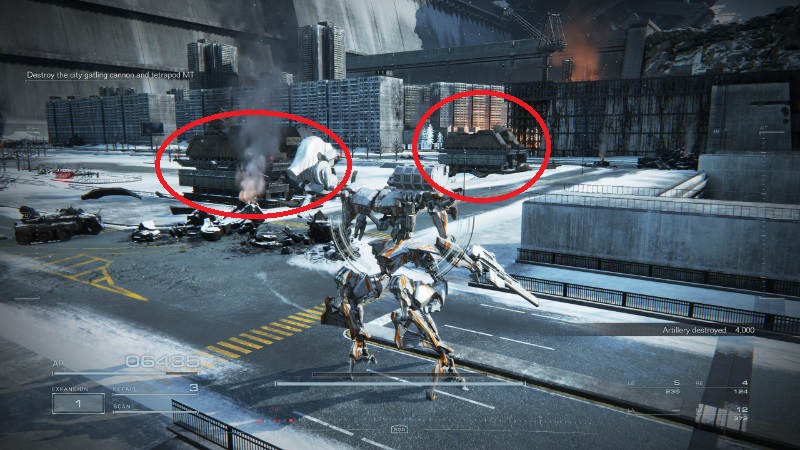
The Gatling Cannons have heavy, forward-facing armor, so frontal attacks are pointless. They’re stationary and slow to turn, however, so you can easily maneuver behind them and attack their weakpoints from the rear. If you want to survive Operation Wallclimber, that’s the way to do it.
Eliminate the Tetrapod MT
The Tetrapod MT guards the gate into the wall. It’s flanked by a turret on either side, so you’ll either want to destroy them or take the battle somewhere else. The Tetrapod is a rugged opponent: thick armor, good mobility, and powerful weapons make it difficult to deal with, especially for players still learning the ropes.
Take Advantage of Your Assembly
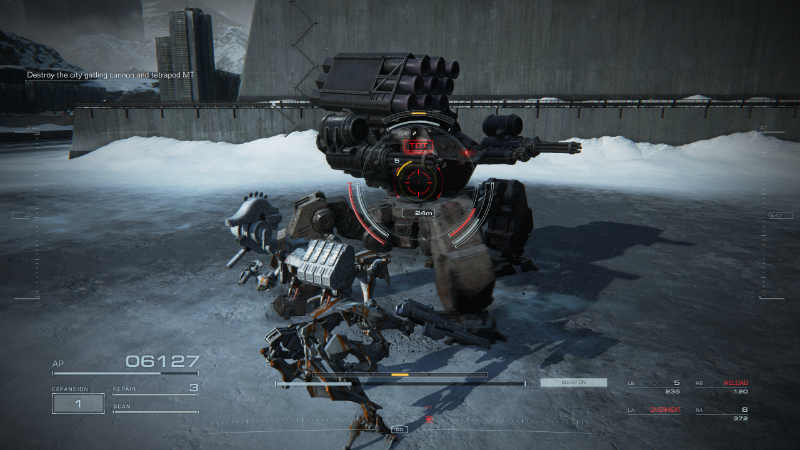
Your Assembly will dictate your approach to this part of Operation Wallclimber. The most important thing is that you stagger the Tetrapod and leave it vulnerable. A sword is arguably the best way to do this, but the Tetrapod is dangerous at close and mid-range, so be careful. The Tetrapod struggles to keep up with reverse-joints and other fast builds but can outmaneuver clumsier tanks. As long as you can keep the pressure on it and either tank through or dance around its attacks, it’ll go down eventually.
Reach the Supply Sherpa
Depending on how the fights have gone, you might be low on AP or ammo by this point in the mission. There’s a Supply Sherpa not far ahead that you can use to replenish all of your exhausted ammo and AP, but you have a couple of fights to get through first. Access the bulkhead on the second story of the wall (where you destroyed the turrets earlier) and enter the wall. There are some MTs inside. Dispose of them and move on. Use the Supply Sherpa to replenish, because you have a tough fight ahead of you.
How To Beat the Juggernaut
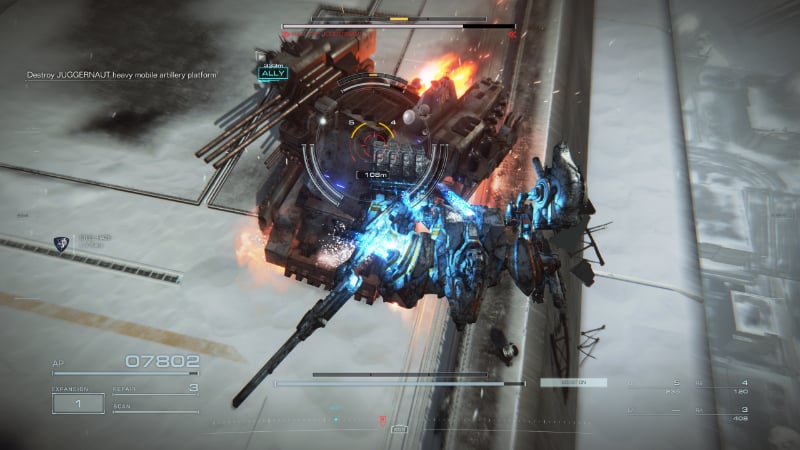
The Juggernaut is a heavy mobile artillery platform, and it’s earned that designation. Rugged armor and surprisingly quick boosters are this mech’s defining features. Like the wall itself, it’s not an insurmountable hurdle, but it won’t let the player best it easily. If you aren’t careful, 621’s story can end here. These tips will make surviving the mission a lot easier.
- V.IV Rusty joins you for the fight against the Juggernaut, so make use of his assistance. He doesn’t do a ton of damage, but he’s a valuable distraction. Let him draw aggro while you concentrate on damaging the Juggernaut and putting an end to Operation Wallclimber.
- Like the gatling cannons earlier, the Juggernaut comes equipped with rugged forward-facing armor, so you’ll need to attack it from behind. It looks slow, but its powerful boosters can hurl it toward you across the arena. Get behind it and use whatever weapon you can to maximize your damage. If possible, use a melee weapon to stagger it, then unload on it with everything you have.
- Once you reach the halfway point of the fight, V.IV Rusty will leave the battle to deal with incoming enemy forces, leaving you to finish this stage of the mission alone. It’s harder without Rusty as a distraction, and you may be low on resources by now. Always mind your position, staying above or behind the Juggernaut as much as possible. Concentrate on its weakspot, and you’ll destroy it.
With the Juggernaut destroyed, Operation Wallclimber is a success, and the Rubicon Liberation Front fortress will fall. Take a well-deserved rest. Armored Core 6 doesn’t get easier after this.
Armored Core 6 will be available on PC, PlayStation 5, and

