")
All veteran Destiny 1 fans will remember the fan-favorite Khvostov auto rifle, which has now appeared as a Legendary in Destiny 2. While not the exotic version, it is still great to have with you at all times for any type of content. However, obtaining it will take a lot of effort, patience, and time. But if you have the right fireteam and good gear and have finished most of The Final Shape’s campaign, you’re almost ready to add this weapon to your arsenal.
Destiny 2: How To Obtain The Legendary Khvostov
There are a few steps you need to take to obtain this classic weapon. Before we delve into details, here is the short checklist of everything you need for it:
- Finish the first seven campaign missions of The Final Shape. We have a guide on all the steps of the storyline for you to follow.
- Finish the first step of the Ergo Sum quest.
- Find the nine region gests in The Pale Heart.
- Complete the Convalescence questline until you unlock the Alone in the Dark quest.
- Retrieve 6 bits from Cysts.
- Head to the Impasse and unlock the chest.
While this all sounds pretty straightforward, it’ll take a lot of time, skill, and patience unless you have some friends to help you.
Finding the Region Chests
We are skipping the Ergo Sum quest because that starts as soon as you enter the Lost City, and following it is pretty straightforward. However, once you finish that, you can start looking for region chests across all areas. It is important to remember that the chests are marked with a cross on your map. Yet, they are still a bit hard to find, so we’ll go over each one.
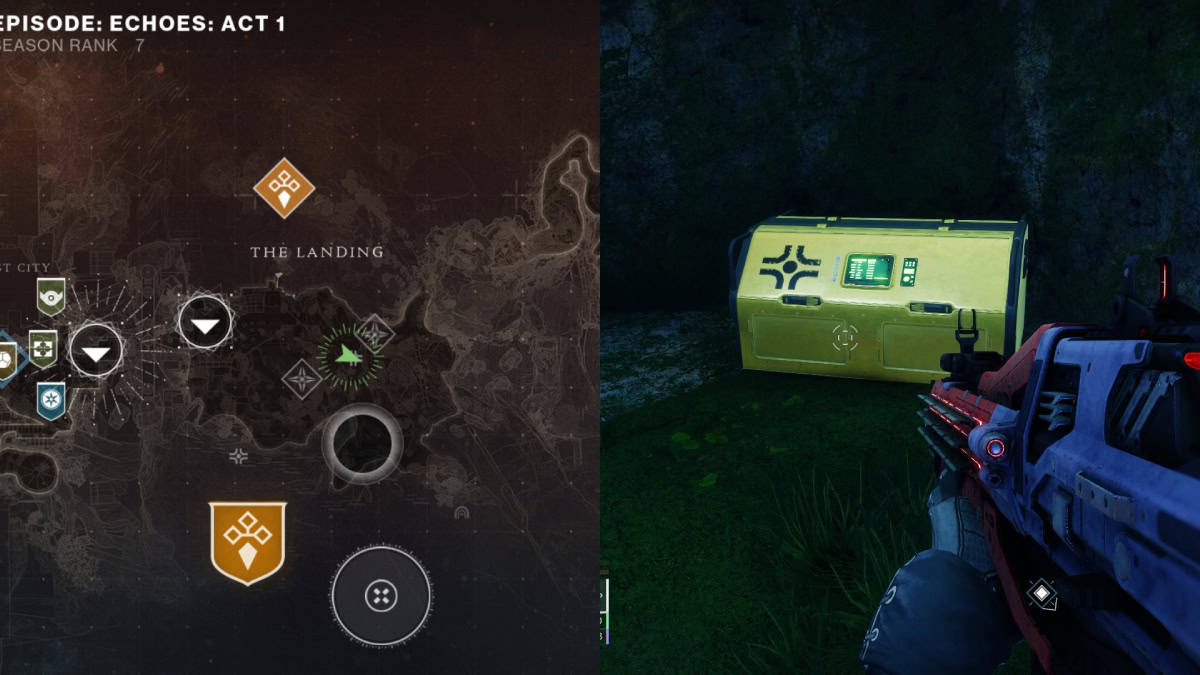
The Landing
For the first chest, head to the east part of The Landing until you spot an area with hanging bridges. Head to where the waterfall is and jump behind it. The chest is behind the waterfall.
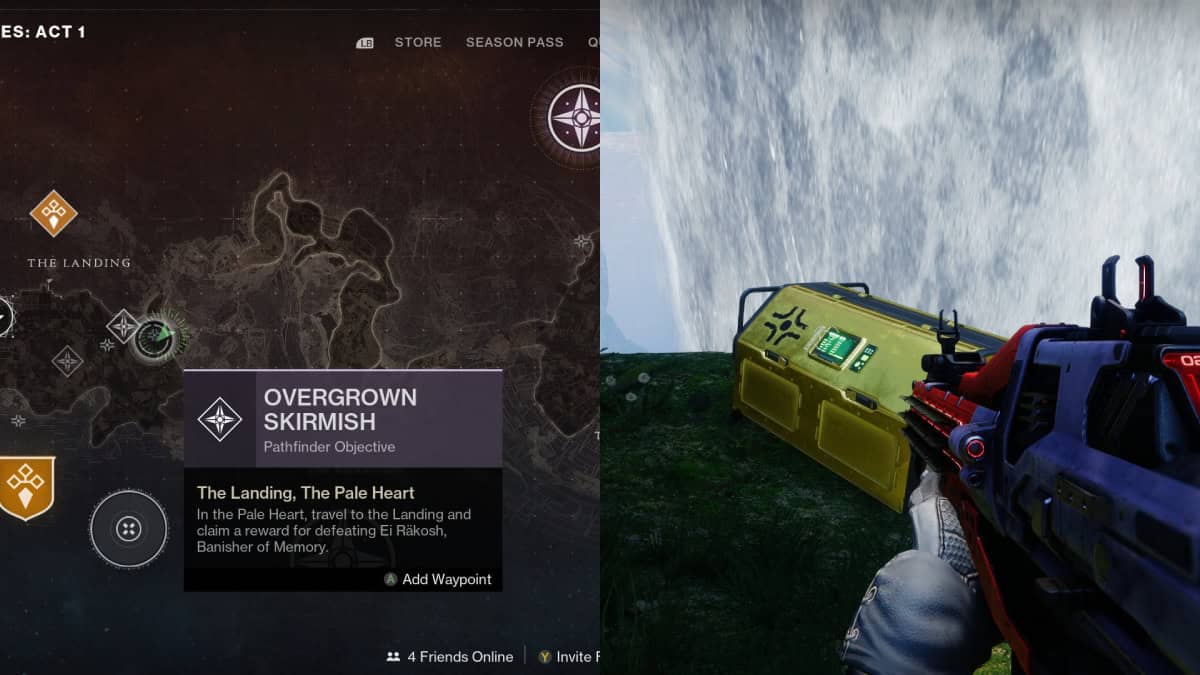
The second chest is almost at the center of the map. Keep following the next mark on your map until you find a small cave. Enter it and jump into the hole. Use your double jumps to land on a ledge where the chest is.
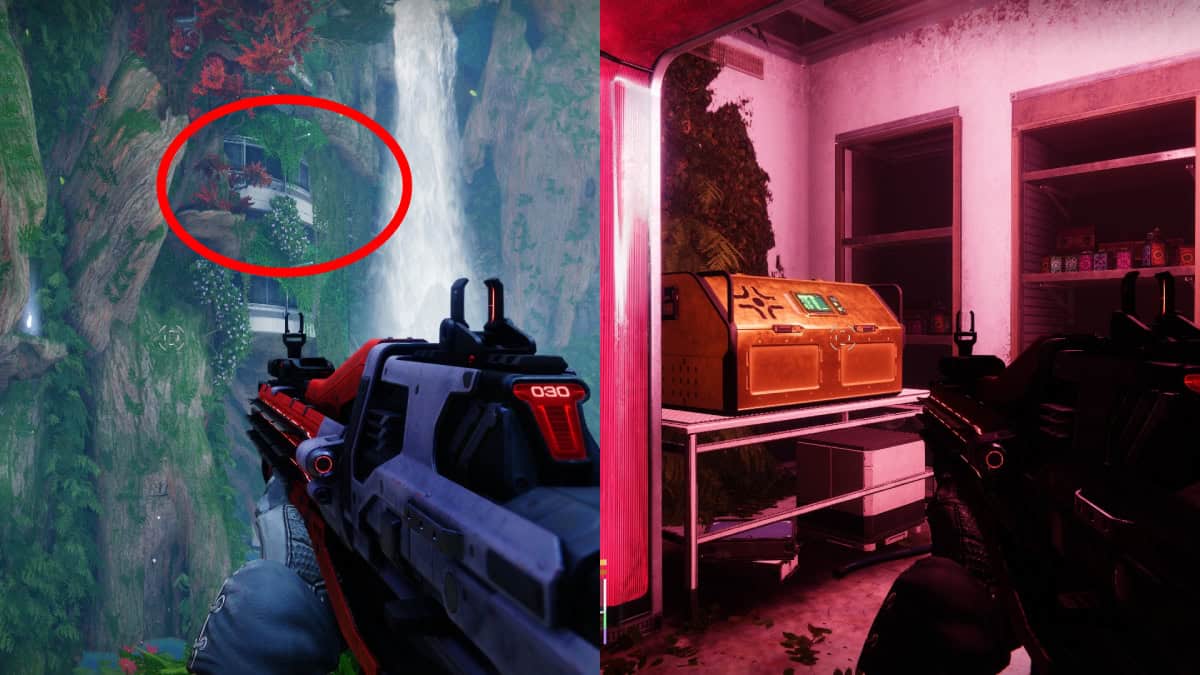
The third and final chest in The Landing is near the fast travel point. Teleport to it, and turn right until you spot a waterfall. Position yourself in front of the building with the tree branches and red leaves. Jump toward the building coming out of the landscape. Enter the building; you’ll find the chest at the end.
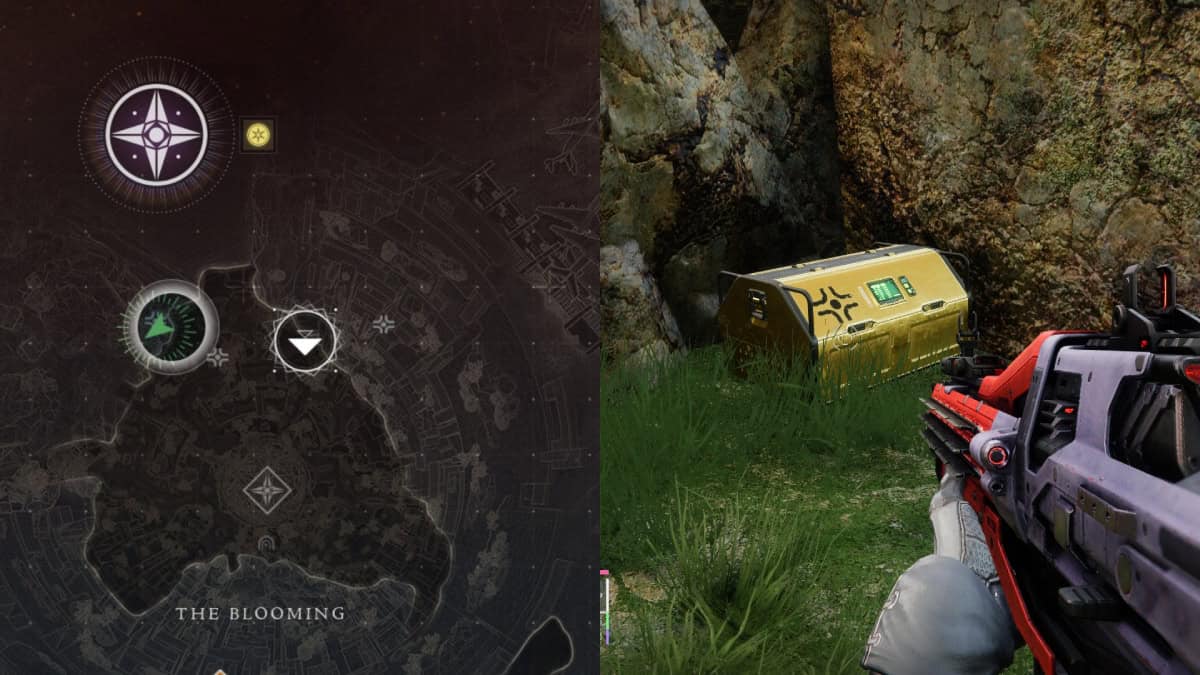
The Blooming
If you head to The Blooming, you can find the first chest across from the fast travel point. Head toward the coast where a bunch of enemies are and a black floating sphere in the sky. Hug the wall, and you’ll find the chest tucked next to a cliff.
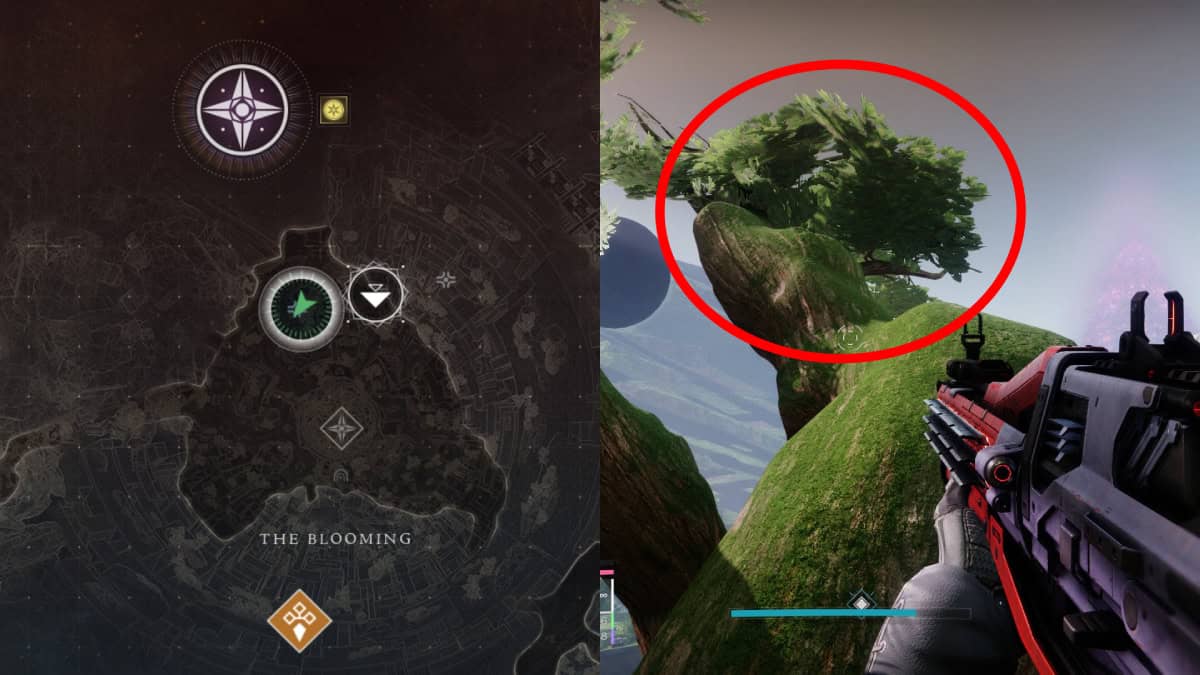
For the second chest, travel south from the first chest’s location until you spot a large tree. Climb to the top, and you’ll find the chest there.
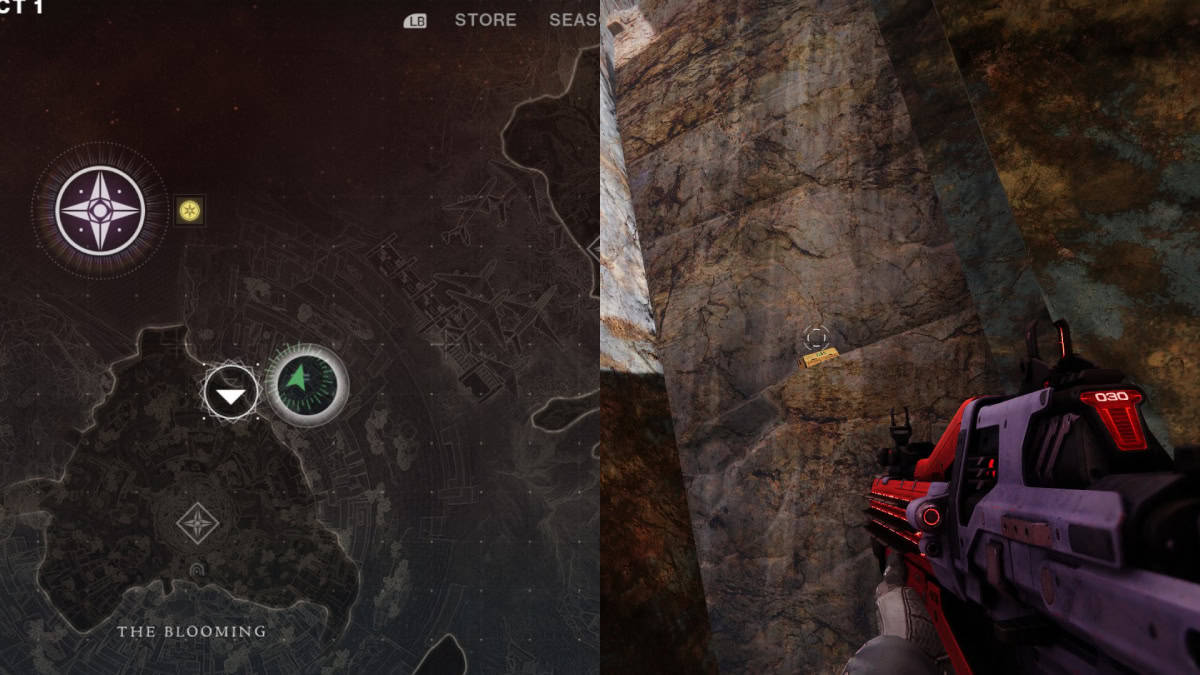
The final chest in The Blooming is at the far east of the area. You’ll need to enter the sector you visited during the campaign. However, when you reach the first clearing, hug the right wall and climb until you spot the chest on a cliff.
The Impasse
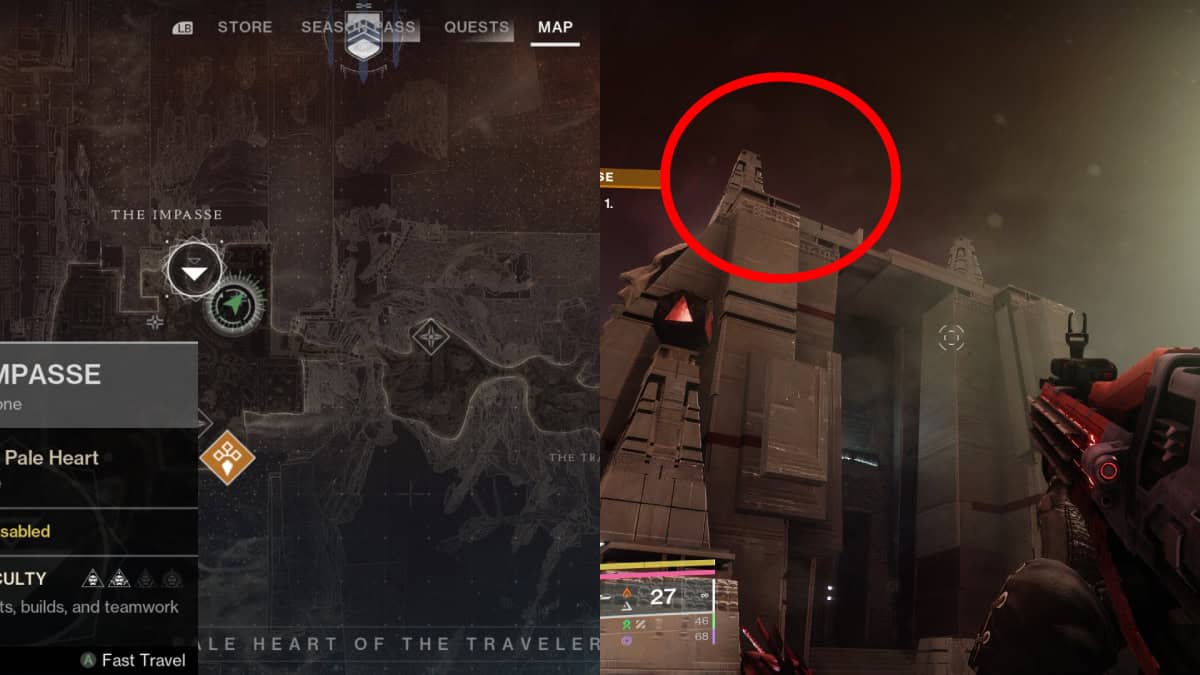
The first chest is easy to find. Head west until you spot the temple, which appeared during the campaign. Climb on top of it to find the chest.
For the second one, turn left from where you found the first chest and keep going until you reach a quarry-like area. Jump down, and you’ll see the chest on a ledge.
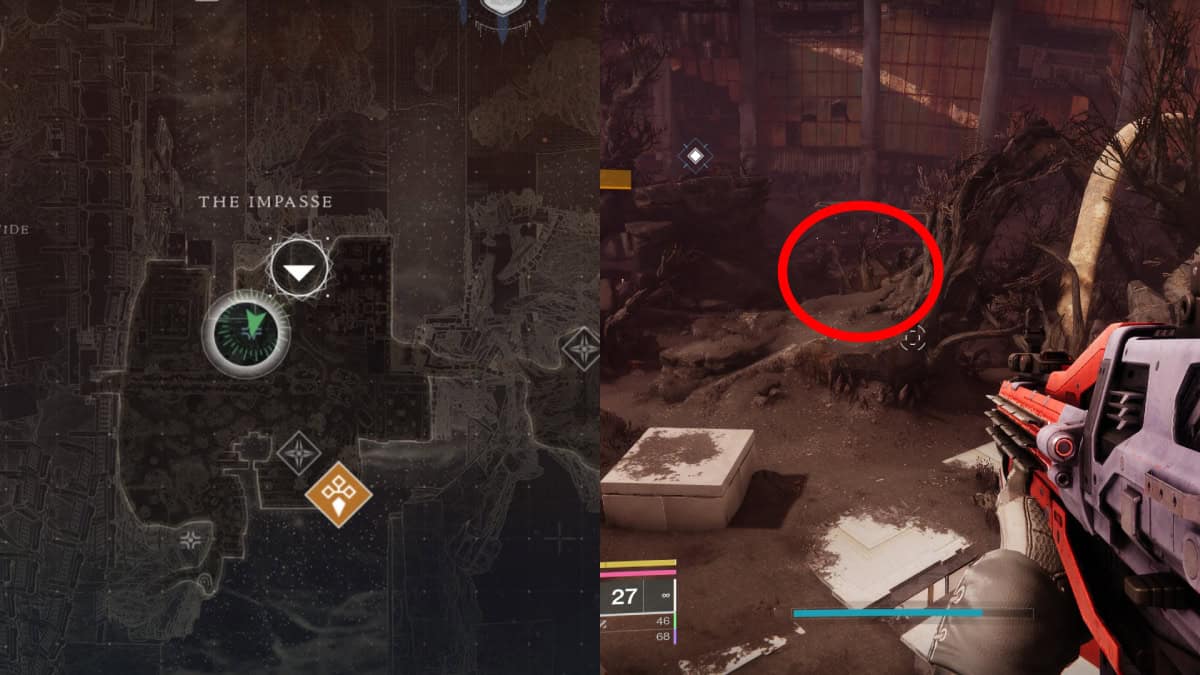
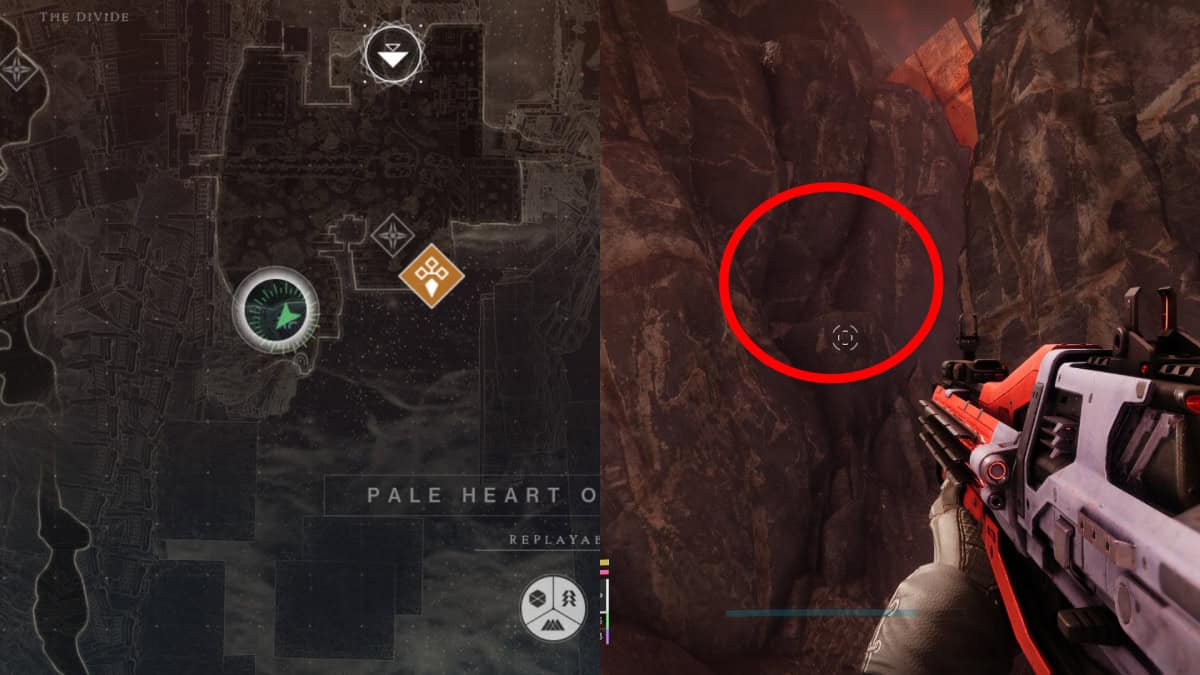
The final regional chest you’ll need for the Legendary Khvostov in Destiny 2 is near The Impasse’s lost sector. You might remember the campaign took you there near some stones wrapped with a purple light. Climb on it, then jump to the place we show in the image: the chest inside that small cave.
Alone In The Dark Grind
The final step to get the remaining five bits for the Legendary Khvostov in Destiny 2 requires you to unlock the Alone in the Dark quest. To do so, you must follow the Convalescene questline, which begins with Convalescence: Rootbound and ends with Convalescence: Greenery. The first quest will take you to The Forgotten Deep sector. The second one will task you with opening Overthrow chests in The Pale Heart areas. Completing all Overthrow stages can finish this quest. Finally, you need to do the Sword Cyst to unlock Alone in the Dark.
Once you unlock the Alone in the Dark quest, you must wait until you get specific objectives. Below, we’ll list every mission you need and where you’ll find the bits for your weapon.
| Quest | Bit Location |
|---|---|
| Aerial Ace | Finish the mission normally and head toward the exit. Once you get past the lava, enter the small cave to find the clutter containing the bit. |
| Smothering Darkness | Complete the mission and head to the exit where the purple crystal is. Turn right to find the bit. |
| Moth | Follow the cyst as usual until you spot an Ogre on a platform. Drop down until you reach the end of the room and enter the small room to your right. |
| Searing Light | Complete the mission and enter the room that has a purple glow. Your objective is in the room to your left. |
| Slayer | Finish the mission and head inside the cave full of roots. You can find the bit behind a tree in a small body of water. |
| Sword Cyst | This might be the first bit you get, but if you missed it, play the Cyst again until you reach the room with platforms and drawbridge. Head to the far back, and you’ll spot a small room with a dead-end; the bit is at the back of it. |
Opening Khvostov’s Chest
The final step to obtain your Legendary Khvostov in Destiny 2 is to head to The Impasse and prepare for a dose of nostalgia. Fast travel to the area and enter the familiar building from the game’s tutorial. Keep following the corridors inside the place and loot the chest to obtain your auto rifle. Remember, this is only the Legendary version, and we’re still looking for the Exotic version for those looking for a better rifle for their collection.


