")
Chapter 4: Trial & Error definitely has the most mini-puzzles in Roblox Terminal, even in beginner mode. And many of the mini-puzzles are tied to one another. Once you finish one, it usually helps you complete another. Despite all the puzzles, they aren’t particularly hard, not like Chapter 3: Descent, where you had to think outside the box. Terminal Chapter 4: Trial & Error is more of a brain teaser on beginner mode.
How to Complete the Domino Puzzle in Terminal Chapter 4
On the one table, you’ll see a series of dominoes. For now, you can’t complete it because you’re missing domino pieces. Instead, you’ll have to first solve a series of mini-puzzles to get them.
Solving the Crossword Puzzle
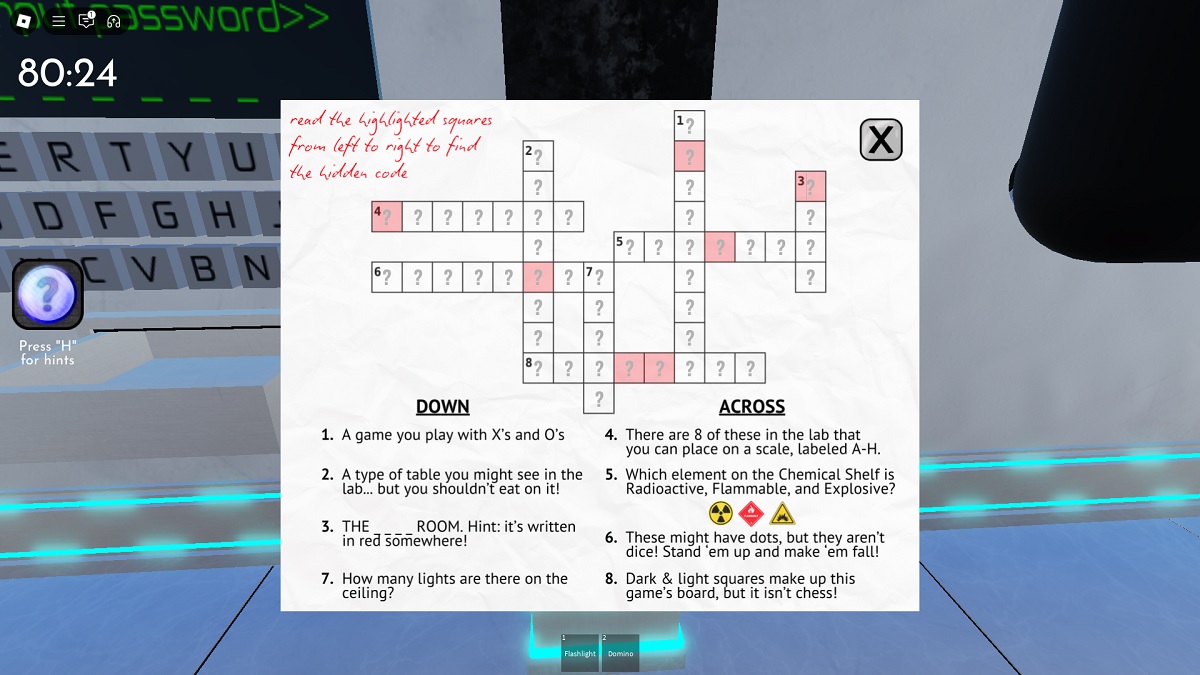
Starting with the crossword puzzle opposite of the Chemicals Closet. There’s a keyboard on the wall, which obviously needs the correct word. You learn it by completing the crossword puzzle nearby.
- Answer to Question #1: Tictactoe
- Answer to Question #2: Periodic
- Answer to Question #3: Game
- Answer to Question #4: Mixture
- Answer to Question #5: Uranium
- Answer to Question #6: Dominoes
- Answer to Question #7: Seven
- Answer to Question #8: Checkers
Now, jot down the letters in the red boxes, from left to right. You’ll get the word MOCKING. Type that into the display and get your first handful of dominoes. Oh, and a bottle, which you need for later.
Solving the Dice Puzzle

To the right of the Chemicals Closet is a keypad and a small poster with dice. There are four dice placed around the room. Read the numbers facing up, in this order:
- Cube: 4
- Octahedron: 5
- Dodecahedron: 9
- Icosagon: 1
Punch those numbers into the keypad, then grab the next set of dominoes and bottles are yours.
Solving the Sudoku Puzzle
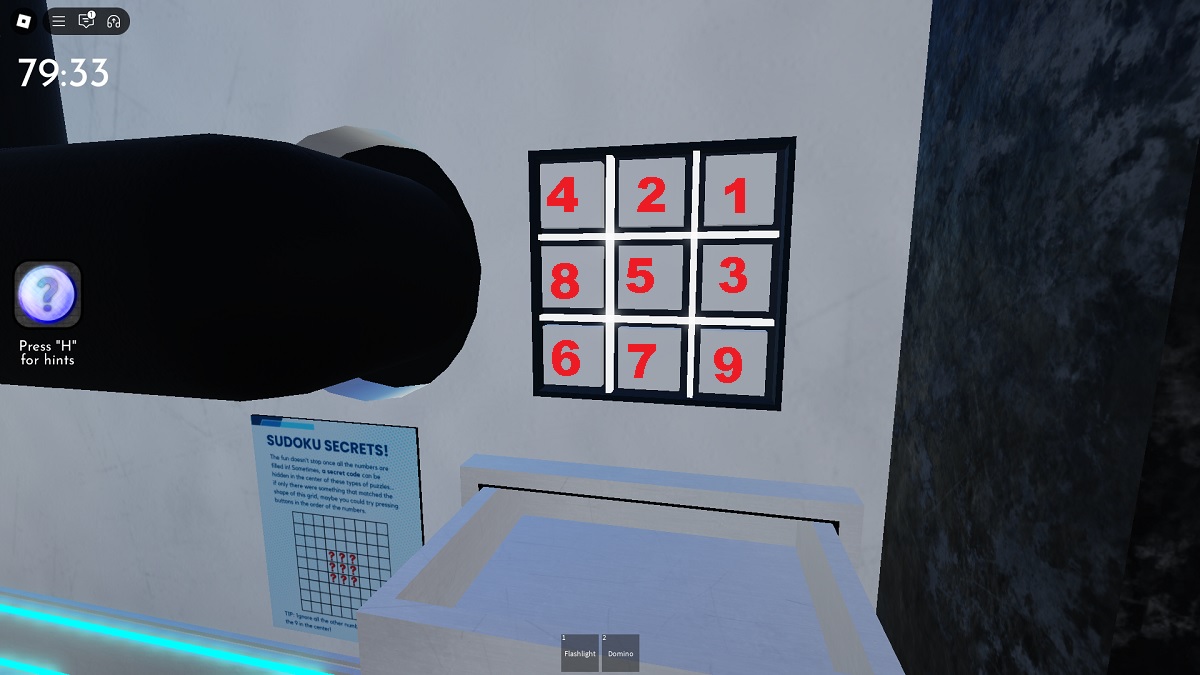
On the other side of the Chemicals Closet is a sudoku puzzle and a keypad that has had the numbers completely removed. Luckily, the sudoku puzzle has already been solved. You’ll find the solution on the counter with the doll house.
Focus on just the nine blocks at the very center, the same blocks that were marked with question marks on the sudoku poster by the keypad. Starting with 1, press the keys in a linear progression—1, 2, 3, 4, 5, 6, 7, 8, then 9.
Solving the Domino Puzzle

By this point, you just need two more dominoes. Near the mass scale, you’ll find one last bottle. Dump them into the big bottle in the corner and get the two remaining dominoes.
Solving the puzzle is simple: place the dominoes in a way that the sides touching are matching numbers. For example, the first domino on the board (in the top left) is a five, so the next domino must have a five.
You’ll be left with a single domino, which you use to unlock the Fume Hood and press the button inside.
How to Activate the Teleporters in Terminal Chapter 4
Pressing the button in the Fume Hood will activate one of the terminals in the middle of the room. Interact with the keypad and punch in the code 6498, then interact with the tile that lights up. You’ll be shrunk down to doll size. Head inside the doll house!
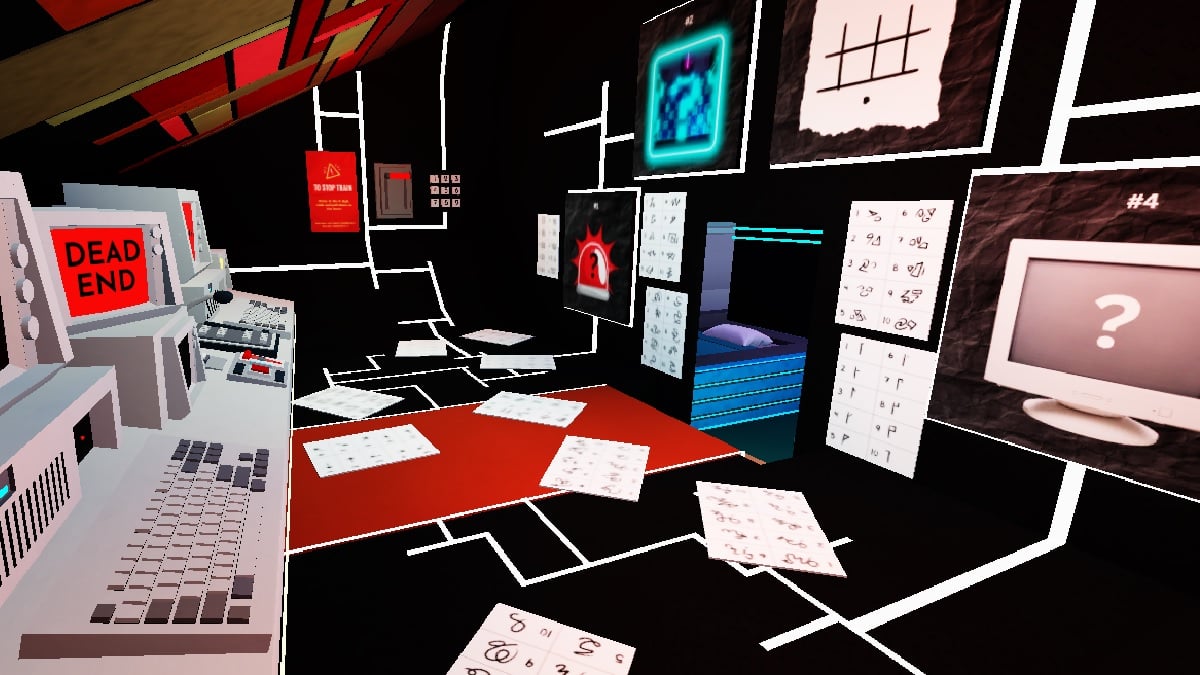
Follow the blue line upstairs and take a look at the wall with pictures. If you find those objects in the house, and interact with them, it’ll reveal a number. The numbers go in order of the objects, from left to right. That means the code will be 4821.
Solving the Scale Puzzle
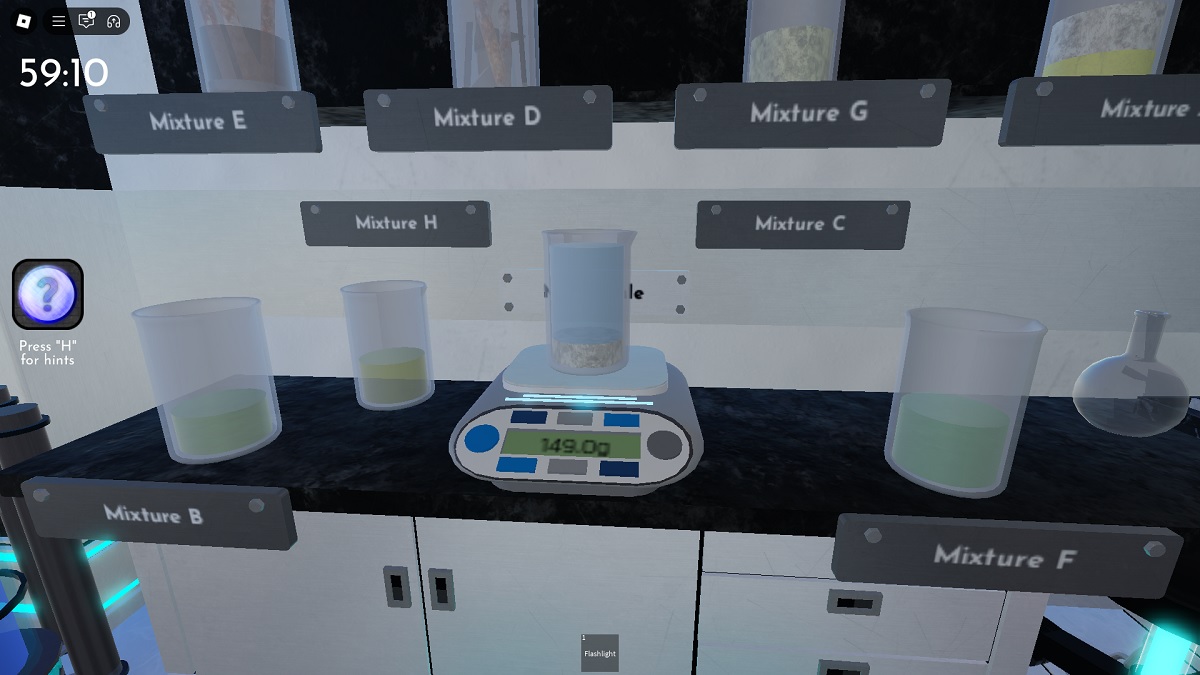
Unlike the normal mode of Terminal Chapter 4, the scale puzzle is much more simpler. To learn the code for the next terminal, place each mixture on the scale and write down their mass. Order the mixtures from heaviest to lightest. Focusing on the five heaviest, you’ll get the word CAGED.
Stepping through the next teleporter, you’ll come to enlarged dominoes. Follow the blue powerline to a color wheel. To power the next teleporter, you have to play a game of Simon Says. The colors are different for everyone and will change if you fail.
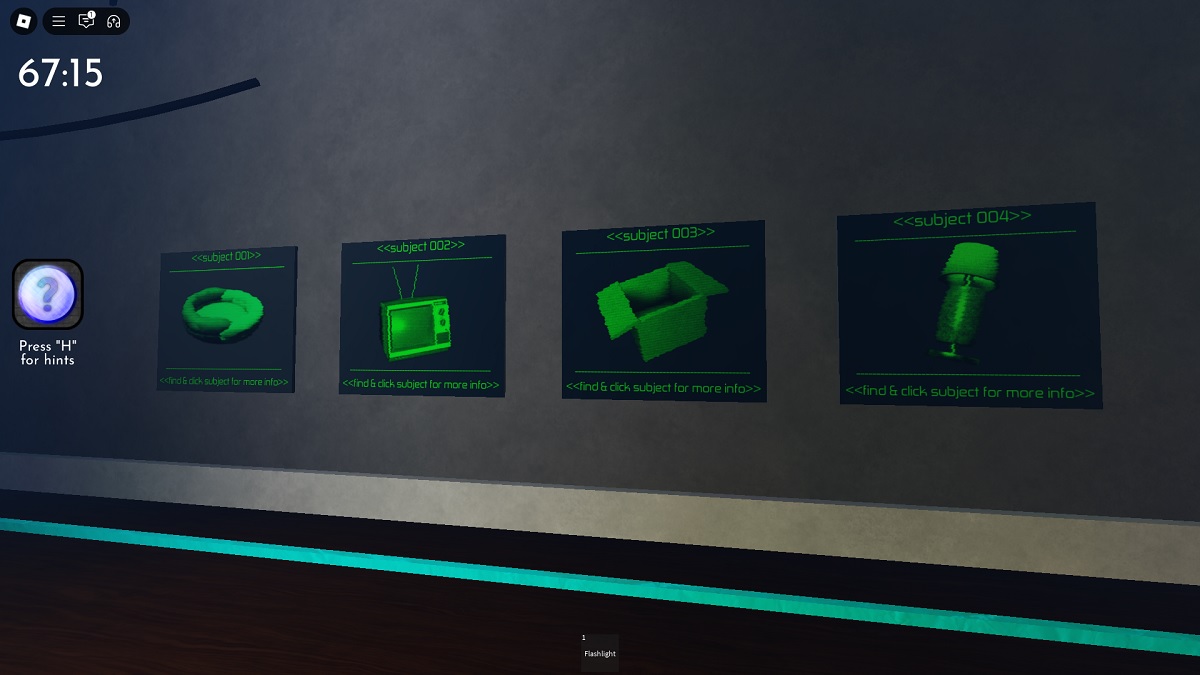
Solving the Picture Puzzle
Interacting with the next terminal, you’ll see a picture of a beaker, double helix, amoeba, and another slightly different beaker. The goal is to decode the message and you’ll get the 4-digit code.
Around the room are the same images, followed by a number. The first picture is on the side of the counter with the Legos; the second is to the right of the Chemicals Closer; the third and fourth are on the floor and above the poster of the periodic table, respectively. It’ll translate to 2653.
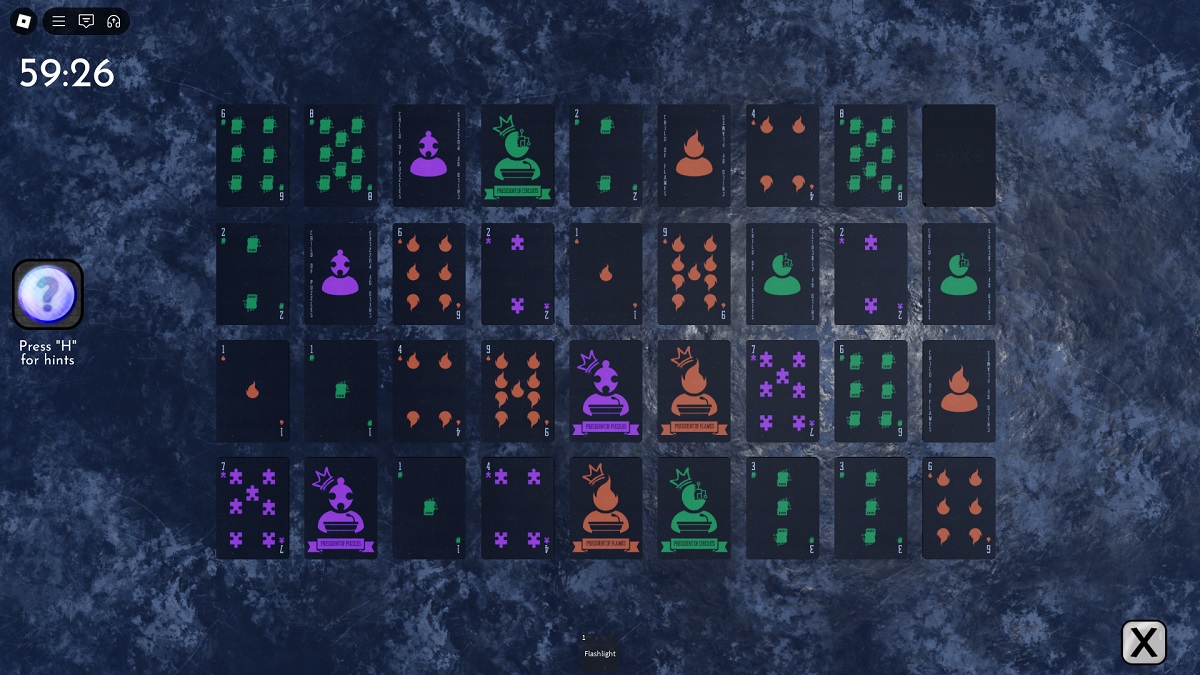
On the other end of the teleporter is a card matching game. You aren’t limited by any turns, so take your time. Completing it will power the next and final teleporter.
How to Escape in Terminal Chapter 4: Trial & Error
Type in AHEAD into the terminal and activate the teleporter. Follow the blue powerline to another keyboard and a note. It states that nine of the Lego buildings have a sticker with a letter. Each building is numbered—just focus on one through nine. You’ll get the word REACTIONS.
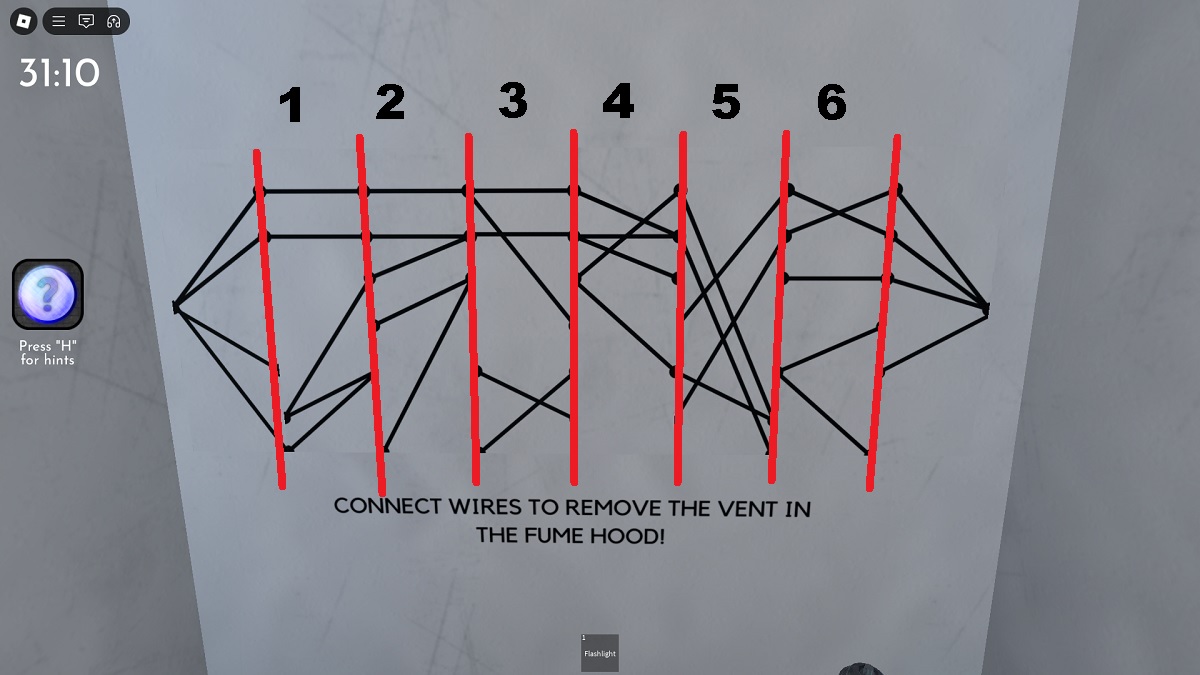
Back in the lab, the Chemicals Closet will open, revealing one final puzzle. The goal is to adjust each section so that the wires are connected. I’ve separated each one into sections and will address them as Section 1 through Section 6 (as seen in the screenshot).
- Move Section 4 to Section 6
- Move Section 2 to Section 5
- Move Section 3 to Section 1
Gas will escape from the Fume Hood, giving you the opportunity to escape the room and, more importantly, you’ll have Roblox Terminal Chapter 4: Trial & Error under your belt!


