
Skip To...
The Honkai: Star Rail Luminflux Pyxis puzzles can be tricky to navigate, especially toward the end of each set. You’ll encounter these particular puzzles while exploring the world after Belobog, Xianzhou Luofu. To solve them, you’ll have to rotate devices to destroy orbs in a particular pattern. By redirecting beams, you can eliminate all the orbs simultaneously. If you need help solving Luminflux Pyxis in Honkai: Star Rail, we’ll do our best to guide you.
How to Unlock the Honkai Star Rail Luminflux Pyxis Puzzles
Over the course of three days, players can interact with the Honkai: Star Rail Luminflux Pyxis puzzles for rewards. These can include things like Stellar Jade and Trailblazer EXP. These puzzles are easy at the start but get more difficult each day. The game adds on extra mechanics, ultimately making the puzzle a little harder to solve each time you come across it. Despite the difficulty curve, the puzzles are still pretty enjoyable to complete and get the hang of.
If you’ve completed the Humming Antlers chapter story quest, you may find these kinds of puzzles familiar. The last time you saw them, you used them to destroy all the Ambrosial Arbor coils. This time around, the game mechanics are similar, and the puzzles are barriers that block your way from advancing.
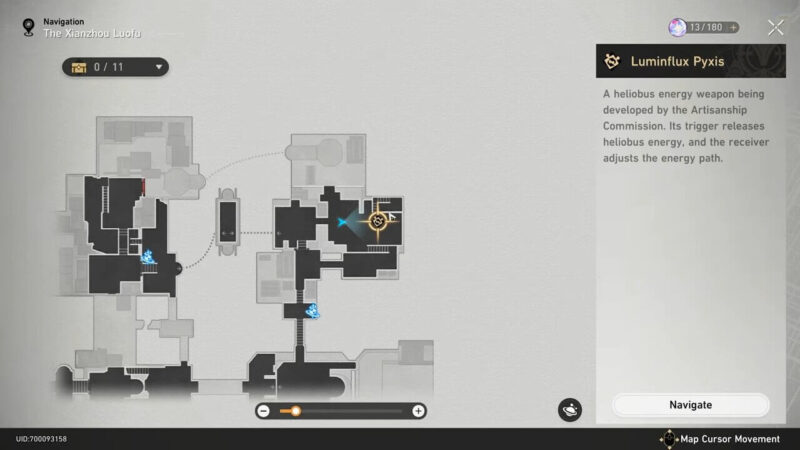
Once you complete the quest, you can access the puzzles repeatedly for the next three days, near the top right of the Artisanship Commission Map. To do so, simply speak to Master Gongshu. A puzzle marker is on the map to let you know from now on that the puzzles are available for your three allotted days.
Luminflux Pyxis Puzzle Solutions: Day 1
Solving Luminflux Pyxis puzzles in Honkai: Star Rail off pretty simple at first start. Unlike the previous version of this quest, you’re not destroying coils — you’re destroying orbs. These puzzles are technically difficult in comparison to the ones you find in story mode. Nevertheless, this doesn’t automatically make them the hardest things in the world, at least not at first.
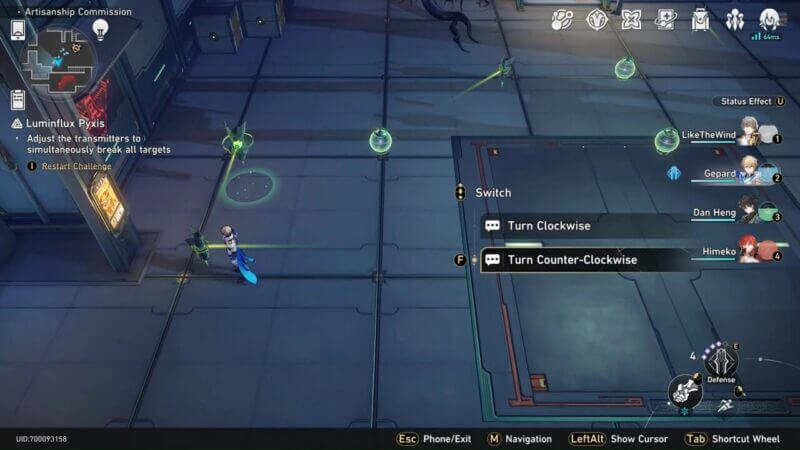
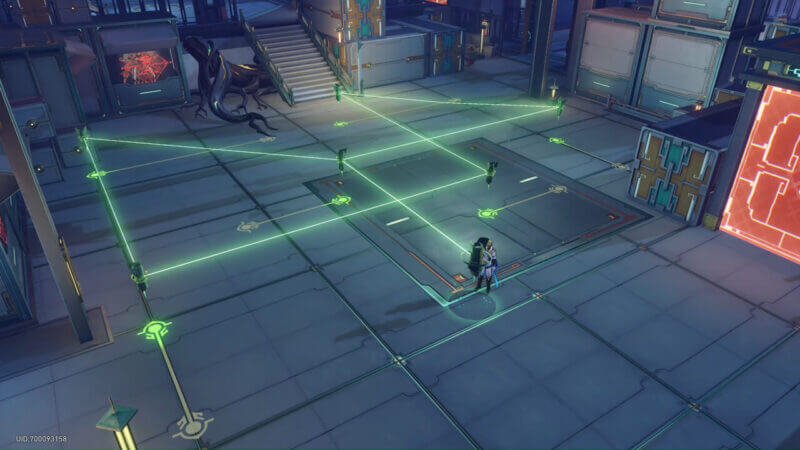
To solve the puzzles, rotate the devices to reflect beams of light off each other. The rays will form a pattern that destroys the orbs all at the same time. You can rotate the beams clockwise or counterclockwise until you have a pattern that works.
Puzzle 1
Here is the first Luminflux Pyxis puzzle solution:
- Start with the device under the light cone.
- Align it to the one in the bottom right corner.
- Direct the bottom right one to the top right.
- From there, watch as it directs things to the last device.
This completes the puzzle, giving you a Basic Treasure Chest.
Puzzle 2
In Puzzle 2, you have five devices this time around.
- Align the bottom left device.
- Align the top middle toward the right to connect to the device on the right side.
- On the third, rightmost device, rotate it down toward the bottom right device.
- From there, direct that last bottom right device horizontally until it hits the final device on the far left side.
For completing the second puzzle, you’ll get a Basic Treasure Chest.
Puzzle 3
In the third puzzle, you’ll have to connect a total of six devices.
- Connect the first toward the rightmost device.
- Connect to the one on the right before aiming the beam downward. Aim down to the rightmost but lowest device on the puzzle.
- Next, horizontally connect the beam from right to left until it comes full circle.
For completing the third puzzle, you get a Bountiful Treasure Chest.
Luminflux Pyxis Puzzle Solutions: Day 2
On day two, things step up just a notch. Now instead of just rotating devices, you also have to move them on designated paths underneath the devices. It ultimately makes these puzzles more challenging, but not to a point where they’re impossible. If you’re having trouble, peruse below for a little help on how to solve Day 2’s set quickly.
Puzzle 1
On Puzzle 1, you have a total of four devices, and only two can move about.
- Start by aiming the launcher at the top, moving the nearby device right to align it with the shooting beam.
- From there, you don’t need to touch the second device, as it’s already aimed in the right direction.
- When you get to the third device, aim it diagonally toward the bottommost right device.
- Align the fourth device with the third device, aiming at the orb at the top.
Once you solve this puzzle, you’ll get a Basic Treasure Chest, just like before.
Puzzle 2
For the second puzzle, you have four devices. Only three require rotation.
- Start by rotating the device above the launcher diagonally, toward the bottom left.
- In order to connect the two, move the second device to align them properly.
- The third device rotation is obvious; simply move it so that it connects with the fourth device.
- From there, you don’t actually need to rotate the next device. Once you’ve gotten to the last device, rotate it and move it up so that it aligns with the previous device.
- Next, rotate it to diagonally connect to the last orb in the southmost right corner.
You get a Basic Treasure Chest for this puzzle.
Puzzle 3
The final round of Luminflux Pyxis puzzles in Day 2 is complicated compared to the other puzzles in this quest. You have a total of five devices, all of which must move and rotate to complete the quest.
- For the first device, move it to the bottom and spin it towards the top right.
- Then take the second device and turn it so that it diagonally connects to the orb at the bottom right.
- Afterward, move the third device to the bottom before rotating it to the left. It should connect with the two orbs and link to the fourth device.
- Finally, for the fourth and fifth devices, rotate the fourth diagonally toward the fifth, then rotate the fifth toward the last orb.
You get a Precious Treasure Chest for this puzzle.
Luminflux Pyxis Puzzle Solutions: Day 3
The final day of these puzzles has the most complex setup of them all. While there aren’t any new mechanics added, it’s still worth it to read a summary if you’re intent on solving these puzzles quickly. Below is an overview of how to solve all three.
Puzzle 1
- For the first puzzle, start by moving the device closest to the launch upwards. This will direct the beam toward the second device.
- This allows you to launch the beam upward toward the orb above. Because of the pattern of the puzzle, this orb will be the last one to receive the light beam.
- Aim the device that the launch device is targeting at the two orbs along the way so that the beam hits them both.
- For the next device, aim it toward the bottom left corner. This action allows you to align the beam with the orb on that path toward the fourth device.
- Once you get to the fourth device, shift it down and rotate it to face the first device, but from the right side.
Once you’ve done this, you get a Basic Treasure Chest in Honkai: Star Rail.
Puzzle 2
Compared to the others, this puzzle is easy. Only one of the devices needs to actually move.
- Start with the one on the bottom right, rotating sideways until it faces the top left.
- Then, take the device on the left above the launcher and move it until it aligns with the first device.
- Once there, rotate the first device to direct the light toward the third device.
- Then take the third device and rotate it diagonally toward the bottom left. This will align it with the last device.
- Take the last device and direct the beam toward the remaining orb on the right.
Puzzle 3
To solve the last puzzle on the final day, move the first device above the launching point.
- From there, aim the second device to shoot at an angle up to the leftmost point.
- You can then aim the third device down so it hits the fourth device.
- The fourth device doesn’t need to move at all. Instead, rotate it so that it shoots to hit the fifth on the right side of the puzzle.
- Next, shoot the device up to hit the one closest to the stairs, then aim that one at the final device on the rightmost side. Once that’s done, you have a connecting stream that solves the puzzle.


