As you venture through the Nine Realms, you’ll realize that there are loads of things for you to do, like the Sigrun’s Curse Favor in God of War: Ragnarok. Though, sometimes the quests and side quests that you chose to do are pretty difficult and oftentimes not explained very well. You can be stuck, not having any clue how to complete the favor. Luckily for you, we’ve got guides for all kinds of God of War: Ragnarok quests, bosses, and more! Keep reading to learn how to Complete Sigrun’s Curse in God of War: Ragnarok.
Sigrun’s Curse Guide: God of War Ragnarok

This quest is best started in Lake of Nine, Midgard. However, there are two different ways you can find this quest to start it.
- Go to the Derelict Outpost
- Head to the Oarsmen
Keep in mind that no matter which way you begin the quest, you will still have the same outcome. Triggering the quest is pretty simple. Once you are inside the Derelict Outpost or the Oarsmen, it will begin. However, if you are starting in the Derelict Outpost, you’ll have to grapple your way up. The Sigrun’s Curse Favor will be started. The biggest part now is to keep on heading forward, listening to Mimir talk about Sigrun’s Curse with your companion, fighting any enemies that cross your path.
How to Complete Sigrun’s Curse in God of War Ragnarok

Now, your next step is to defeat some enemies and explore the surrounding area. Keep reading below to learn how to complete Sigrun’s Curse in God of War: Ragnarok.
- As you continue farther into the area, you’ll realize there are some enemies that you will have to take out.
- Kill the enemies.
- Once the enemies are fully cleared out, go over to the area where the end of the platform is.
- There will be rock formation, and just behind it, the fire Lore Marker in this quest.
- From there, if you look to your right, you can find one of Odin’s ravens sitting on a rock. Use your Leviathan Axe to take the bird down.
- Now, you’ll have to do some grappling.
- To the right of where you first came into the area, there will be another crane post for you to hook onto to grapple. However, you’ll need to rotate it so that you can grapple to the opposite side.
- Once you make it to the other side, head in the direction to the left of you. There, you can find a chain.
- Pull the chain until the post is as high as it can be.
- Now, grapple to the other side once again, and prepare for some fighting.
- Clear out the frost-covered enemies with your Blades of Chaos and get ready for the next step.
- Once the area is cleared, there will be a ledge to your left that you’ll need to climb up.
- However, you will be face to face with some nasty Wisps and Hel-Raiders once you reach the top of the ledge, so be ready to fight.
- You can allow your companion to take out the Wisps while you focus on the Hel-Raiders.
- In the process of trying to move forward, you’ll encounter a crane post that is stuck.
- If you head down the ledge, you can find a chain that can be used to raise or lower the post.
- Lower the post as low as it will go and turn it to the left.
- Once you’ve turned the post, you can raise it back up and grapple to the other side successfully.
- Lore Markers and Loot can be found now!
- Once you make it to the other side, climb up the ledge once again.
- Here, you can find another Lore Marker and a Legendary Chest to loot.
- Make sure you take a peek at the Lore Marker and read it before you move on.
- Now it’s time to move on. From where you stand, you can turn around and find an area that can be grappled up.
- Once your up, keep a close eye on your surroundings. There will be a glowing item for you to collect here.
- Pick up the first half of the key and keep looking for the other half.
- Now, you’ll have to head back and make your way over to the Oarsmen Region. (If you started Sigrun’s Curse in the Oarsmen Region, this is where you would begin the quest, then look back to step 1 to continue once you’ve finished this portion.)
- You’ll encounter some vines that you’ll need to clear out to continue moving on.
- Using the Blades of Chaos, you can easily cut through the vines and clear the way for you to jump through the gap.
- You should see some stairs now. Head down those and prepare for a fight.
- Once you clear out all the enemies, you can more farther ahead and get started.
- There will be a wall that you’ll have to climb. Once you’re at the top, you can look around to find the next staircase.
- Once you’re up the wall, you’ll have to take on Stalker, the half horse, half human enemy.
- The best way to take Stalker down is by using your Leviathan Axe. Throw it at Stalker’s horns when they are glowing.
- Make sure to collect the rewards you find in the area after defeating Stalker, and don’t forget to collect the items from the chest.
- Now, there will be a chain that you’ll have to climb to reach the next level.
- Once you’ve climbed up, you can find another of Odin’s ravens. Be sure to take it out ASAP.
- Now, if you look around, you’ll be able to see a pile of wood. Use your Blades of Chaos to slice through the pile of wood to reveal an area you’ll have to check out later.
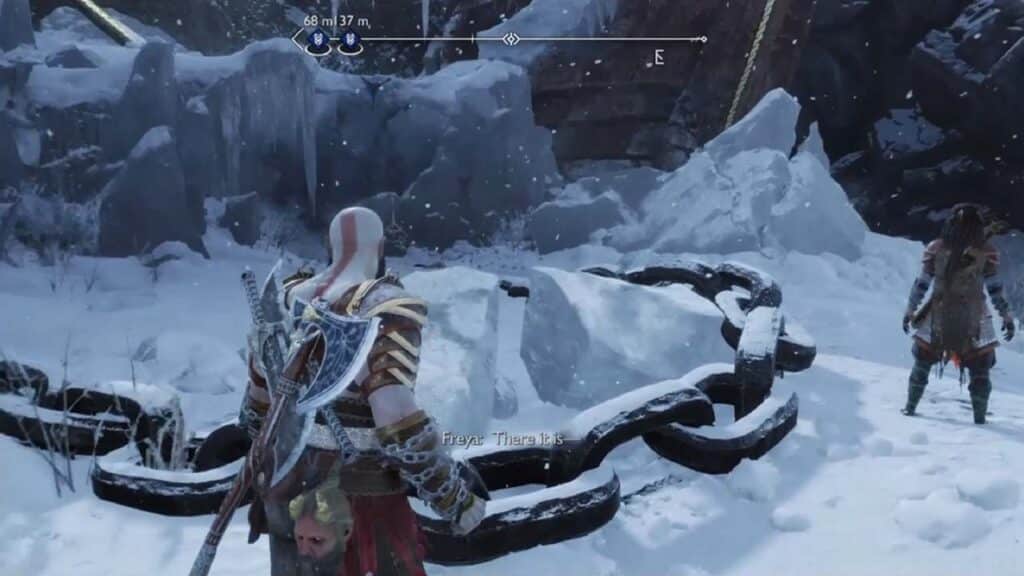
- Now, head to the massive chains sitting in the snow and have Kratos pull on them.
- Now you’ll be able to access the staircase you need to use.
- Go down the stairs and defeat the Wisps that await you below.
- Once you clear the enemies, look for the Legendary Chest that’s waiting for you.
- Once you’ve looted the Legendary Chest, you’ll find another Lore Marker in addition to the second half of the key.
- Make sure you take a quick peek at the Loot Marker before going to collect the second half of the key.
- There will be a locked gate in the area. if you search around it, you’ll find the second half of the key.
- Now, you’ll have to make your way to The Lost Treasury.
- This can be found over by the Derelict Outpost, so you’ll have to make your way there.
- When you reach the area, a Mystic Gateway will unlock.
- When you arrive, climb over the ledge, and you will have found The Lost Treasury.
- Though, as soon as you arrive, you’ll be met with frost-covered enemies.
- Use your Blades of Chaos to take out the enemies and continue on.
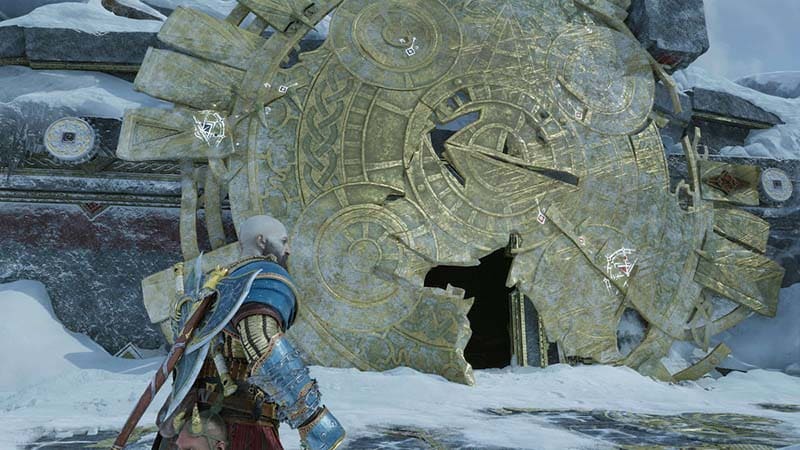
- The entrance is blocked by Tyr’s Statue Shield.
- This will make it difficult to get in, as you’ll have to find another way now.
- As you approach the shield, you’ll find some markings.
- You can climb up on the right side.
- As you climb up, you’ll realize that there is some ore blocking your path.
- Using your companions arrows, you can break the oil lamp to clear your path.
- You will also have to interact with a pillar to continue on your way as well.
- In the area where the ore was blocking your path, there will be some Wisps to take on.
- Once you clear out all of the wisps, you can loot the Red Chest in that area.
- If you interact with the pillar that was mentioned in step #19, it will clear the path to the Red Chest.
- The pillar will need to be moved to your left, then down in front of the shield.
- Your next step is to move the shield.
- You can move the shield to the left now, then continue to climb back up the shield again.
- Once you’re up, you’ll have to take down some more Wisps.
- Now, you’ll gave to open the gate.
- Using your Blades of Chaos, you can move the pillar to the left.
- Once you’ve moved the pillar, you can move the shield to the right.
- Now, you can unlock the gate.
- You can use your Leviathan Axe and your companion’s arrows to keep the shield frozen in place to keep the gate unlocked.
- Head inside now!
- Once you’re inside, the gate will lock again, and you’ll have to destroy the chains to keep it unlocked.
- Inside, there will be another Legendary Chest, so be sure to loot it.
- Now, you’ll find that there’s some bramble blocking your path.
- Using your Sigil Arrows and Blades of Chaos, you can clear the bramble and keep heading through.
- Now, use the key you collected earlier to unlock the vault and be ready to do some fighting.
- You’ll have to fight some Wisps and a Traveller
- Now, climb up the chain and look down.
- You can see that the floor below can be broken by Kratos. So, break the floor and create a gaping hole in the center of it.
- There will be a Lost Page below. Collect that, then climb back up and read the Lore Marker.
Related:
Where to find Cyclone of Chaos in God of War Ragnarok
When you read the last Lore Marker, you’ll find the answer about what happened that caused Sigrun’s Curse, and the God of War: Ragnarok Sigrun’s Curse quest will have been completed!


